# Betaflight 系统烧写 Bootloader
本页介绍了如何将 PX4 bootloader 烧写到使用 Betaflight固件(例如 OmnibusF4 SD 或 Kakute F7 )的飞控板的 flash 中。
There are two options for flashing the bootloader: via Betaflight Configurator (easier), or building from source.
# 使用 Betaflight 配置器 更新 Bootloader
To install the PX4 bootloader using the Betaflight Configurator:
- 您应该已经下载了已编译过的 bootloader 二进制文件(二进制文件针对特定的飞控板编译生成)。
- 下载适用于您平台的 Betaflight 配置器 (opens new window)。 :::tip If using the Chrome web browser, a simple cross-platform alternative is to install the configurator as an extension from here (opens new window). 飞控板上电后可以放开该按钮。
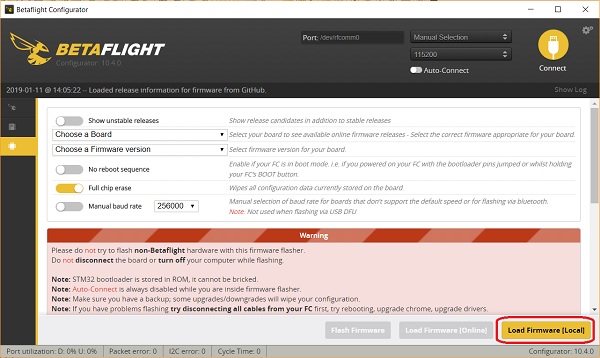
- 将飞控板连接到 PC 并启动 Betaflight 配置器。
- Press the Load Firmware [Local] button
- 从文件系统中选择 bootloader 二进制文件,然后烧写进飞控板的 flash。
现在,您应当可以在飞控板上安装 PX4 固件了。
# 使用源代码进行 Bootloader 更新
# 下载 Bootloader 源
通过以下命令下载并编译 Bootloader (opens new window):
git clone --recursive  https://github.com/PX4/Bootloader.git
cd Bootloader
make <target> # For example: omnibusf4sd_bl or kakutef7_bl
# 烧写 Bootloader
您可以使用 Windows 上的 dfu-util (opens new window) 或图形化的 dfuse (opens new window) 工具烧写 PX4 bootloader。
无需担心,使用以下任何一种方法进行烧写即可。
STM32 不会变成砖。 DFU 不会被烧写覆盖,并且总是允许安装新固件,即便烧写失败。 飞控板上电后可以放开该按钮。
# 进入 DFU 模式
两种方法都要求飞控板处于 DFU 模式。 要进入 DFU 模式, 当将 USB 连接到电脑时按住启动按钮。 飞控板上电后可以释放该按钮。
# dfu-util
dfu-util -a 0 --dfuse-address 0x08000000 -D build/<target>/<target>.bin
重新启动飞控板,并且不要按下启动按钮。
# dfuse
在此处查看 dfuse 手册: https://www.st.com/resource/en/user_manual/cd00155676.pdf
Flash the
# 重新安装 Beatflight 固件
In order to switch back to Betaflight:
- 备份 PX4 参数,例如通过导出将其导出到 SD 卡中。
- Keep the bootloader button pressed while attaching the USB cable
- Then flash Betaflight as usual with the Betaflight-configurator
← Bootloader 更新 着陆探测器配置 →