# Pixracer接线指南
PX4 does not manufacture this (or any) autopilot. Contact the [manufacturer](https://store.mrobotics.io/) for hardware support or compliance issues. :::
注意
Under construction
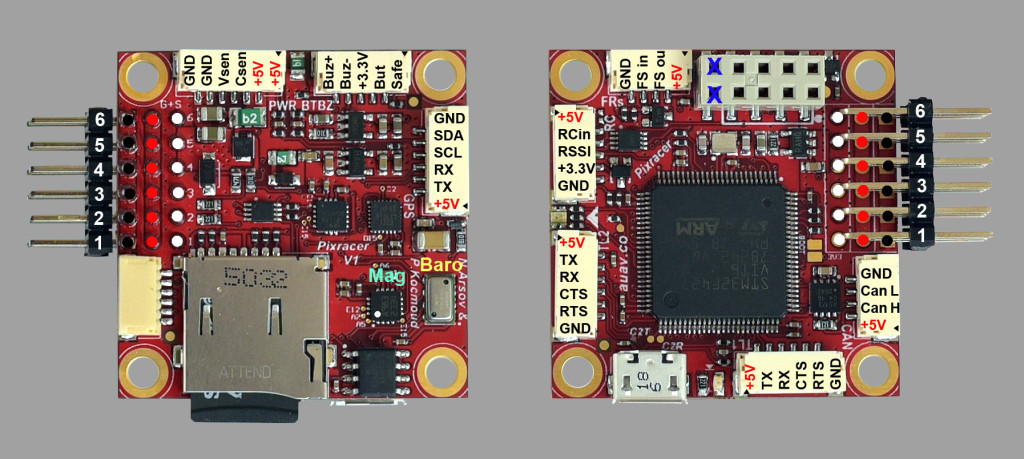
This quick start guide shows how to power the Pixracer flight controller and connect its most important peripherals.

# Wiring Guides/Assembly
# 主要设置
# 电台/远程 控制
A remote control (RC) radio system is required if you want to manually control your vehicle (PX4 does not require a radio system for autonomous flight modes).
You will need to select a compatible transmitter/receiver and then bind them so that they communicate (read the instructions that come with your specific transmitter/receiver).
The instructions below show how to connect the different types of receivers:
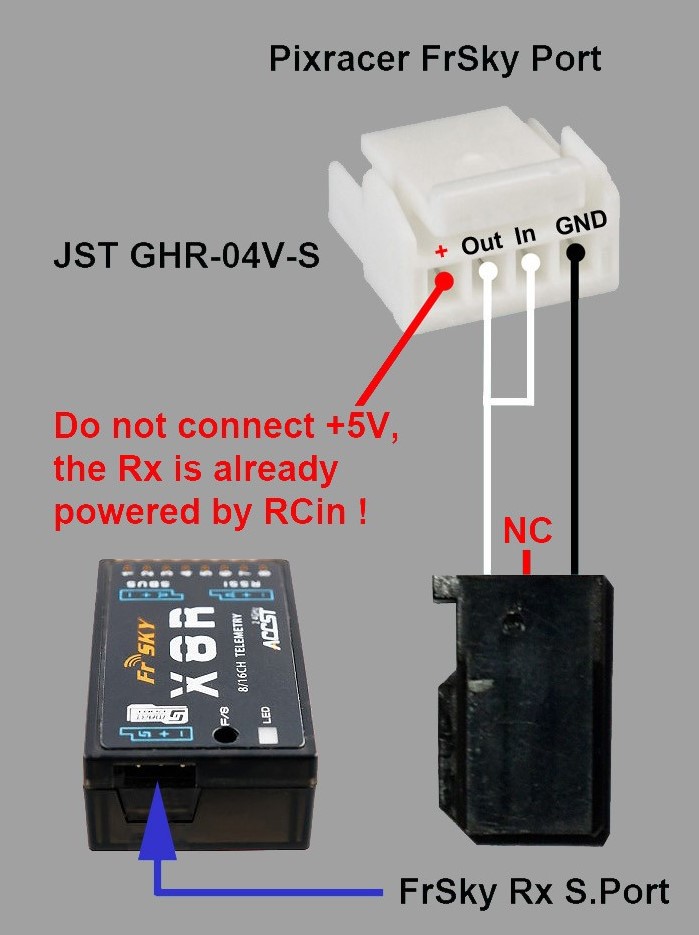
Frsky 的接收机通过所示的端口连接, 并可以使用提供的 I/o 连接器。

PPM-SUM and S.BUS receivers connect to the RCIN port.
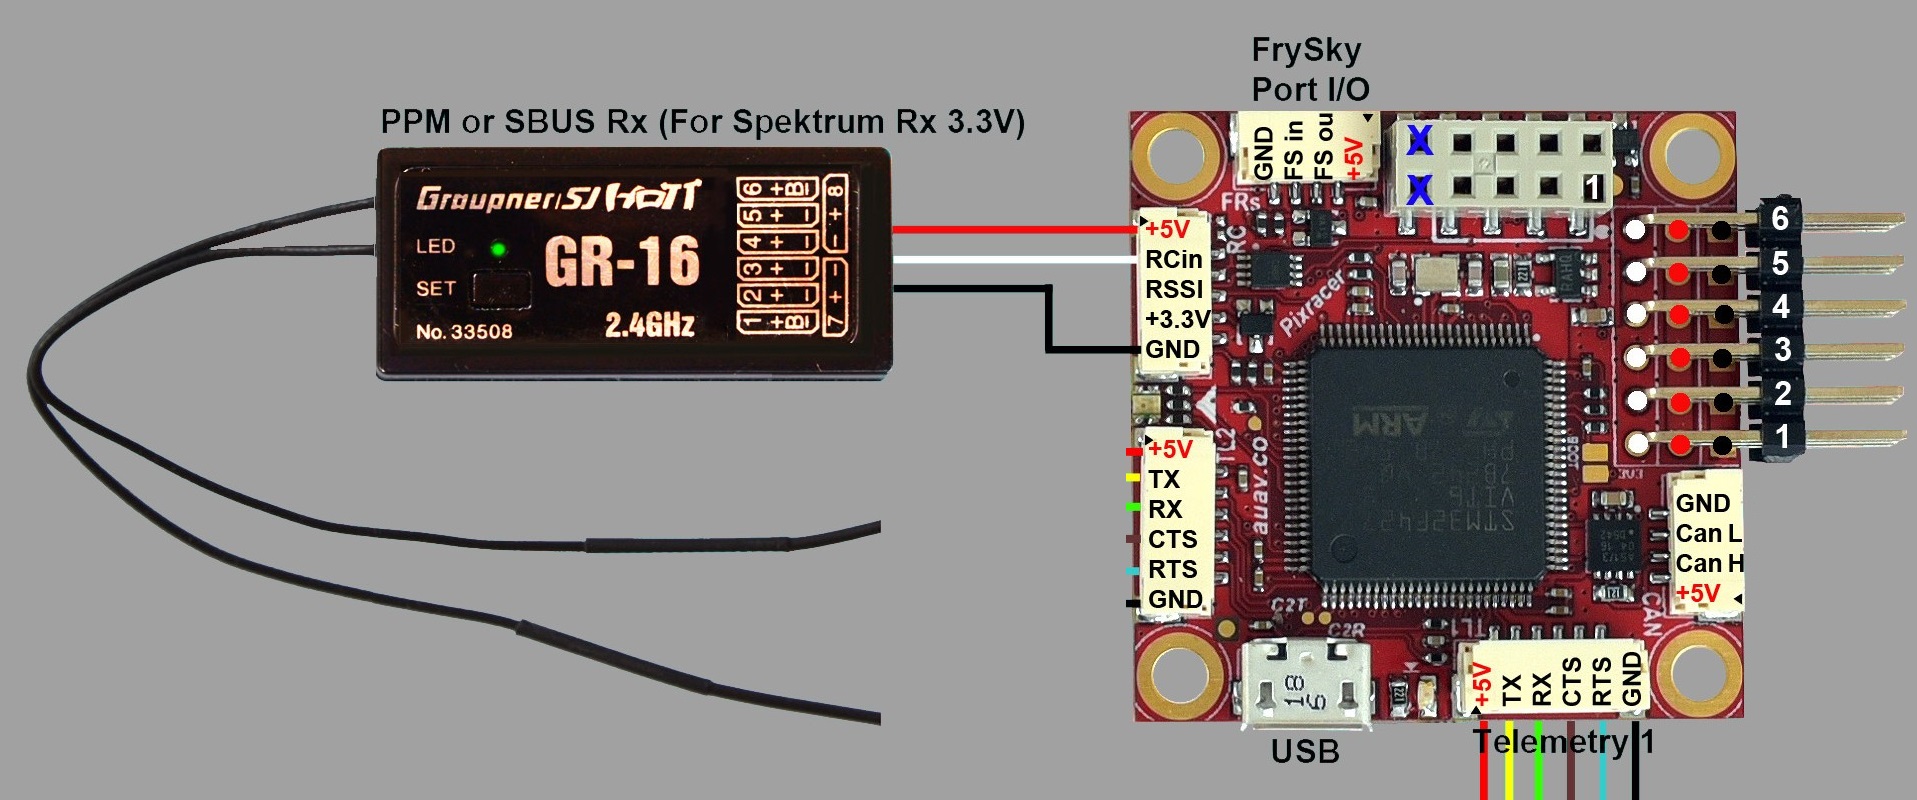
PPM and PWM receivers that have an individual wire for each channel must connect to the RCIN port via a PPM encoder like this one (opens new window) (PPM-Sum receivers use a single signal wire for all channels).
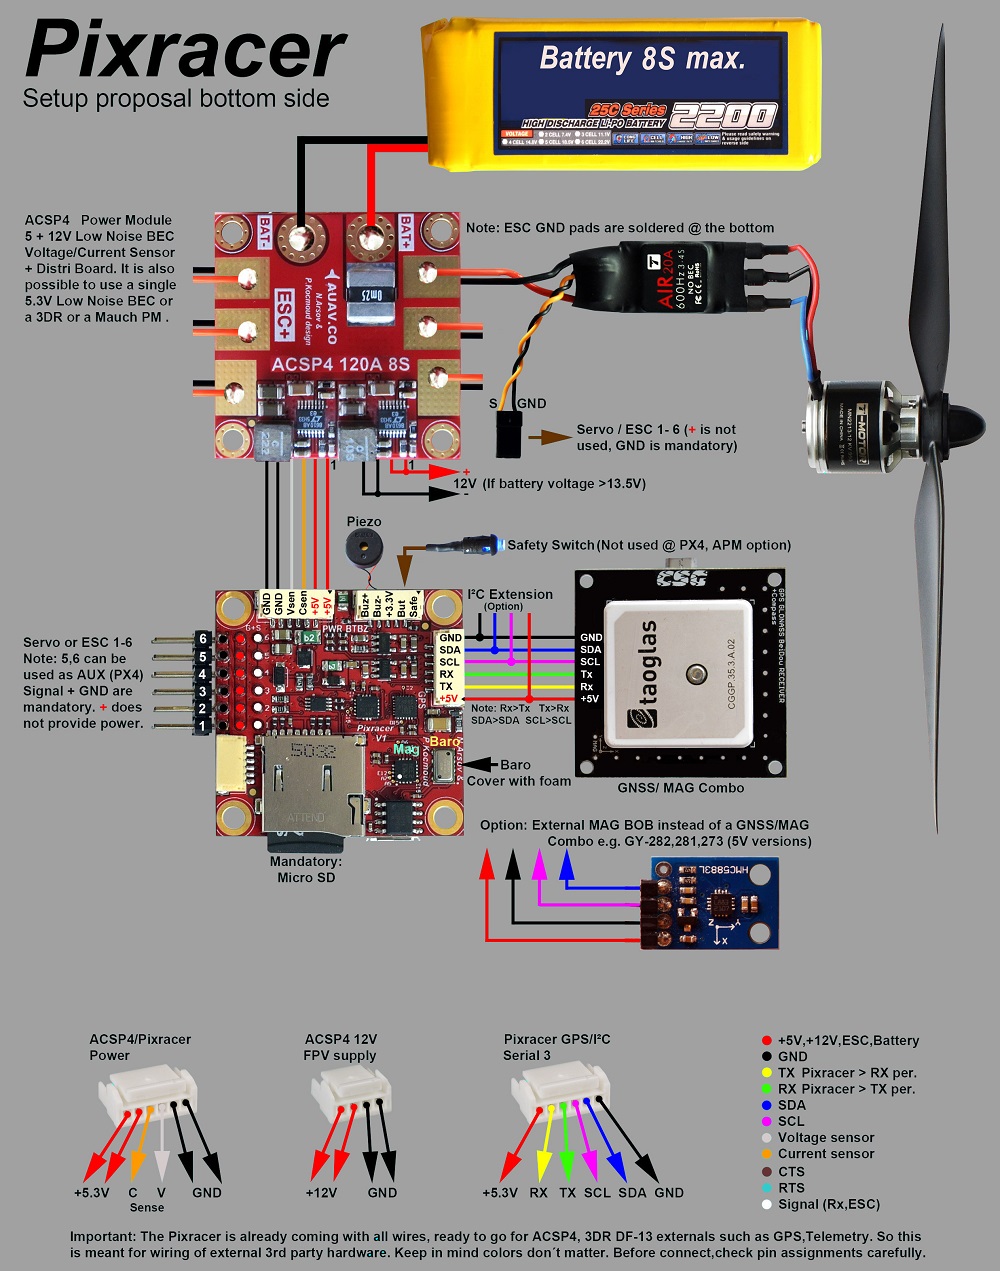
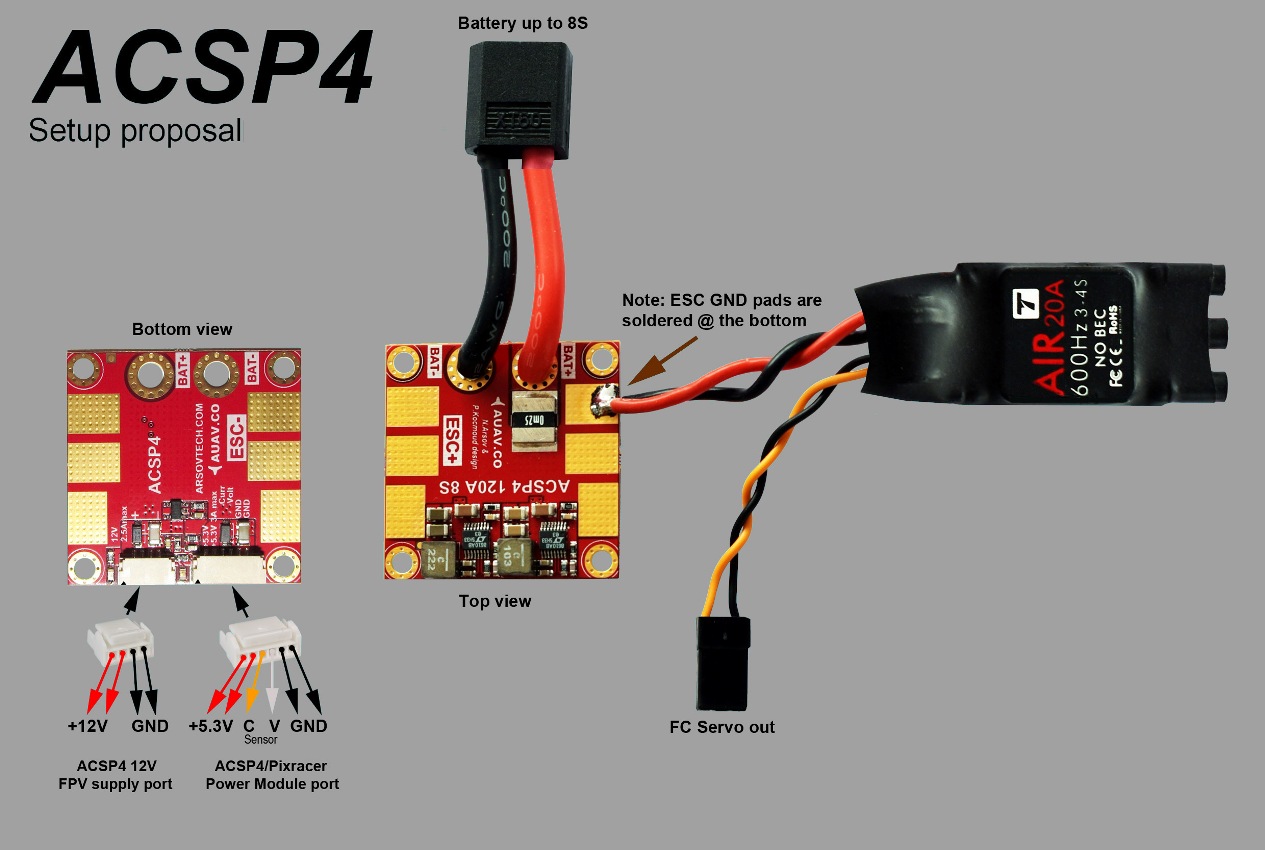
# 电源模块 (ASCP4)
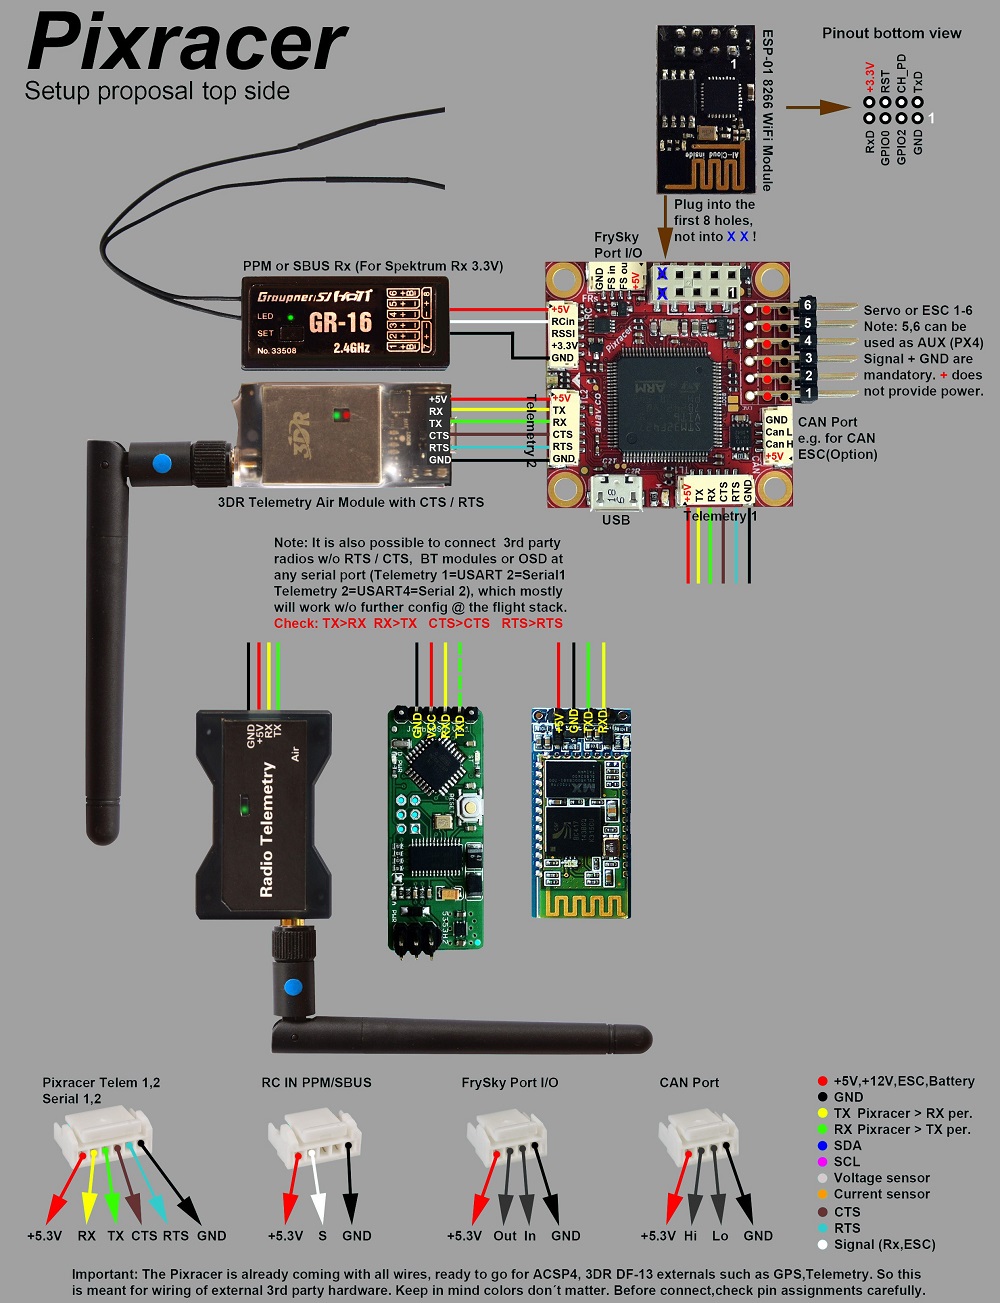
# External Telemetry
Pixracer has inbuilt WiFi, but also supports telemetry via external Wi-Fi or radio telemetry modules connected to the TELEM1 or TELEM2 ports. This is shown in the wiring diagram below.
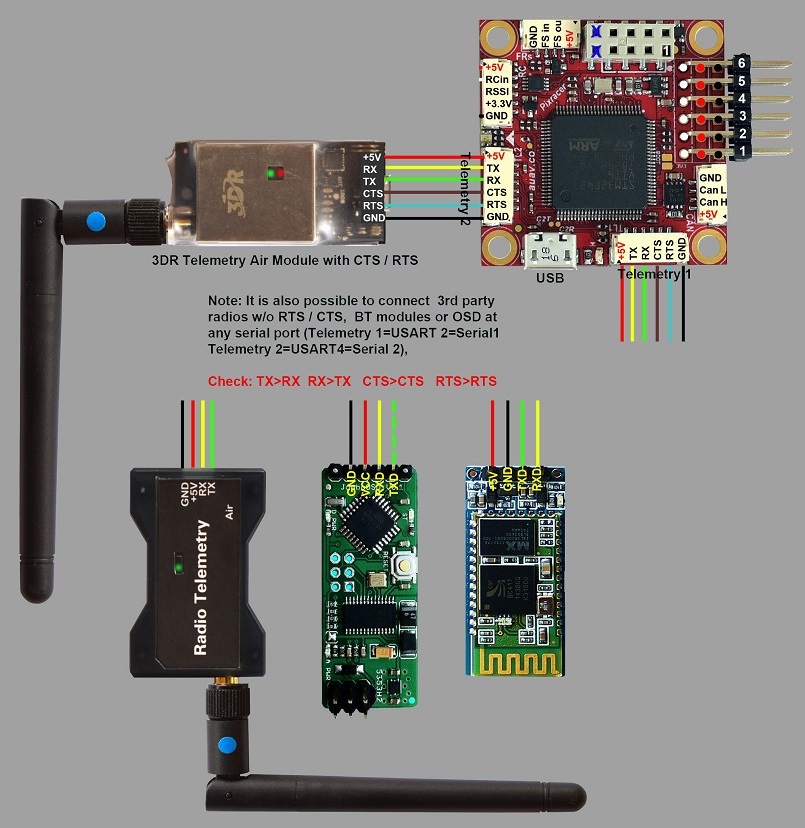
注解
The TELEM2 port must be configured as a second MAVLink instance using the MAV_2_CONFIG parameter. For more information see MAVLink Peripherals > MAVLink Instances (and Serial Port Configuration). :::