# Pixracer Wiring Quick Start
WARNING
PX4 does not manufacture this (or any) autopilot. Contact the manufacturer (opens new window) for hardware support or compliance issues.
WARNING
Under construction
This quick start guide shows how to power the Pixracer flight controller and connect its most important peripherals.

# Wiring Guides/Assembly
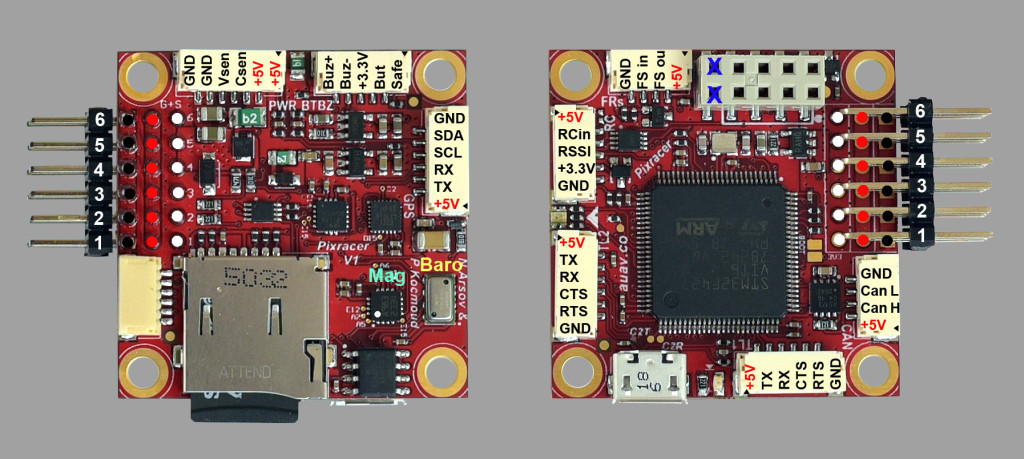
# Main Setup
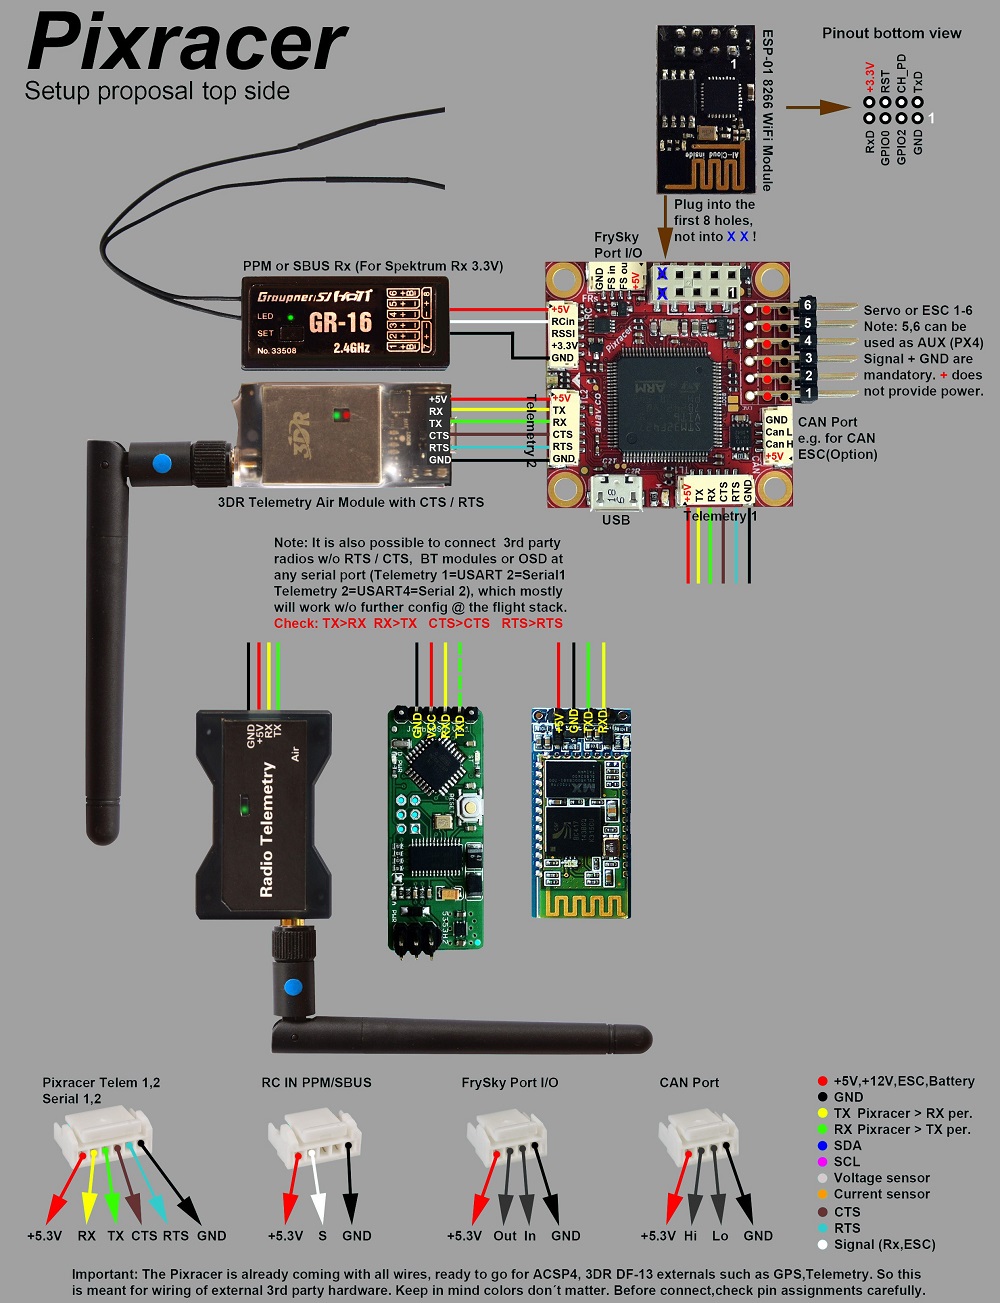
# Radio/Remote Control
A remote control (RC) radio system is required if you want to manually control your vehicle (PX4 does not require a radio system for autonomous flight modes).
You will need to select a compatible transmitter/receiver and then bind them so that they communicate (read the instructions that come with your specific transmitter/receiver).
The instructions below show how to connect the different types of receivers:
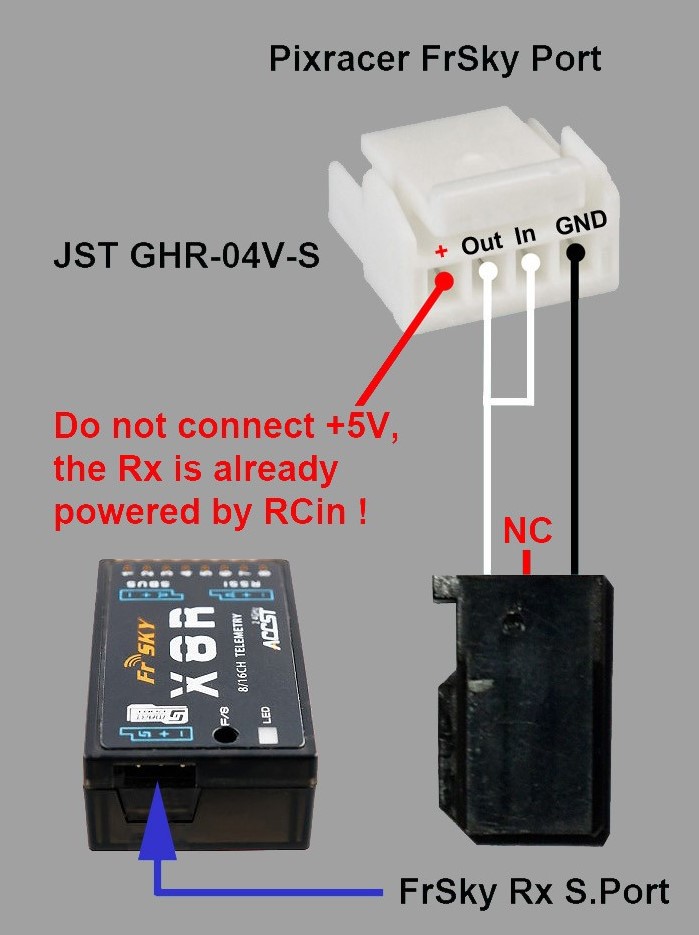
FrSky receivers connect via the port shown, and can use the provided I/O Connector.

PPM-SUM and S.BUS receivers connect to the RCIN port.
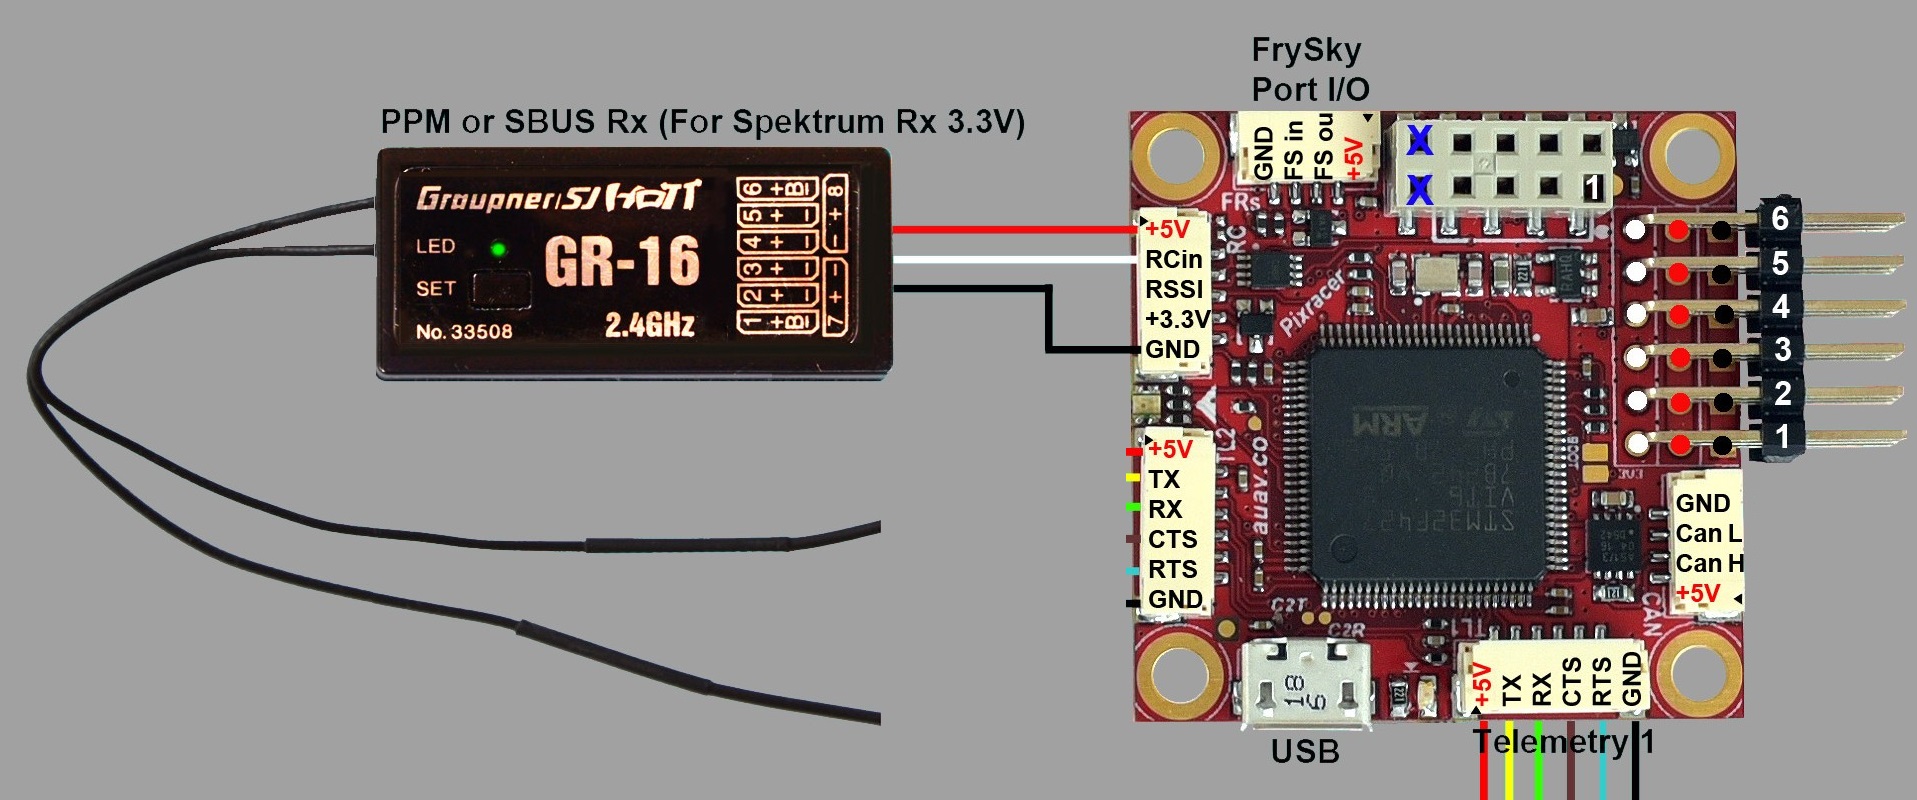
PPM and PWM receivers that have an individual wire for each channel must connect to the RCIN port via a PPM encoder like this one (opens new window) (PPM-Sum receivers use a single signal wire for all channels).
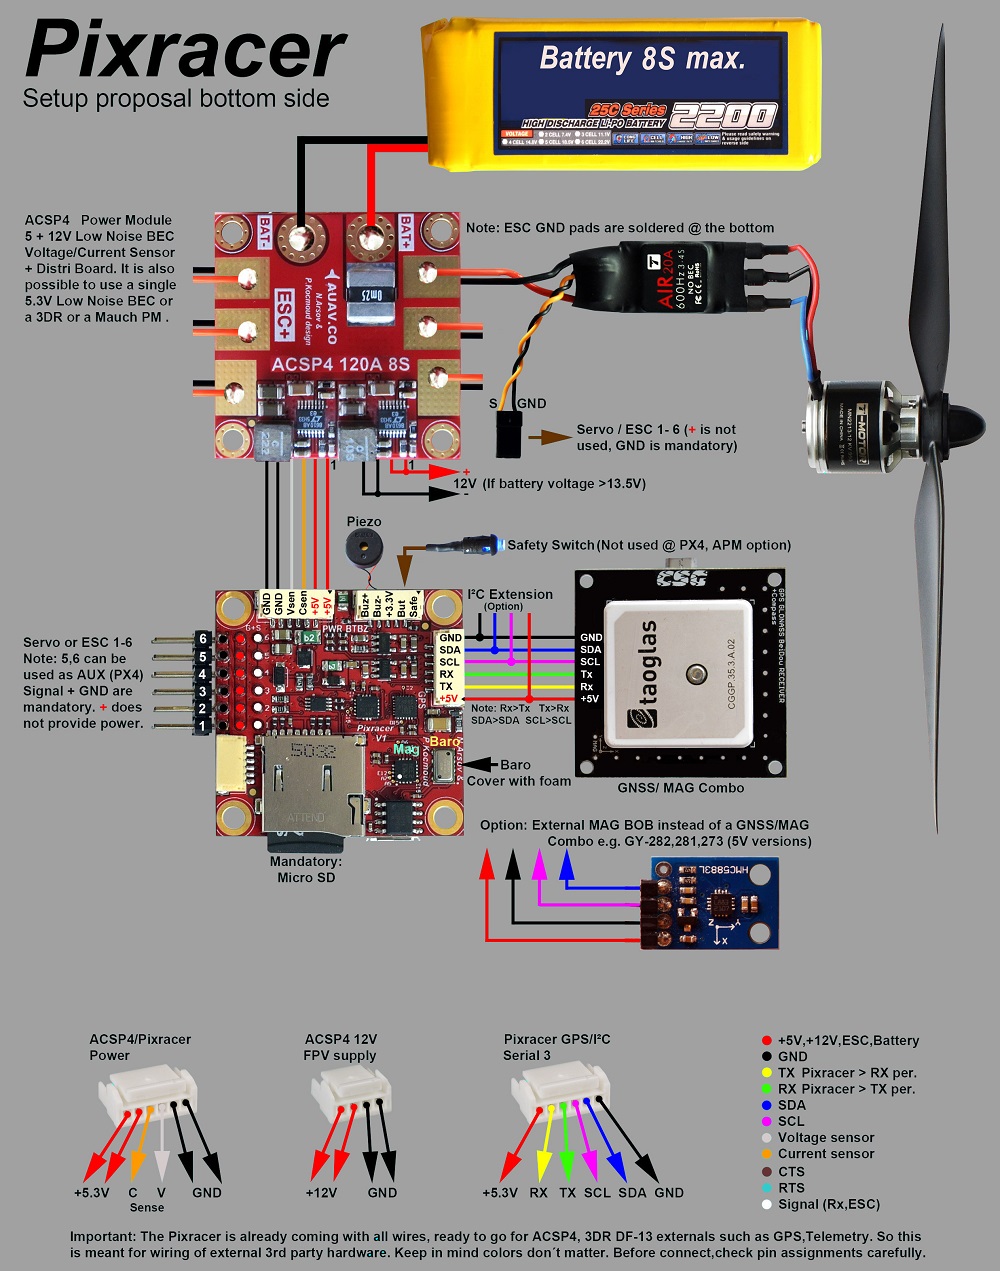
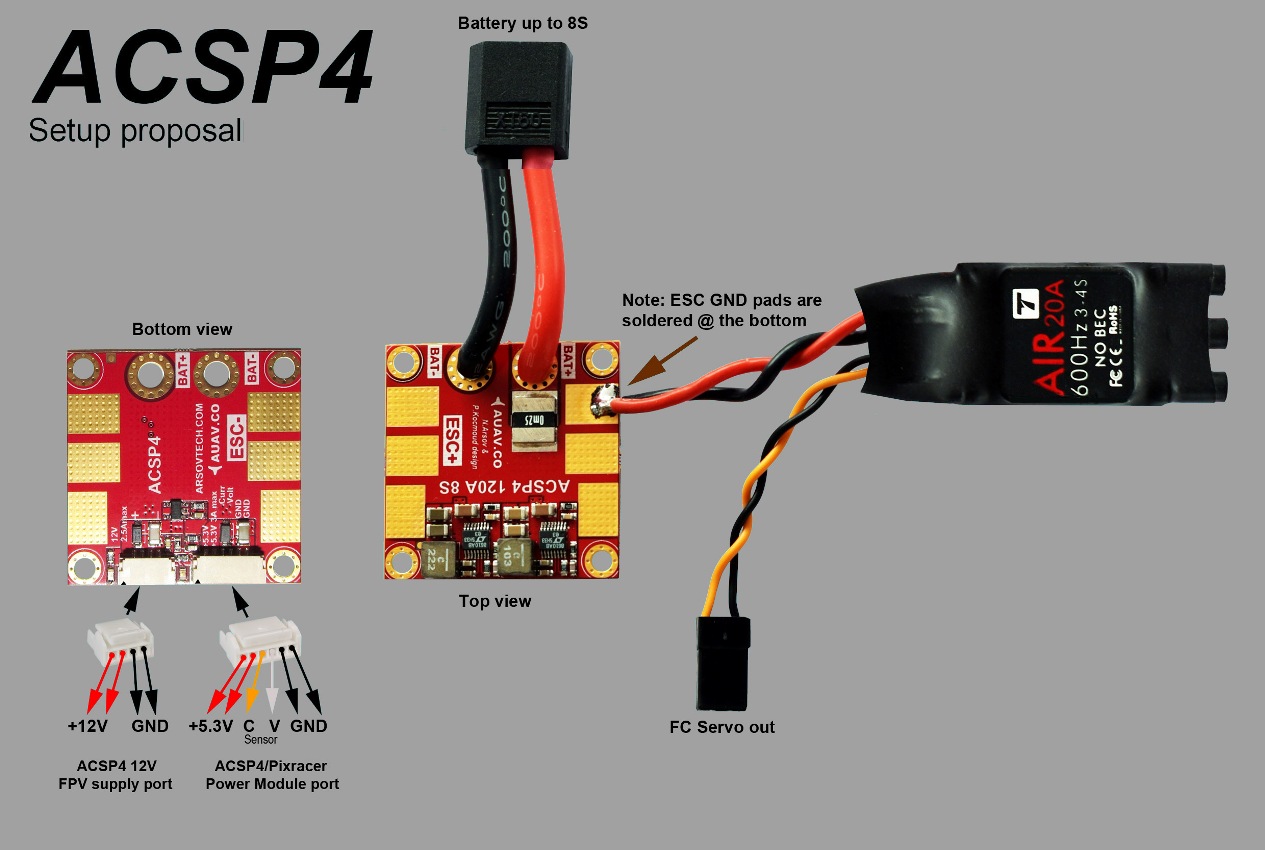
# Power Module (ACSP4)
# External Telemetry
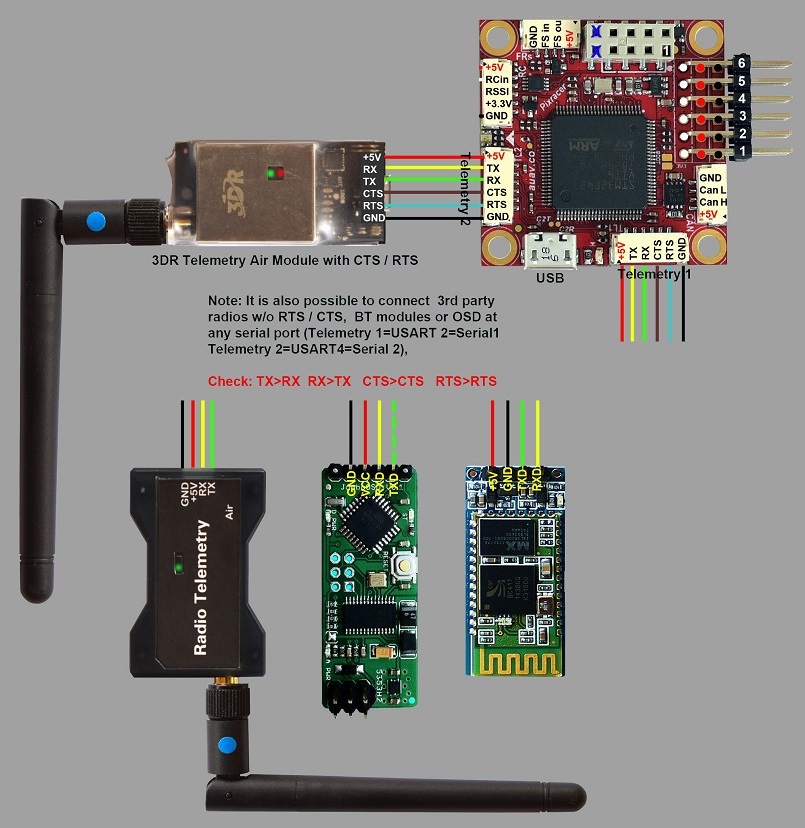
Pixracer has inbuilt WiFi, but also supports telemetry via external Wi-Fi or radio telemetry modules connected to the TELEM1 or TELEM2 ports.
This is shown in the wiring diagram below.
Note
The TELEM2 port must be configured as a second MAVLink instance using the MAV_2_CONFIG parameter.
For more information see MAVLink Peripherals > MAVLink Instances (and Serial Port Configuration).