# DJI Flame Wheel 450 with Distance Sensor and RTK GPS (Pixhawk 3 Pro)
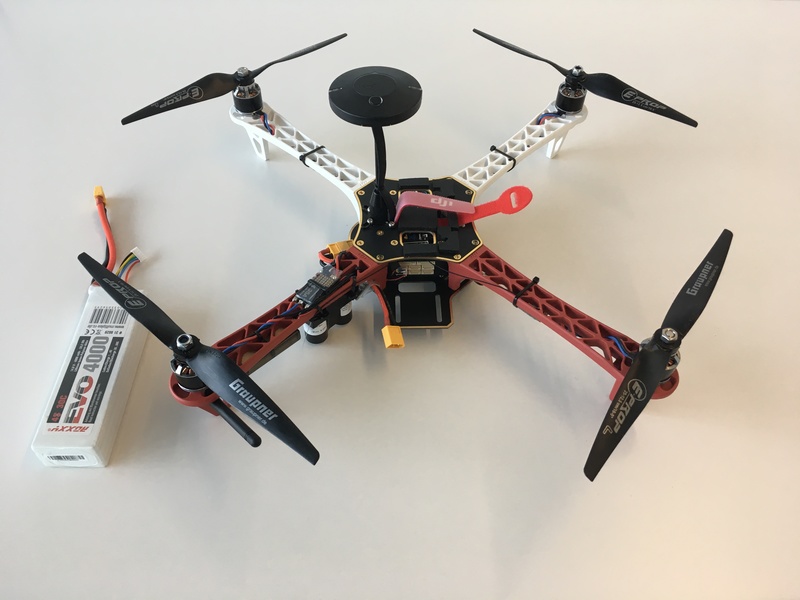
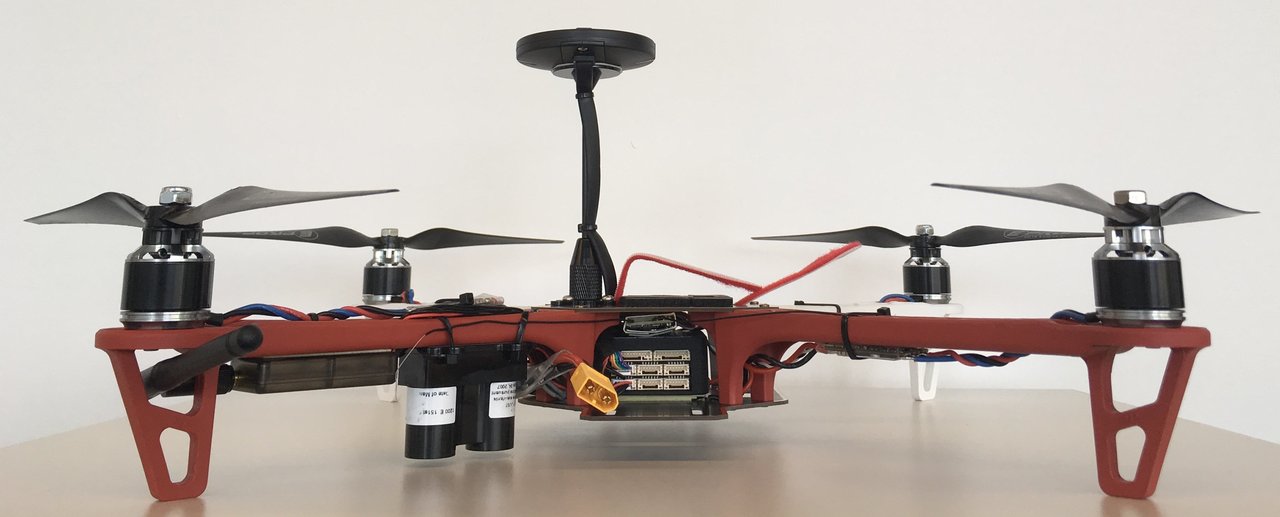
The DJI® Flame Wheel F450 Quadcopter is designed for amateur aerial photography, first person view applications, and general flying entertainment. This topic provides full build and configuration instructions for using the frame with the Pixhawk 3 Pro flight controller. Additionally this build includes an RTK GPS and a distance sensor for precision positioning.
Key information:
- Frame: DJI Flame Wheel 450
- Flight controller: Pixhawk 3 Pro
- Positioning: RTK GPS
# Parts List
- Autopilot: Pixhawk 3 Pro
- Frame: DJI Flamewheel 450 (opens new window)
- Motors: 3DR Iris Plus 950kv rebranded T-Motors MN2213
- ESCs: Hobbywing XRotor 35A Micro 3-6S BLHeli
- Blades: Graupner 10"x5" (You need to print these adapters (opens new window) to be M6 compatible)
- Distance sensor: Lidar-Lite V3
- GPS: Here+ RTK GPS
- Telemetry: 3DR Telemetry
- Battery: Roxxy LiPo - 4S, 4000mAh
In addition we use a FrSky X4R-SB 3/16ch 2.4Ghz receiver and a FrSky Taranis controller. You will also need zip ties, double sided tape, a soldering iron and a 3D printer in case you use the same Blades, for this build. The GPS mast was reused from an Intel Aero.
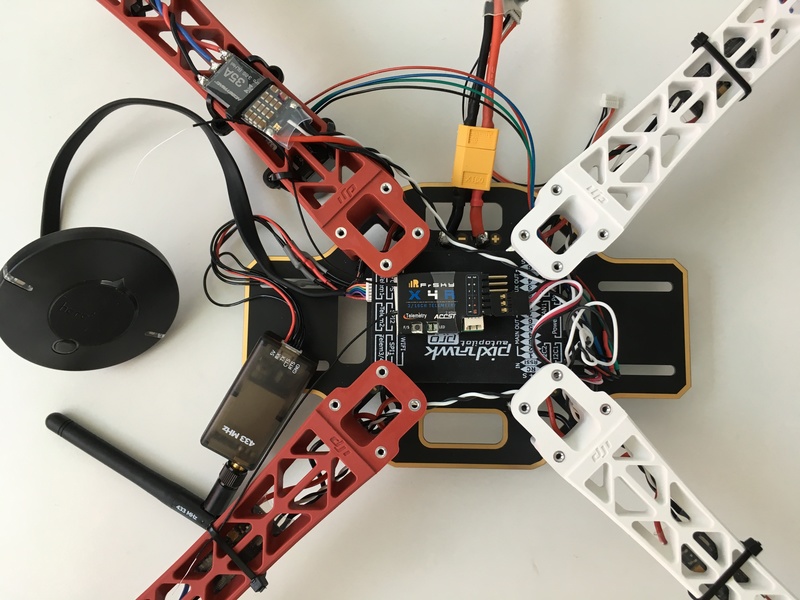
The Pixhawk 3 Pro can be attached using the double sided tape because the IMU inside is already dampened.
In this setup the autopilot is rotated by 180 degrees so that it's easier to access the SD card. But if you rotate the base plate by 180 degrees instead, the flight controller board can be mounted facing forward. Either way works, just make sure to set the board rotation correctly in QGroundControl afterwards.
# Wiring and Connections
General pinout for the Pixhawk 3 Pro can be found here (opens new window).
# 3DR Telemetry
The 3DR Telemetry does not come with a JST GH connector which the Pixhawk 3 Pro uses. The pinout remains the same and just the plug needs to be changed. Use the Telem 1 port on the Pixhawk 3 Pro.
| pin | Pixhawk 3 Pro Telem 1 | 3DR Telemetry |
|---|---|---|
| 1 | VCC | VCC |
| 2 | TX | RX |
| 3 | RX | TX |
| 4 | CTS | CTS |
| 5 | RTS | RTS |
| 6 | GND | GND |
# Lidar-Lite V3
The pinout for the Lidar Lite V3 and the Pixhawk 3 Pro I2C 1 port is as follows.
| pin | Pixhawk 3 Pro I2C 1 | Lidar Lite V3 |
|---|---|---|
| 1 | VCC | VCC |
| 2 | SCL | - (Power enable) |
| 3 | SDA | - (Mode control) |
| 4 | GND | SCL |
| 5 | - | SDA |
| 6 | - | GND |
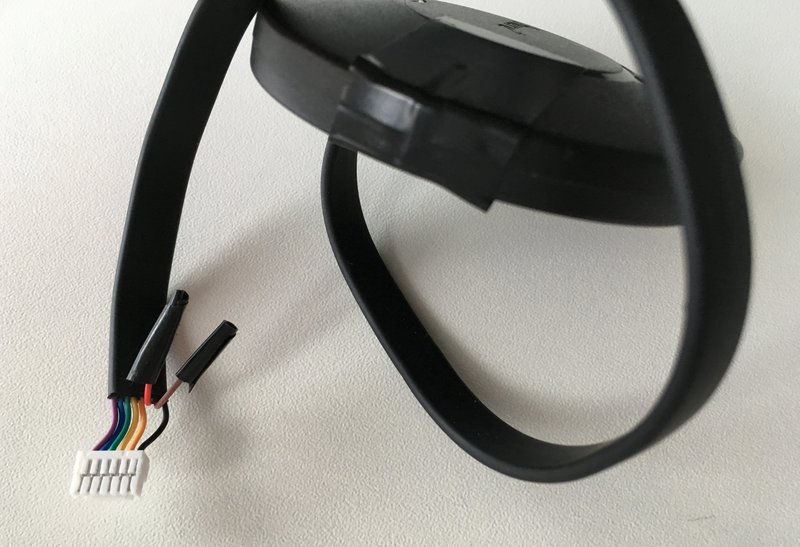
# Here+ RTK GPS
The Here+ GPS comes with an 8 pin connector suited for the Pixhawk 2. In order to use it with the Pixhawk 3 Pro (or a Pixracer), a 6 pin connector has to be used and pin 6 and 7 are not needed (see below). The additional pins are for the safety button and can be attached as well if needed. More information on the pinout can be found in this document (opens new window), page 17.
| pin | Here+ GPS | pin | Pixhawk 3 Pro GPS |
|---|---|---|---|
| 1 | VCC_5V | 1 | VCC |
| 2 | GPS_RX | 2 | GPS_TX |
| 3 | GPS_TX | 3 | GPS_RX |
| 4 | SCL | 4 | SCL |
| 5 | SDA | 5 | SDA |
| 6 | BUTTON | - | - |
| 7 | BUTTON_LED | - | - |
| 8 | GND | 6 | GND |
# Configuration
General documentation on how to setup your quad in QGroundControl can be found in Basic Configuration. Specific setup instructions are provided below.
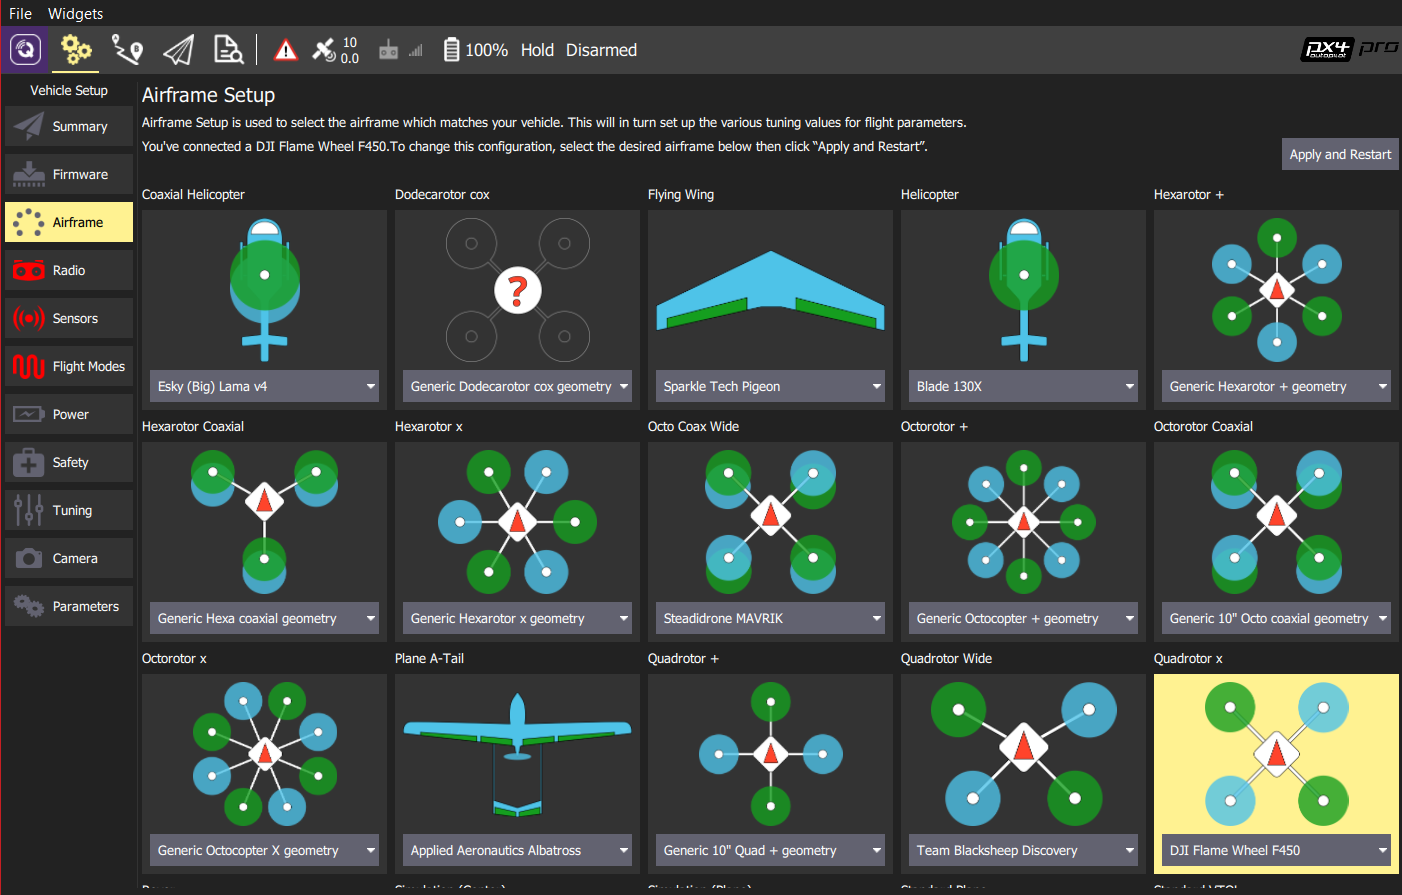
# Airframe
Select the airframe DJI Flame Wheel 450 in QGC > Airframe > Quadrotor x.
# RTK GPS
RTK GPS is plug and play. For more instructions see here.
# Lidar-Lite
To enable the Lidar-Lite V3 (connected via I2C), the parameter SENS_EN_LL40LS has to be set to I2C.
This can be done in QGroundControl Parameters (opens new window) as shown below:
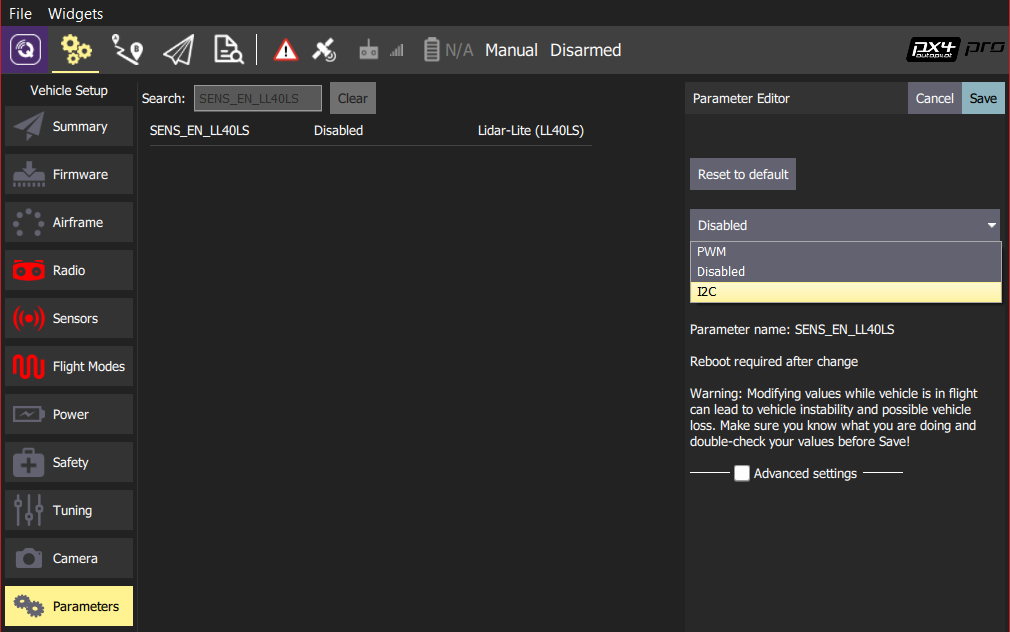
Note
After setting the SENS_EN_LL40LS you will need to restart the flight controller.
# Others
Set the following parameters as well:
EKF2_HGT_MODE=2: this makes sure the Lidar-Lite is used as height sourceMAV_PROTO_VER=2: use MAVLink protocol version 2CBRK_IO_SAFETY=22027: disable the safety buttonEKF2_GPS_POS_X,EKF2_GPS_POS_Y,EKF2_GPS_POS_Z: set the GPS device offset with respect to the board (NED coordinates).