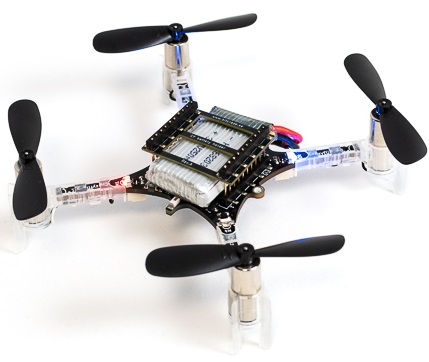
# Crazyflie 2.1
PX4 does not manufacture this (or any) autopilot. Contact the [manufacturer](https://www.bitcraze.io/) for hardware support or compliance issues.
PX4 support for this flight controller is [experimental](../flight_controller/autopilot_experimental.md).
注意
Crazyflie 2.1 is only able to fly in Manual/Stabilized mode.
The Crazyflie line of micro quads was created by Bitcraze AB. An overview of the Crazyflie 2.1 can be found here (opens new window).
# Quick Summary
注解
The main hardware documentation is here (opens new window)
- Main System-on-Chip: STM32F405RG
- CPU: 168 MHz ARM Cortex M4 with single-precision FPU
- RAM: 192 KB SRAM
- nRF51822 radio and power management MCU
- BMI088 3 axis accelerometer / gyroscope
- BMP388 high precision pressure sensor
- uUSB connector
- On-board LiPo charger with 100mA, 500mA and 980mA modes available
- Full speed USB device interface
- Partial USB OTG capability (USB OTG present but no 5V output)
- 8KB EEPROM
# Where to Buy
The vehicle can be purchased here: Crazyflie 2.1 (opens new window) (store.bitcraze.io)
Useful peripheral hardware includes:
- Crazyradio PA 2.4 GHz USB dongle (opens new window): Wireless communication between QGroundControl and Crazyflie 2.0
- Breakout deck (opens new window): Breakout expansion board for connecting new peripherals.
- Flow deck v2 (opens new window): Optical flow sensor and a distance sensor for altitude and position control.
- Z-ranger deck v2 (opens new window): Distance sensor for altitude control (same sensor as the Flow deck).
- Multi-ranger deck (opens new window) Multi-direction object detection
- Buzzer deck (opens new window) Audio feedback on system events, like low battery or charging completed.
- Breakout deck (opens new window): Expansion board that gives you the ability to test new hardware easily without soldering.
- SD-card deck (opens new window): High speed onboard logging to a micro SD card
- Logitech Joystick (opens new window)
# Assemble Crazyflie 2.1
# Flashing PX4
注解
These instructions have only been tested on Ubuntu.
After setting up the PX4 development environment, follow these steps to install the PX4 Autopilot on the Crazyflie 2.1:
Download the source code of the PX4 Bootloader:
git clone https://github.com/PX4/Bootloader.git --recurse-submodulesNavigate into the top directory of the source code and compile it using:
make crazyflie21_blPut the Crazyflie 2.1 into DFU mode by following these steps:
- Ensure it is initially unpowered.
- Ensure battery is disconnected.
- Hold down the reset button (see figure below...).
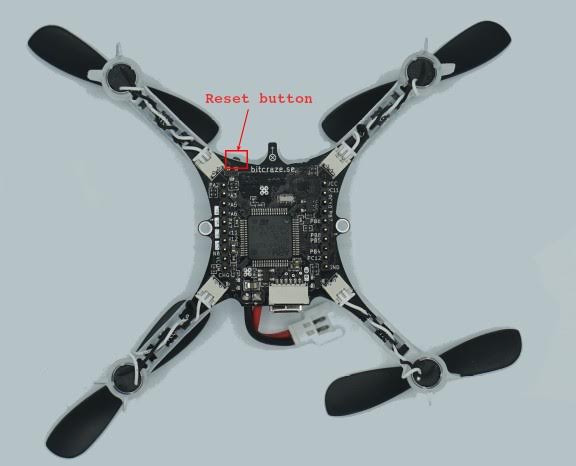
- Plug into computer's USB port.
- After a second, the blue LED should start blinking and after 5 seconds should start blinking faster.
- Release button.
Install dfu-util:
sudo apt-get update
sudo apt-get install dfu-util
Flash bootloader using dfu-util and unplug Crazyflie 2.1 when done:
sudo dfu-util -d 0483:df11 -a 0 -s 0x08000000 -D ./build/crazyflie21_bl/crazyflie21_bl.binWhen powering on the Crazyflie 2.1 the yellow LED should blink.
Download the source code of the PX4 autopilot:
git clone https://github.com/PX4/PX4-Autopilot.gitNavigate into the top directory of the source code and compile it using:
cd PX4-Autopilot/
make bitcraze_crazyflie21_default upload
When prompted to plug in device, plug in Crazyflie 2.1. The yellow LED should start blinking indicating bootloader mode. Then the red LED should turn on indicating that the flashing process has started.
Wait for completion.
Done! Calibrate the sensors using QGroundControl (opens new window).
# Flashing Original Bitcraze Firmware
- Download the latest Crazyflie 2.1 bootloader (opens new window)
- Put the Crazyflie 2.1 into DFU mode by following these steps:
- Ensure it is initially unpowered.
- Ensure battery is disconnected.
- Hold down the reset button.
- Plug into computer's USB port.
- After a second, the blue LED should start blinking and after 5 seconds should start blinking faster.
- Release button.
- Flash bootloader using dfu-util and unplug Crazyflie 2.1 when done:When powering on the Crazyflie 2.1 the yellow LED should blink.
sudo dfu-util -d 0483:df11 -a 0 -s 0x08000000 -D cf2loader-1.0.bin - Install the latest Bitcraze Crazyflie 2.1 Firmware using this (opens new window) tutorial.
# Wireless Setup Instructions
The onboard nRF module allows connecting to the board via Bluetooth or through the proprietary 2.4GHz Nordic ESB protocol.
- A Crazyradio PA (opens new window) is recommended.
- To fly the Crazyflie 2.1 right away, the Crazyflie phone app is supported via Bluetooth.
Connecting via MAVLink:
- Use a Crazyradio PA alongside a compatible GCS.
- Download the crazyflie-lib-python source code:
git clone https://github.com/bitcraze/crazyflie-lib-python.git
注解
We will use cfbridge.py (opens new window) to setup a wireless MAVlink communication link between Crazyflie 2.1 (flashed with PX4) and QGroundControl. Cfbridge enables QGroundControl to communicate with the crazyradio PA. The C based cfbridge (opens new window) is currently experiencing data loss issues, which is why we have chosen to use cfbridge.py.
- Make sure you have set the udev permissions to use the USB Radio. To do this, follow the steps listed here (opens new window) and restart your computer.
- Connect a Crazyradio PA via USB.
- Build a virtual environment (local python environment) (opens new window) with package dependencies using the following method:
pip install tox --user - Navigate to the crazyflie-lib-python folder and type:
make venv - Activate the virtual environment:
source venv/bin/activate - Install required dependencies:
pip install cflib
pip install -r requirements.txt
To connect Crazyflie 2.1 with crazyradio, launch cfbridge by following these steps:
- Power off and power on Crazyflie 2.1 and wait for it to boot up.
- Connect a Crazyflie radio device via USB.
- Navigate to the crazyflie-lib-python folder.
- Activate the environment:
source venv/bin/activate - Navigate to the examples folder:
cd examples - Launch cfbridge:
python cfbridge.py
注解
Cfbridge by default tries to initiate the radio link communication on channel 80 and with crazyflie address 0xE7E7E7E7E7. If you are using multiple crazyflies and/or crazyradios (opens new window) in the same room and want to use a different channel and/or address for each, first connect the crazyflie with QGroundControl via a USB cable and change the syslink parameters (channel, address) in QGroundControl. Next, launch the cfbridge by giving the same channel and address as the first and second arguments respectively, e.g: python cfbridge.py 90 0x0202020202
- Open QGroundControl.
- After using cfbridge, you can deactivate the virtualenv if you activated it by pressing
CTRL+z. Most of the time, launching cfbridge again from the same terminal doesn't connect to crazyflie, this can be solved by closing the terminal and relaunching cfbridge in a new terminal.
提示
If you change any driver in crazyflie-lib-python (opens new window) or if launching cfbridge in a new terminal does not find crazyflie, you can try navigating to the crazyflie-lib-python folder and run the script below to rebuild cflib.
make venv
注解
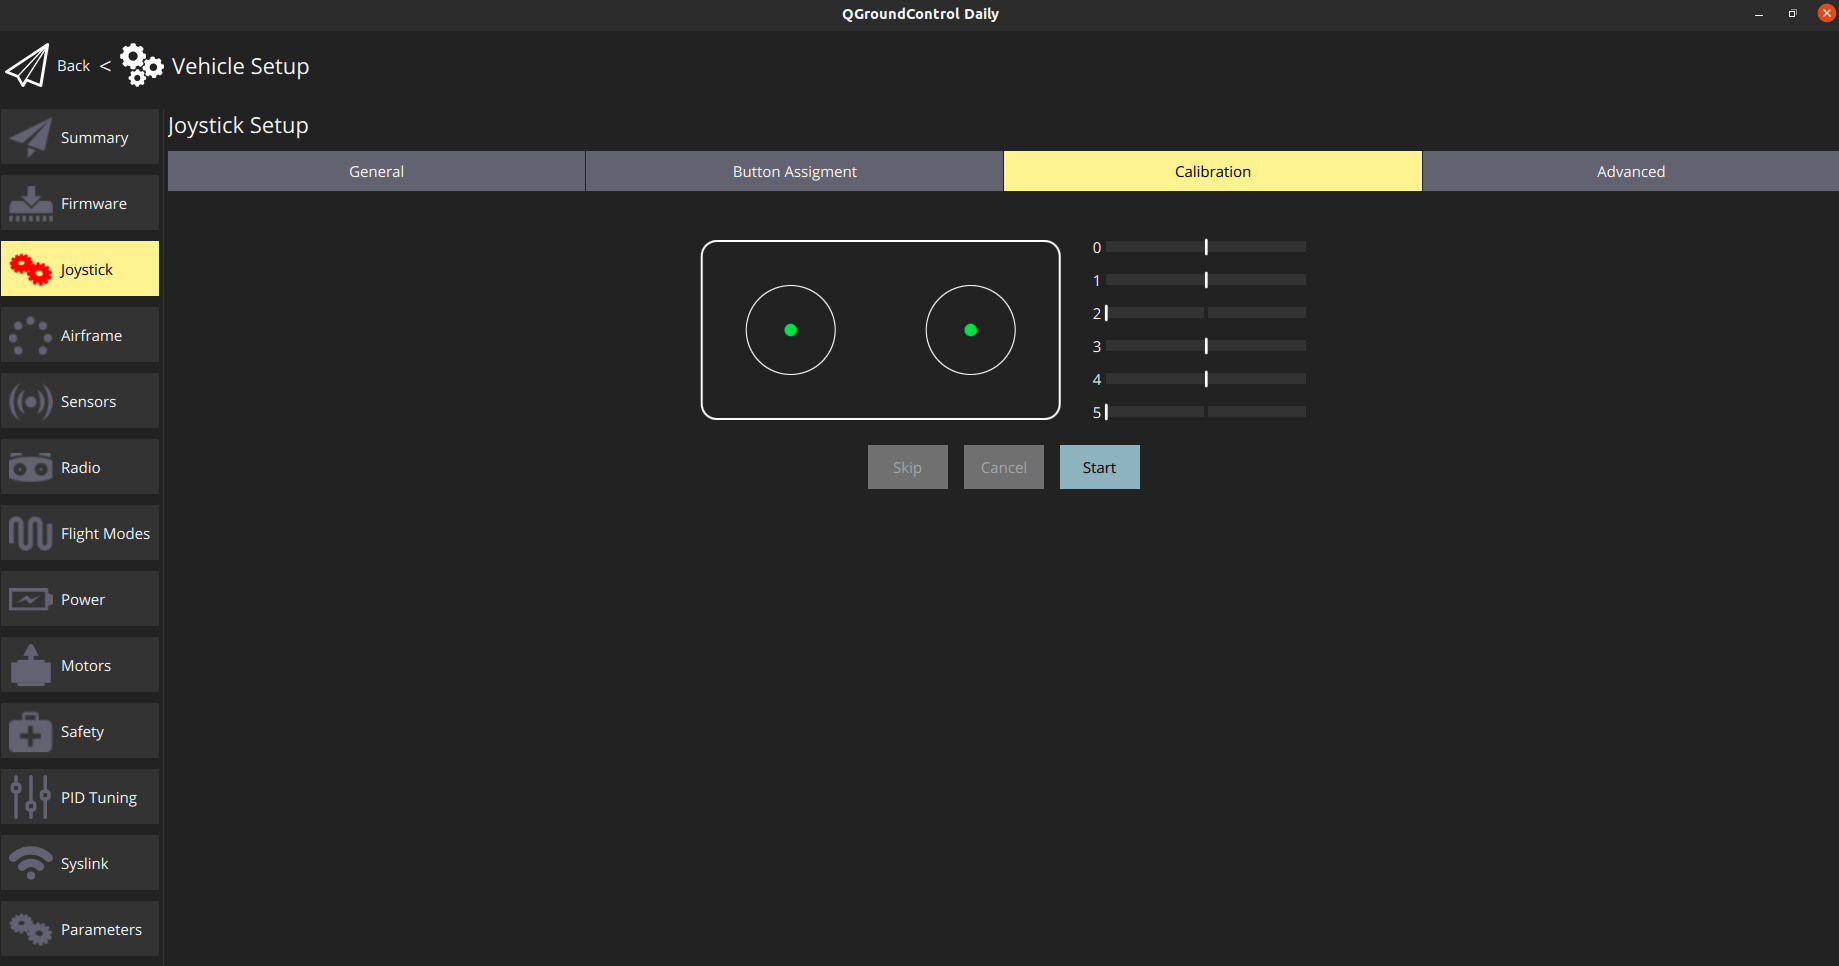
The Joystick menu in QGC, only appears after you connect the controller to the PC (for example a Playstation 3 controller).
# Hardware Setup
Crazyflie 2.1 is only able to fly in Stabilized mode.
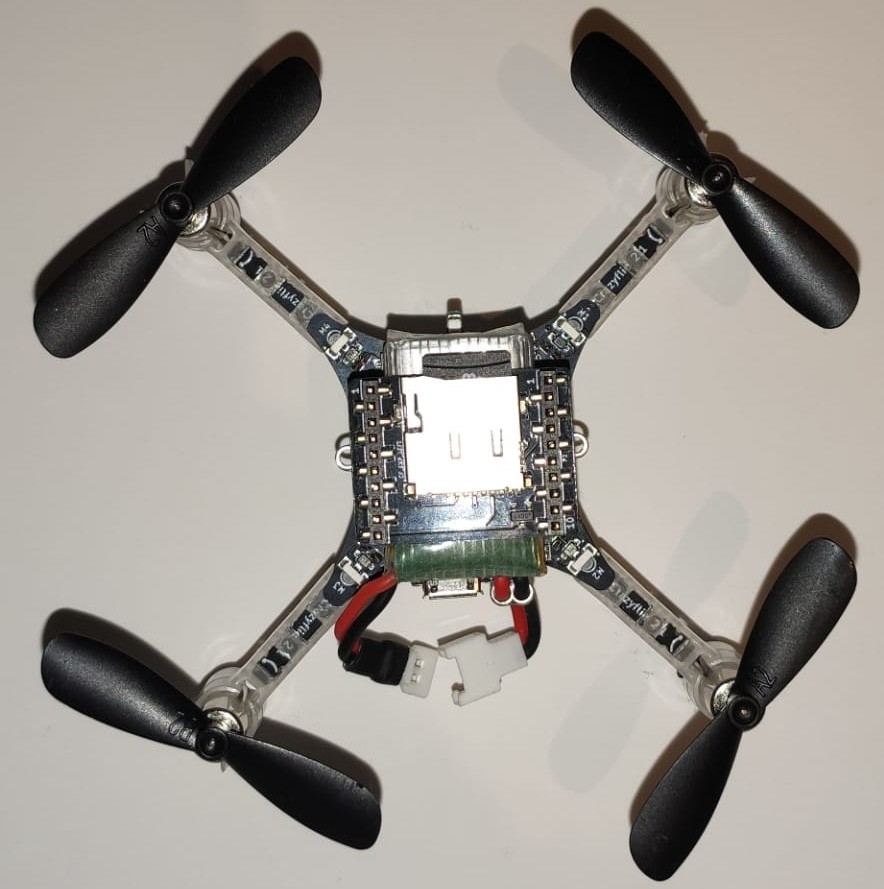
In order to log flight details, you can mount SD card deck on top of crazyflie as shown below:
# Using FrSky Taranis RC Transmitter as Joystick
If you already own a Taranis RC transmitter and want to use it as a controller, it can be configured as a USB Joystick:
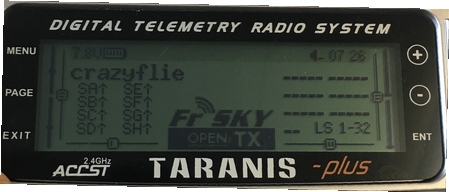
Create a new model in Taranis.
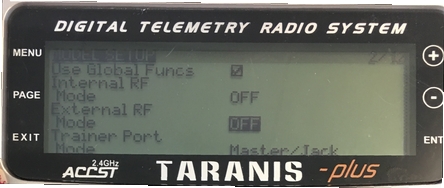
In MODEL SETUP menu page, turn off both internal and external TX modules.
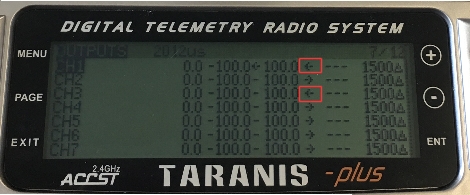
In OUTPUTS menu page (also called “SERVOS” page in some Taranis transmitters), invert Throttle (CH1) and Aileron (CH3).
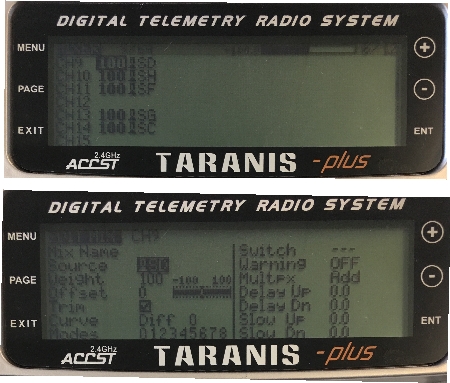
To use Taranis switches to arm/disarm and switch to different flight modes:
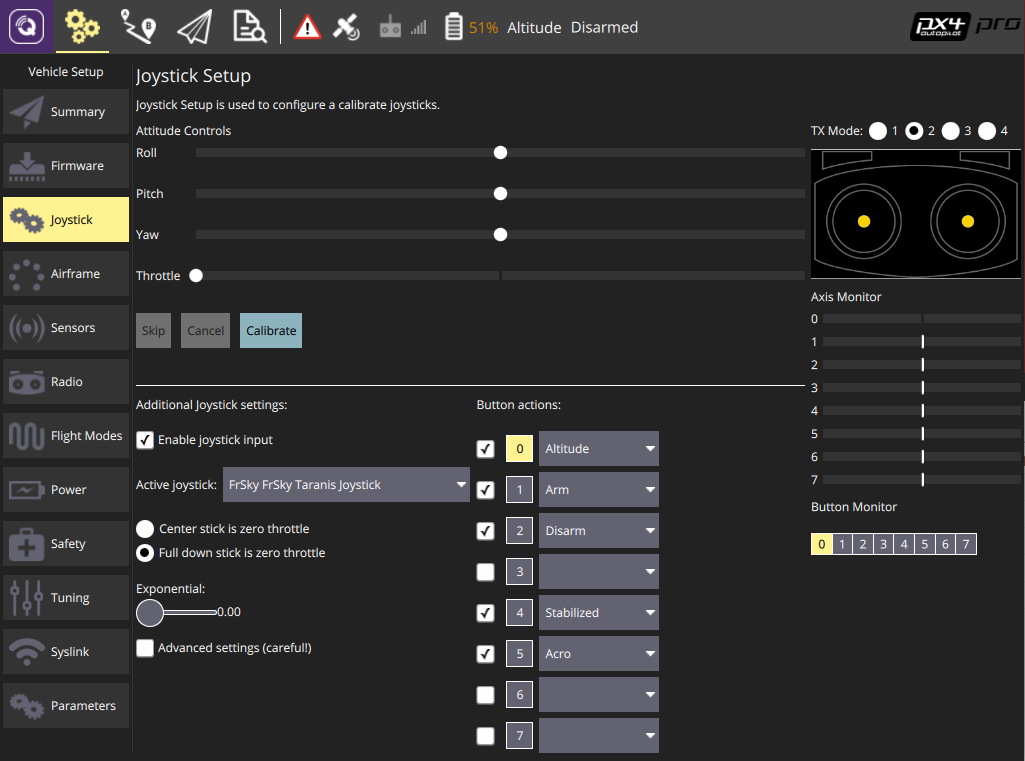
In Taranis UI MIXER menu page, you can assign the switches to any channel in the range channel 9-16 which map to the buttons 0-7 in the QGroundControl Joystick setup. For example, Taranis “SD” switch can be set to channel 9 in Taranis UI:
Connect Taranis to PC with a USB cable and Open QGroundControl.
In QGroundControl Joystick Setup, you can see the buttons turning yellow when you switch them on. For example, channel 9 in Taranis maps to button 0 in QGroundControl Joystick setup. You can assign any mode to this button e.g. Altitude mode. Now when you lower the switch "SD", flight mode will change to Altitude.
# ROS
To connect to Crazyflie 2.1 via MAVROS:
- Start up cfbridge using the above instructions.
- Change the UDP port QGroundControl listens to:
- In QGroundControl, navigate to Application Settings > General and uncheck all the boxes under Autoconnect to the following devices.
- Add in Comm Links a link of type UDP, check the Automatically Connect on Start option, change the Listening Port to 14557, add Target Hosts: 127.0.0.1 and then press OK.
- Make sure you have MAVROS (opens new window) installed.
- Start MAVROS with command:
roslaunch mavros px4.launch fcu_url:="udp://:14550@127.0.0.1:14551" gcs_url:="udp://@127.0.0.1:14557" - Restart QGroundControl if it doesn't connect.
# Flying
← Holybro Kopis 2 芯片勘误表 →