# 遥控设置
The Radio Setup screen is used to configure the mapping of your remote control unit's main attitude control sticks (roll, pitch, yaw, throttle) to channels, and to calibrate the minimum, maximum, trim and reverse settings for all other transmitter controls/RC channels.
RC
Control is enabled by default, but a joystick may be enabled instead (or as a fallback) using the parameter (opens new window) COM_RC_IN_MODE. :::
# 绑定接收机
在你校准遥控器之前,遥控器的发射机和接收机需要绑定(对频)。 发射机和接收机对频的方法各有不同(请参照您使用的遥控器的说明书) 提醒:如果您使用的是 Spektrum 的接收机, 提醒:如果您使用的是 FrSky 的接收机,您可以在发射机上进行绑定(对频),下面是介绍。
注解
If you are using a Spektrum receiver, you can put it into bind mode using QGroundControl, as shown below. :::
注解
If you are using a FrSky receiver, you can bind it with its transmitter, by following instructions here (opens new window). :::
# RC Loss Detection
PX4 needs to be able to detect when the signal from the RC controller has been lost in order to be able to take appropriate safety measures.
RC receivers have different ways of indicating signal loss:
- Output nothing (automatically detected by PX4)
- Output a low throttle value (you can configure PX4 to detect this).
- Output the last received signal (cannot be detected by PX4 as it looks like valid input).
If your RC receiver does not support outputting no signal on RC loss, you must configure it to set throttle low instead, and set the corresponding value in RC_FAILS_THR.
The way to do this is to set the RC controller trim and throttle stick as low as possible, and use the resulting output PWM value in both PX4 and the receiver (read your receiver manual to determine how to set the RC loss value). Then reset the throttle stick trim back to its normal position. This process ensures that the RC loss value is below the minimum value output by the receiver in normal operation.
注解
Do not use a receiver that cannot support one of the two supported RC loss detection methods!
# 执行校准
The calibration process is straightforward - you will be asked to move the sticks in a specific pattern that is shown on the transmitter diagram on the top right of the screen.
To calibrate the radio:
打开您的 RC 发射机。
Start QGroundControl and connect the vehicle.
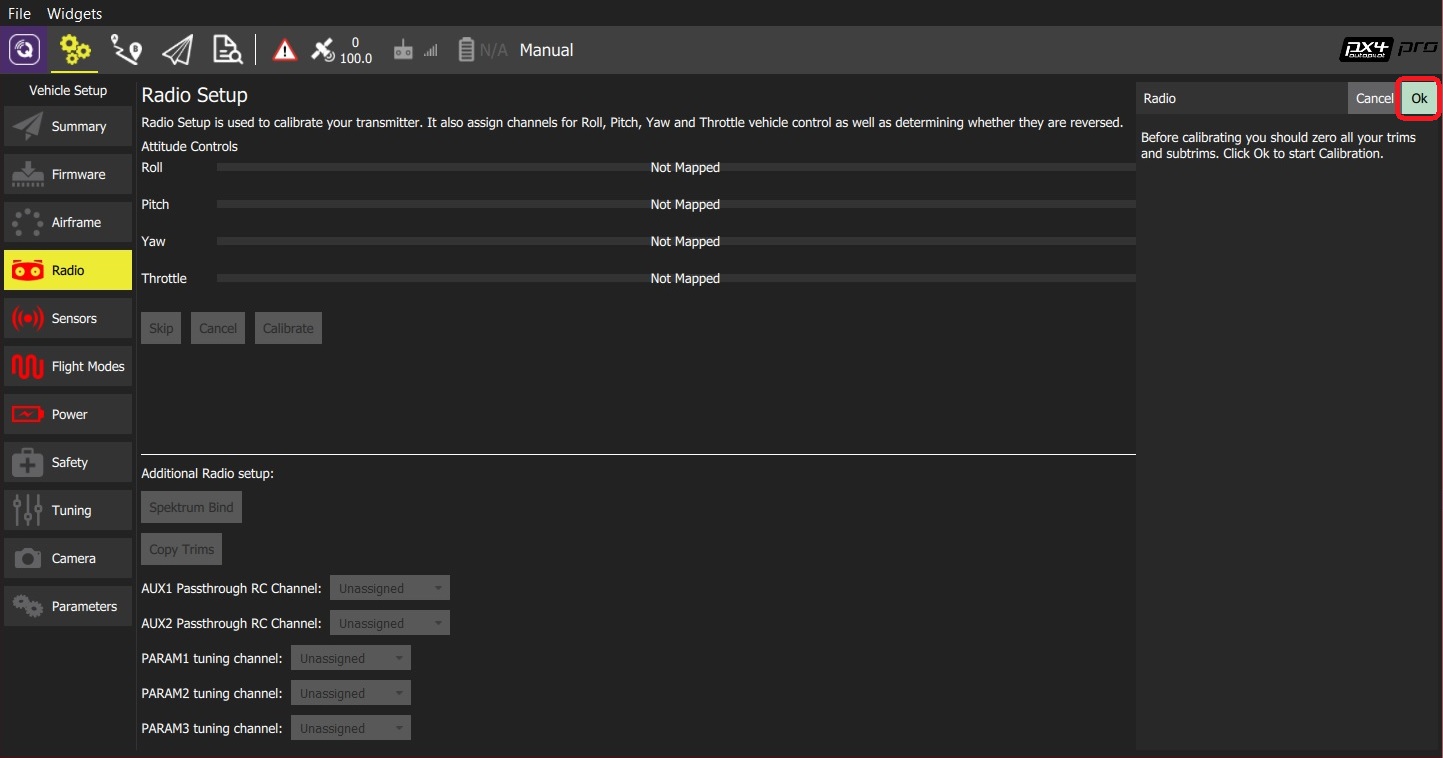
Select the Gear icon (Vehicle Setup) in the top toolbar and then Radio in the sidebar.
Press OK to start the calibration.
Set the transmitter mode radio button that matches your transmitter (this ensures that QGroundControl displays the correct stick positions for you to follow during calibration).
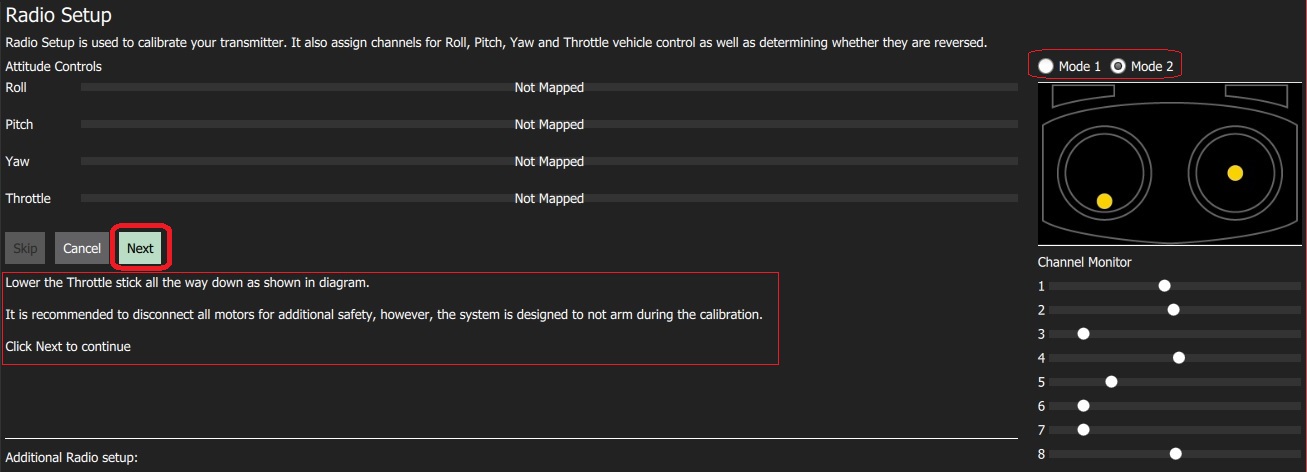
按照文字(在遥控器的图上)提示移动摇杆的位置。 Press Next when the sticks are in position. 重复上述步骤。
When prompted, move all other switches and dials through their full range (you will be able to observe them moving on the Channel Monitor).
Press Next to save the settings.
Radio calibration is demonstrated in the autopilot setup video here (opens new window) (youtube).
# 其他的遥控器设置
As well as calibrating your control sticks and other transmitter controls, there are a number of additional radio setup options that you may find useful on this screen.

# Spectrum 对频
在你校准遥控器之前,遥控器的发射机和接收机需要绑定(对频)。 If you have a Spektrum receiver you can put it in bind mode using QGroundControl as shown below (this can be particularly useful if you don't have easy physical access to the receiver on your vehicle).
To bind a Spektrum transmitter/receiver:
Select the Spektrum Bind button
选择接收机上的 “radio” 按钮。
Press OK
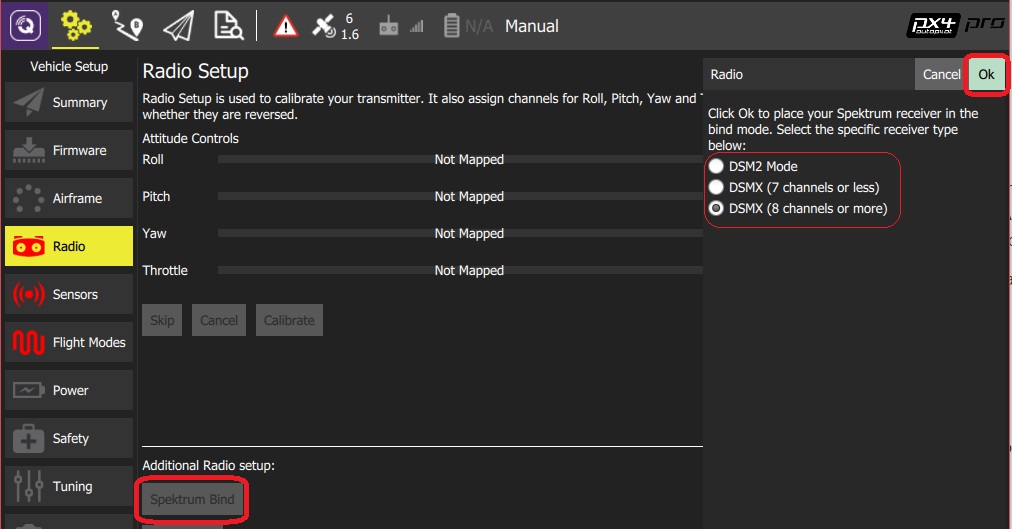
按着对频按钮,打开你的 Spektrum 遥控器。
# 复制微调
This setting is used to copy the manual trim settings from your radio transmitter so that they can be applied automatically within the autopilot. After this is done you will need to remove the manually set trims.
注解
Trim settings are used to adjust the roll, pitch, yaw such that when you center the sticks on your remote control, you get stable or level flight (in Stabilized flight mode). Some RC controllers provide trim knobs that allow you to provide an offset to the value sent by the RC controller for each stick position. The Copy Trims setting here moves the offsets into the autopilot. :::
To copy the trims:
Select Copy Trims.
摇杆居中,油门杆最低。
Press Ok.
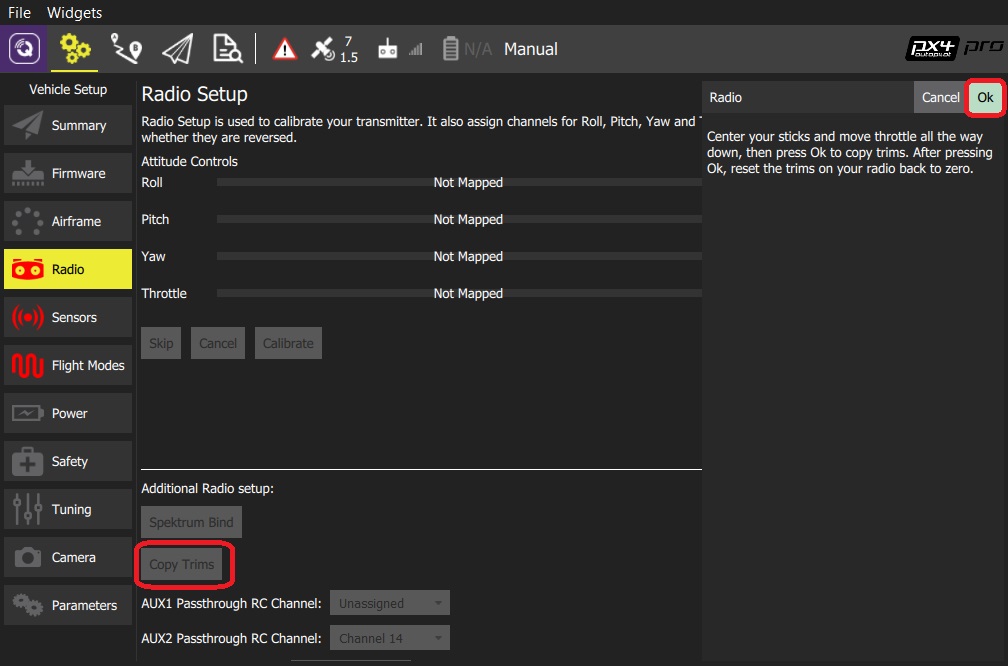
设置遥控器器微调为0。
# 辅助通道
AUX passthrough channels allow you to control arbitrary optional hardware from your transmitter (for example, a gripper).
To use the AUX passthrough channels:
映射2个遥控器控制来隔离通道。
如下所示,依次映射这些通道到端口 AUX1 和 AUX2。 设置后,保存到自驾仪。

The flight controller will pass through the unmodified values from the specified channels out of AUX1/AUX2 to the connected servos/relays that drive your hardware.
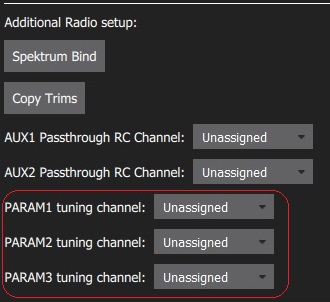
# 参数调试通道
Tuning channels allow you to map a transmitter tuning knob to a parameter (so that you can dynamically modify a parameter from your transmitter).
提示
This feature is provided to enable manual in-flight tuning: Multicopter PID Tuning Guide, Fixedwing PID Tuning Guide. :::
The channels used for parameter tuning are assigned in the Radio setup (here!), while the mapping from each tuning channel to its associated parameter is defined in the Parameter editor.
To set up tuning channels:
映射3个遥控器通道(旋钮或滑块开关)来分离通道。
Select the mapping of PARAM Tuning Id to radio channels, using the selection lists. 设置后,保存到自驾仪。
To map a PARAM tuning channel to a parameter:
Open the Parameters sidebar.
Select the parameter to map to your transmitter (this will open the Parameter Editor).
Check the Advanced Settings checkbox.
Click the Set RC to Param... button (this will pop-up the foreground dialog displayed below)
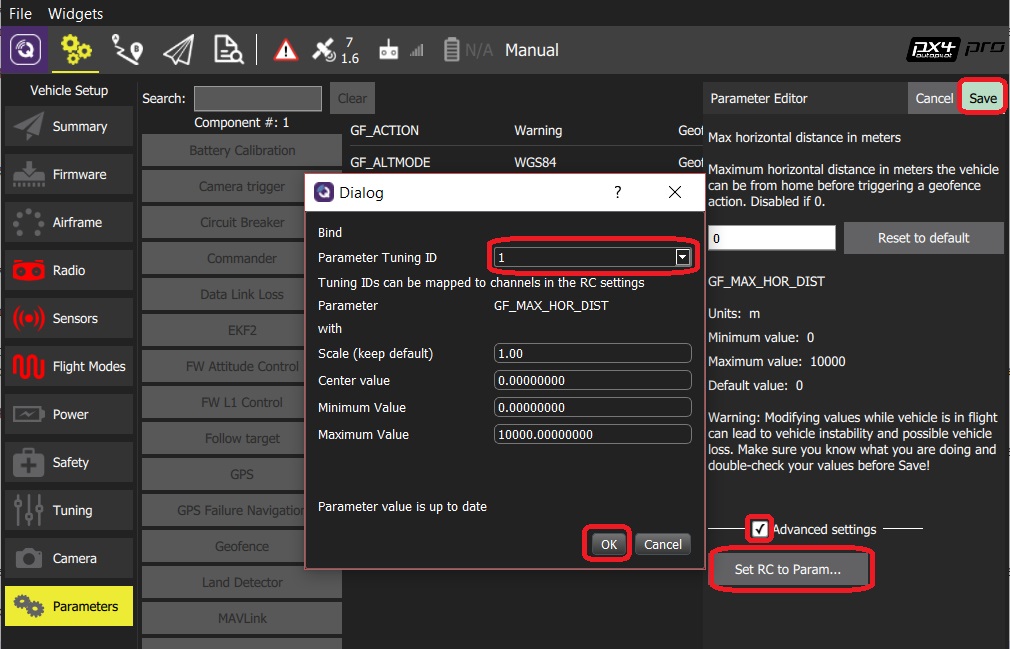
Select the tuning channel to map (1, 2 or 3) from the Parameter Tuning ID selection list.
Press OK to close the dialog.
Press Save to save all changes and close the Parameter Editor.
提示
You can clear all parameter/tuning channel mappings by selecting menu Tools > Clear RC to Param at the top right of the Parameters screen. :::
# 更多信息
- QGroundControl > Radio Control (opens new window)
- PX4 设置视频 - @4m30s (opens new window) (Youtube)
- 遥控系统选择 - 选择一个兼容的遥控系统。