# Debugging with Eclipse and J-Link
This topic explains how to setup and use MCU Eclipse (opens new window) with a Segger Jlink adapter to debug PX4 running on NuttX (e.g. Pixhawk series boards).
# 필요한 하드웨어
- J-Link EDU Mini (opens new window)
- Adapter to connect Segger JLink to Flight Controller SWD Debug Port (debug port).
- Micro USB 케이블
# 설치
# PX4
일반 지침에 따라 PX4를 설정합니다.
- Setup the PX4 Developer Environment/Toolchain for your platform (e.g. for Linux see: Development Environment on Ubuntu LTS / Debian Linux).
- PX4를 다운로드하고, 선택적으로 명령줄에서 빌드합니다.
# Eclipse
To install Eclipse:
- C/C++ 개발자를 위한 Eclipse CDT (opens new window)(MCU GitHub)를 다운로드하십시오.
- Eclipse 폴더의 압축을 풀고 적당한 폴더에 복사합니다(설치 스크립트를 실행할 필요가 없음).
- Run Eclipse and choose a location for your initial workbench.
# Segger Jlink 도구
To install the Segger Jlink tools:
- J-Link Software and Documentation Pack (opens new window)을 운영체제에 해당(윈도우와 리눅스용이 있음)하는 버전으로 다운로드하고 설치하십시오.
- Linux에서 /usr/bin에 설치됩니다.
자세한 내용은 https://gnu-mcu-eclipse.github.io/debug/jlink/install/ (opens new window)을 참고하십시오.
# 첫 사용
Connect the Segger JLink to the host computer and the flight controller debug port (via an adapter).
비행 콘트롤러에 전원을 공급합니다.
Run Eclipse.
파일 > 가져오기 C/C++ > 기존 코드를 Makefile 프로젝트로 만들고 다음을 클릭합니다.
Point it to the PX4-Autopilot folder and give it a name, then select ARM Cross GCC in the Toolchain for Indexer Settings and click Finish. 가져오기는 시간이 걸리며, 완료될 때까지 기다립니다.
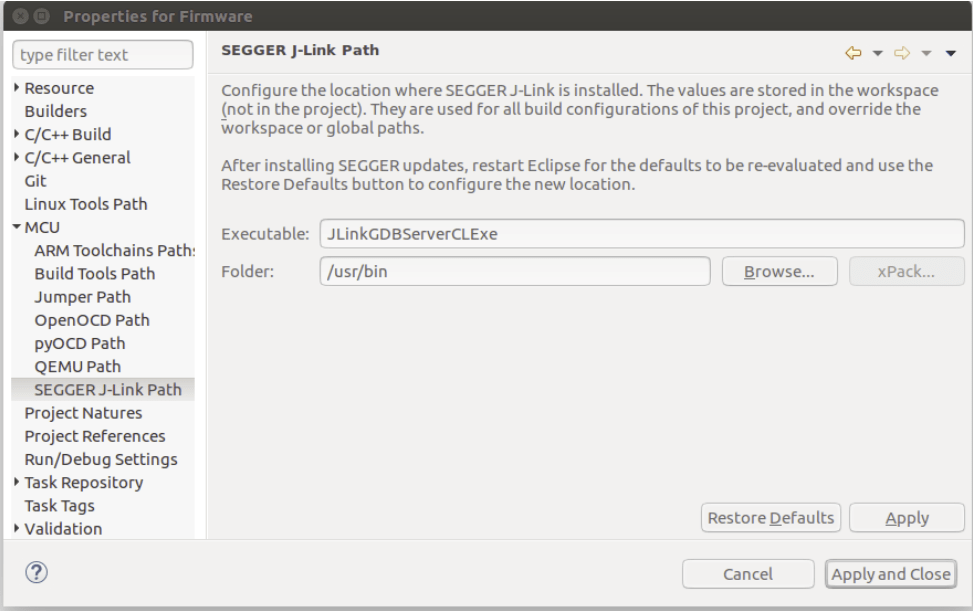
Set the MCU settings: right-click on the top-level project in the Project Explorer, select Properties then under MCU choose SEGGER J-Link Path. 아래 스크린샷과 같이 설정합니다.
패키지를 업데이트합니다.
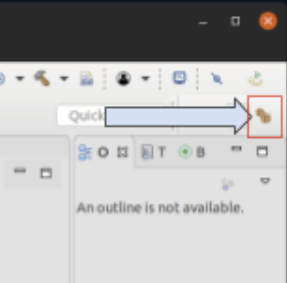
Click the small icon on the top right called Open Perspective and open the Packs perspective.
모두 업데이트 버튼을 클릭합니다.
TIP
이것은 10분정도의 시간이 소요됩니다. 누락된 패키지에 대한 오류를 무시하십시오. :::

- STM32Fxx 장치는 Keil 폴더에 있습니다. 마우스 오른쪽 버튼을 클릭한 다음, F4 및 F7에 해당하는 장치에서 설치를 선택하여 설치합니다.
대상에 대한 디버깅 설정을 진행하십시오:
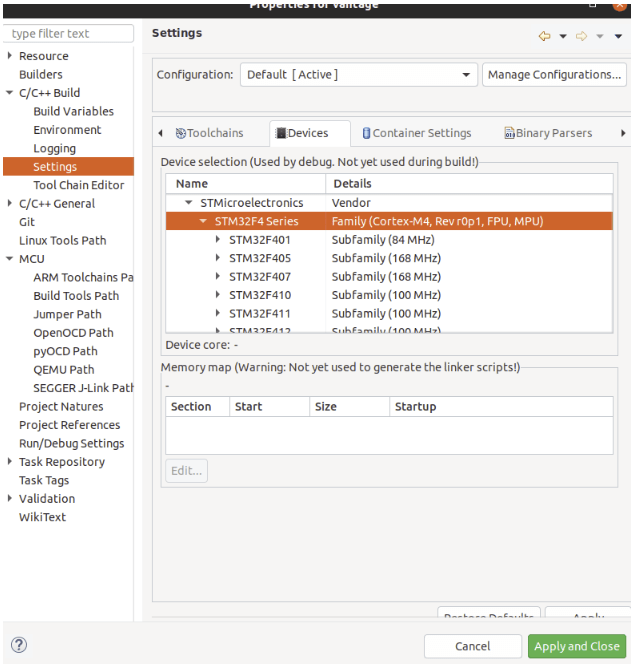
- Right click project and open the Settings (menu: C/C++ Build > Settings)
- Choose the Devices Tab, Devices section (Not Boards).
- 디버그하려는 FMU 칩을 찾으십시오.
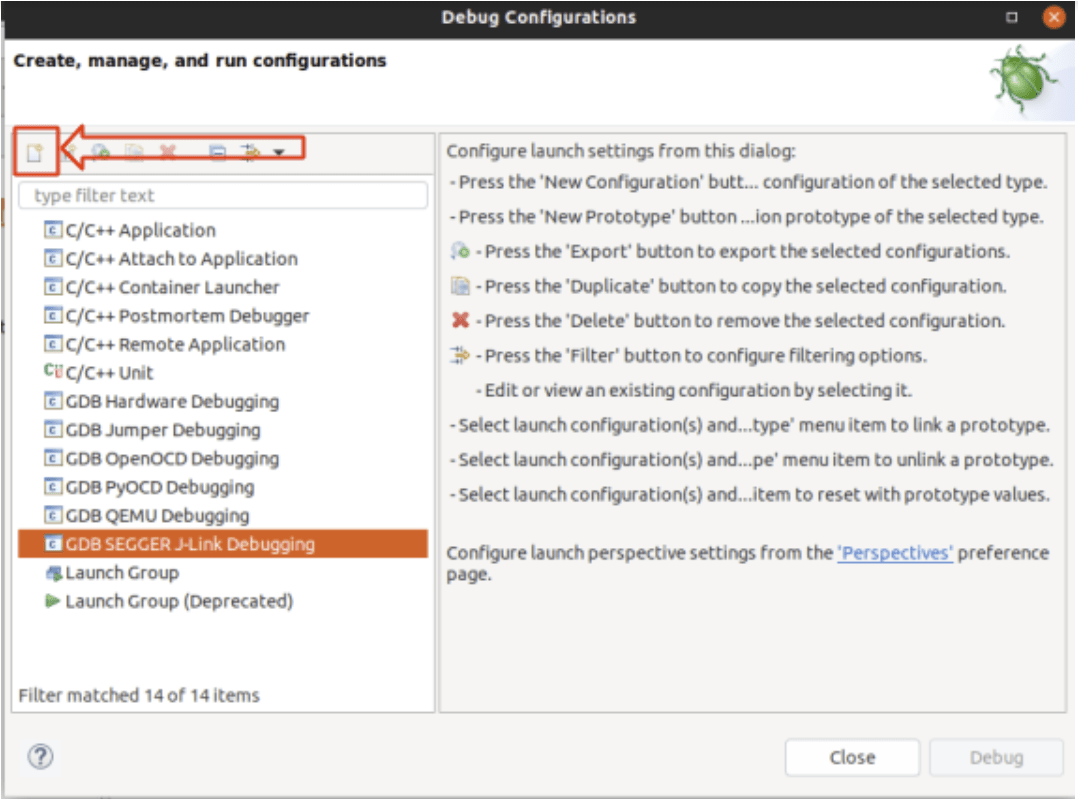
버그 기호 옆에 있는 작은 드롭다운으로 디버그 설정을 선택합니다.

Then select GDB SEGGER J-Link Debugging and then the New config button on the top left.
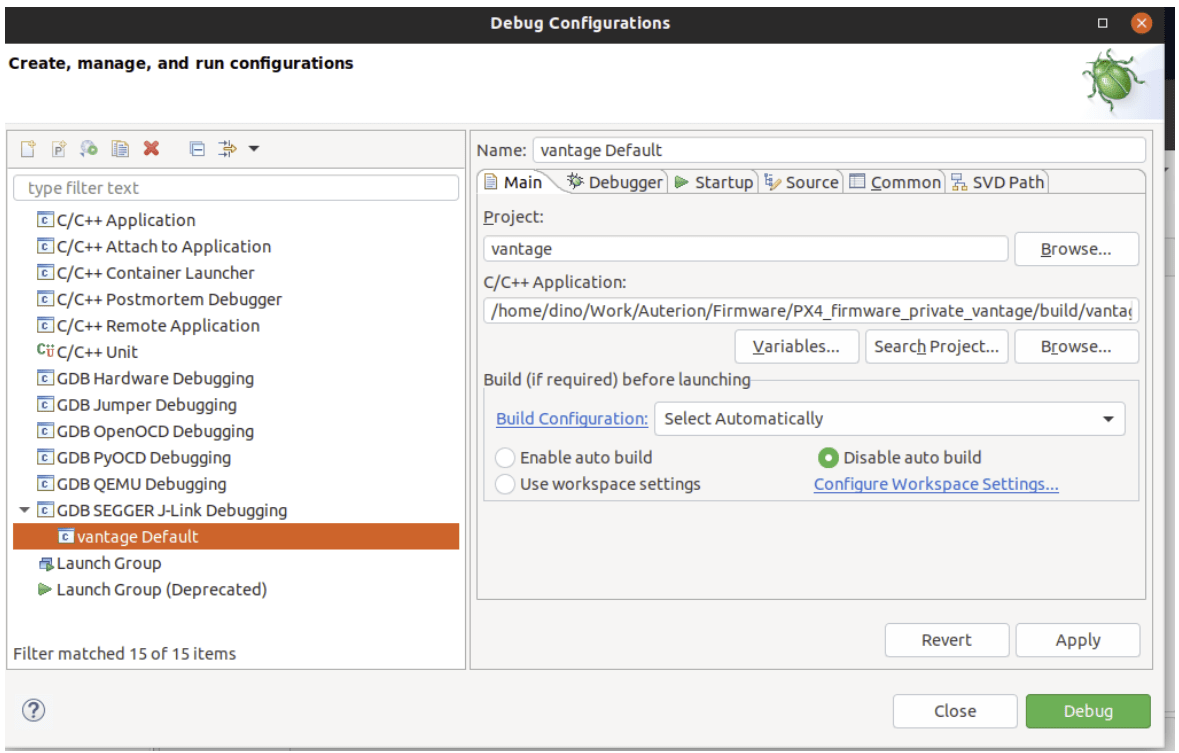
빌드 구성을 설정합니다.
- Give it a name and set the C/C++ Application to the corresponding .elf file.
- Choose Disable Auto build :::note Remember that you must build the target from the command line before starting a debug session. :::
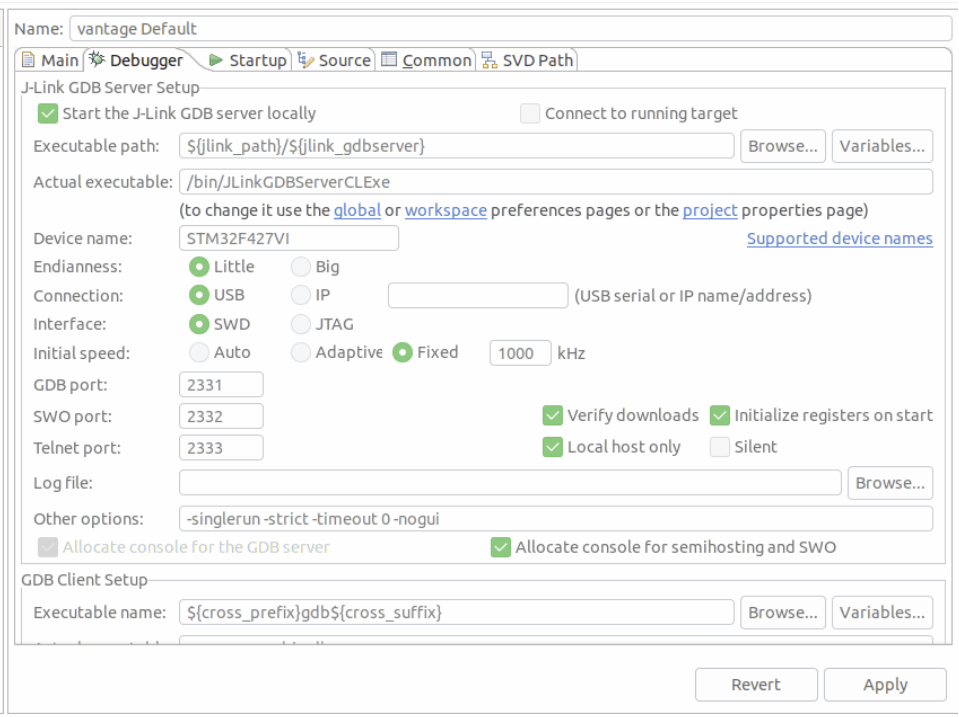
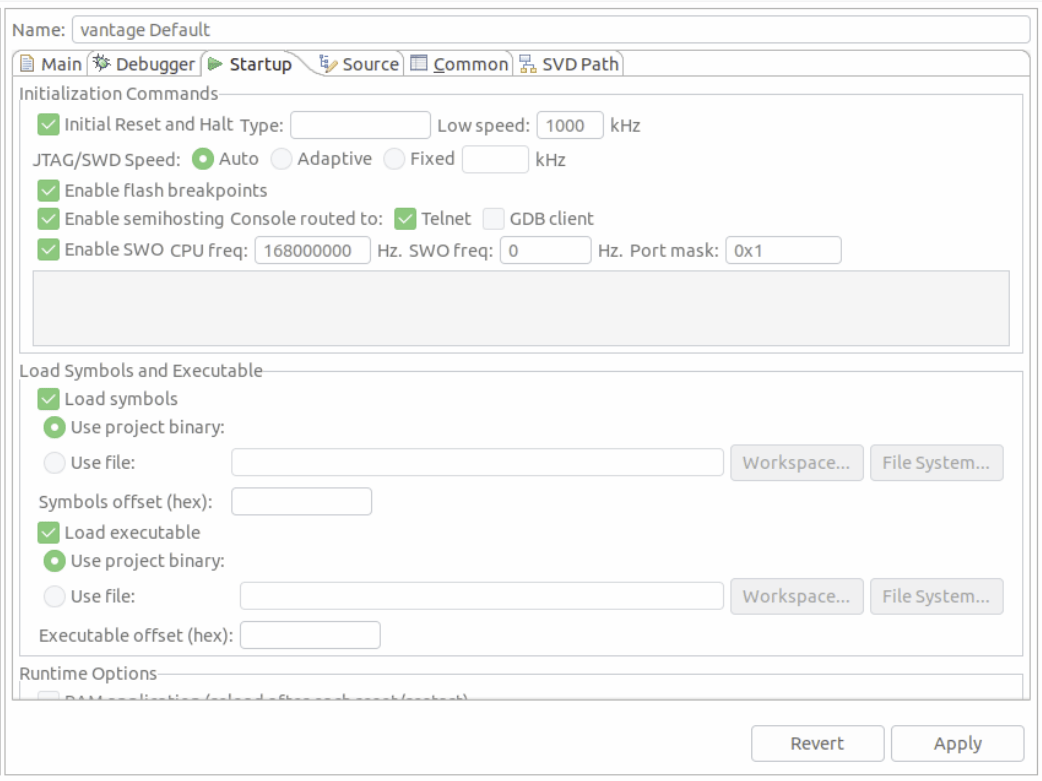
The Debugger and Startup tabs shouldn’t need any modifications (just verify your settings with the screenshots below)
# SEGGER Task-aware debugging
Task-aware debugging (also known as thread-aware debugging (opens new window)) allows you to show the context of all running threads/tasks instead of just the stack current task. This is quite useful since PX4 tends to run many different tasks.
To enable this feature for use in Eclipse:
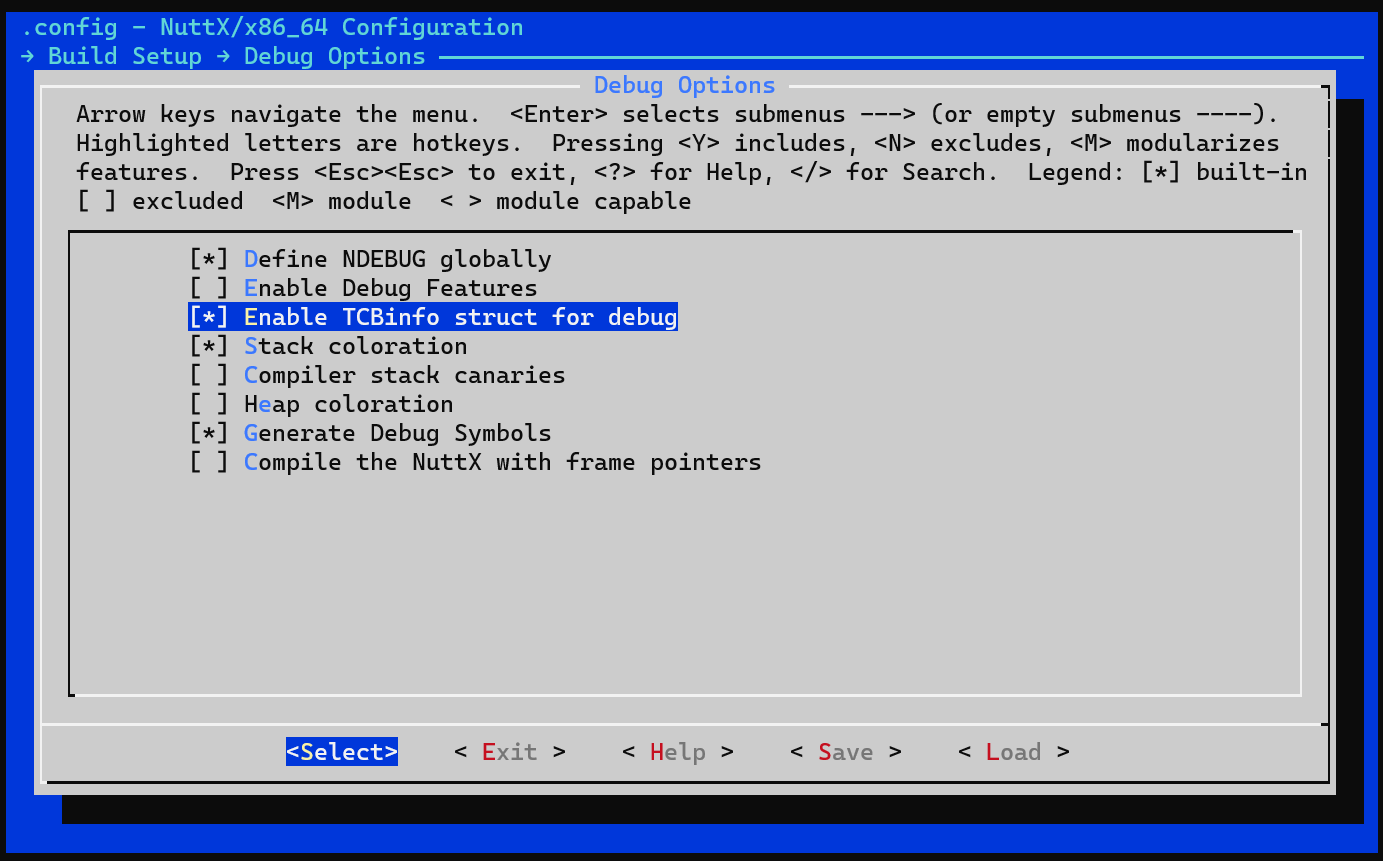
You first need to enable
CONFIG_DEBUG_TCBINFOin the NuttX configuration for your build (to expose the TCB offsets).- Open a terminal in the root of your PX4-Autopilot source code
- In the terminal, open
menuconfigusing the appropriate make target for the build. This will be something like:(See PX4 Menuconfig Setup for more information) on using the config tools).make px4_fmu-v5_default boardguiconfig - Ensure that the Enable TCBinfo struct for debug is selected as shown:
Compile the jlink-nuttx.so library in the terminal by running the following command in the terminal:
make jlink-nuttxModify Eclipse to use this libary. In the J-Link GDB Server Setup configuration, update Other options to include
-rtos /home/<PX4 path>/Tools/jlink-nuttx.so, as shown in the image below.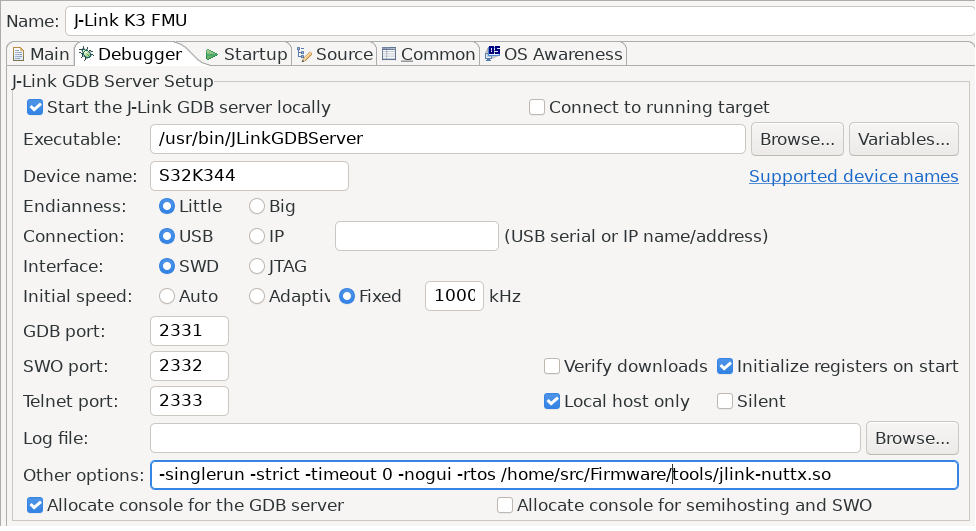
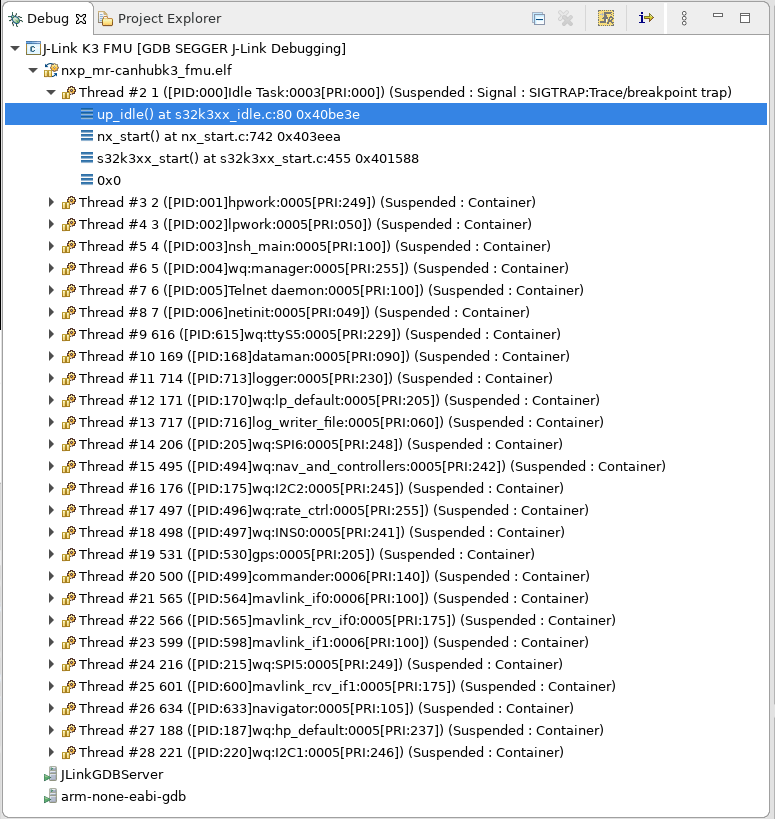
When running the debugger you should see now multiple threads instead of just one:
# 문제 해결
# 패키지 관리자에 없는 대상 CPU
대상 CPU가 패키지 관리자에 표시되지 않으면, 레지스터 보기가 작동하도록 하려면 다음 단계가 필요할 수 있습니다.
TIP
이것은 일반적으로 발생하지 않아야 합니다(그러나 STM F7 컨트롤러에 연결할 때 일화적으로 보고되었습니다).
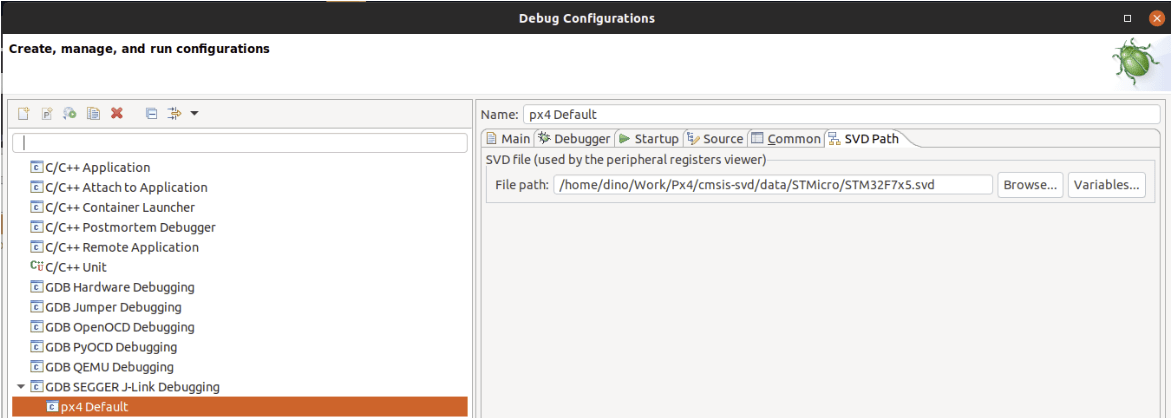
Adding missing SVD files for the Peripheral View:
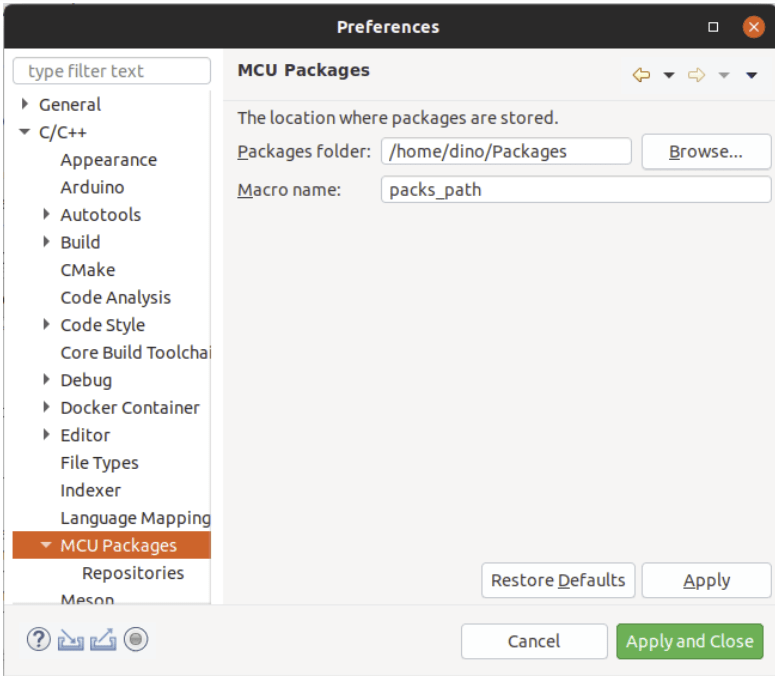
- MCU Eclipse가 패키지를 저장하는 위치를 찾으십시오(환경 설정 > C/C++ > MCU 패키지).
- http://www.keil.com/dd2/Pack/ 에서 누락된 패키지를 다운로드하십시오
- 압축 해제 도구로 다운로드한 팩을 열고 /CMSIS/SVD에서 .SVD 파일의 압축을 풉니다.
- 디버그 옵션 > GDB SEGGER JLink 디버깅 > SVD 경로에서 원하는 .SVD 파일을 선택하십시오.