# 任务
# 规划任务
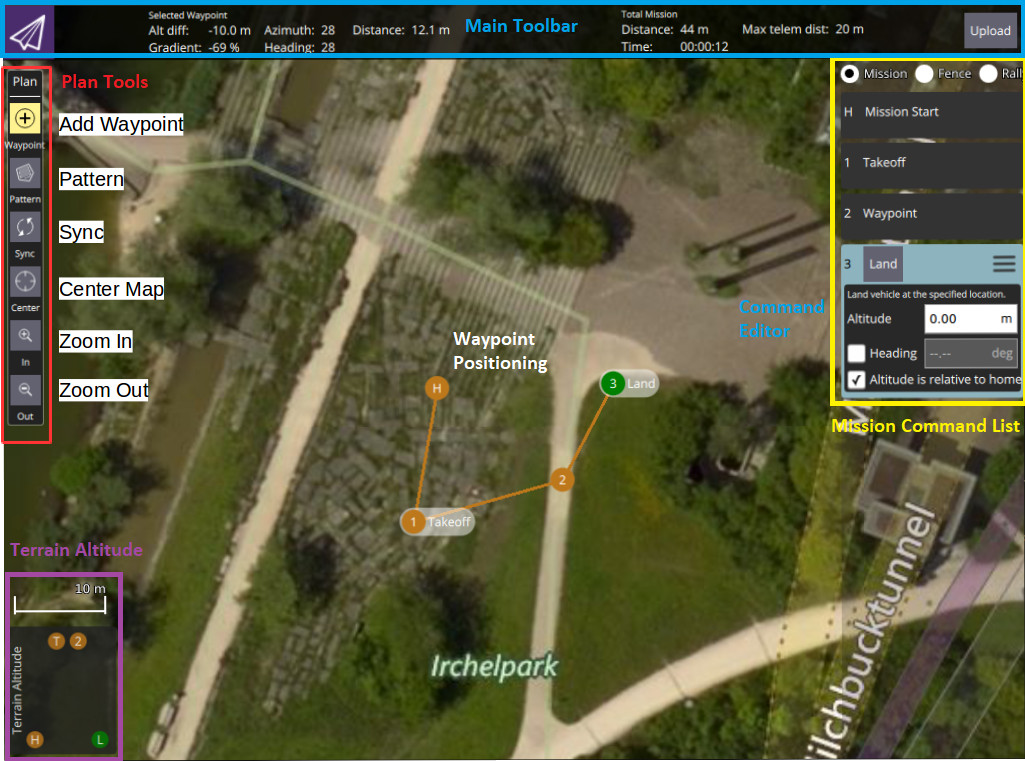
手动规划任务非常简单:
- 切换到mission视图
- 在左上选择 ** 添加航点 ** ("加号") 图标。
- 点击地图添加航点。
- 使用右侧的航点列表修改航点参数和类型。底部的高度指示器提供每个航点的相对高度。
- 完成后, 单击 ** 上载 ** 按钮 (右上), 将任务发送到飞行器。
You can also use the Pattern tool to automate creation of survey grids.
提示
For more information see the QGroundControl User Guide (opens new window).
# Setting Vehicle Yaw
If set, a multi-rotor vehicle will yaw to face the Heading value specified in the target waypoint (corresponding to MAV_CMD_NAV_WAYPOINT.param4 (opens new window)).
If Heading has not been explicitly set for the target waypoint (param4=NaN) then the vehicle will yaw towards a location specified in the parameter MPC_YAW_MODE. By default this is the next waypoint.
Vehicle types that cannot independently control yaw and direction of travel will ignore yaw settings (e.g. Fixed Wing).
# Setting Acceptance/Turning Radius
The acceptance radius defines the circle around a waypoint within which a vehicle considers it has reached the waypoint, and will immediately switch to (and start turning towards) the next waypoint.
For a multi-rotor drones, the acceptance radius is tuned using the parameter NAV_ACC_RAD. By default, the radius is small to ensure that multirotors pass above the waypoints, but it can be increased to create a smoother path such that the drone starts to turn before reaching the waypoint.
The image below shows the same mission flown with different acceptance radius parameters:
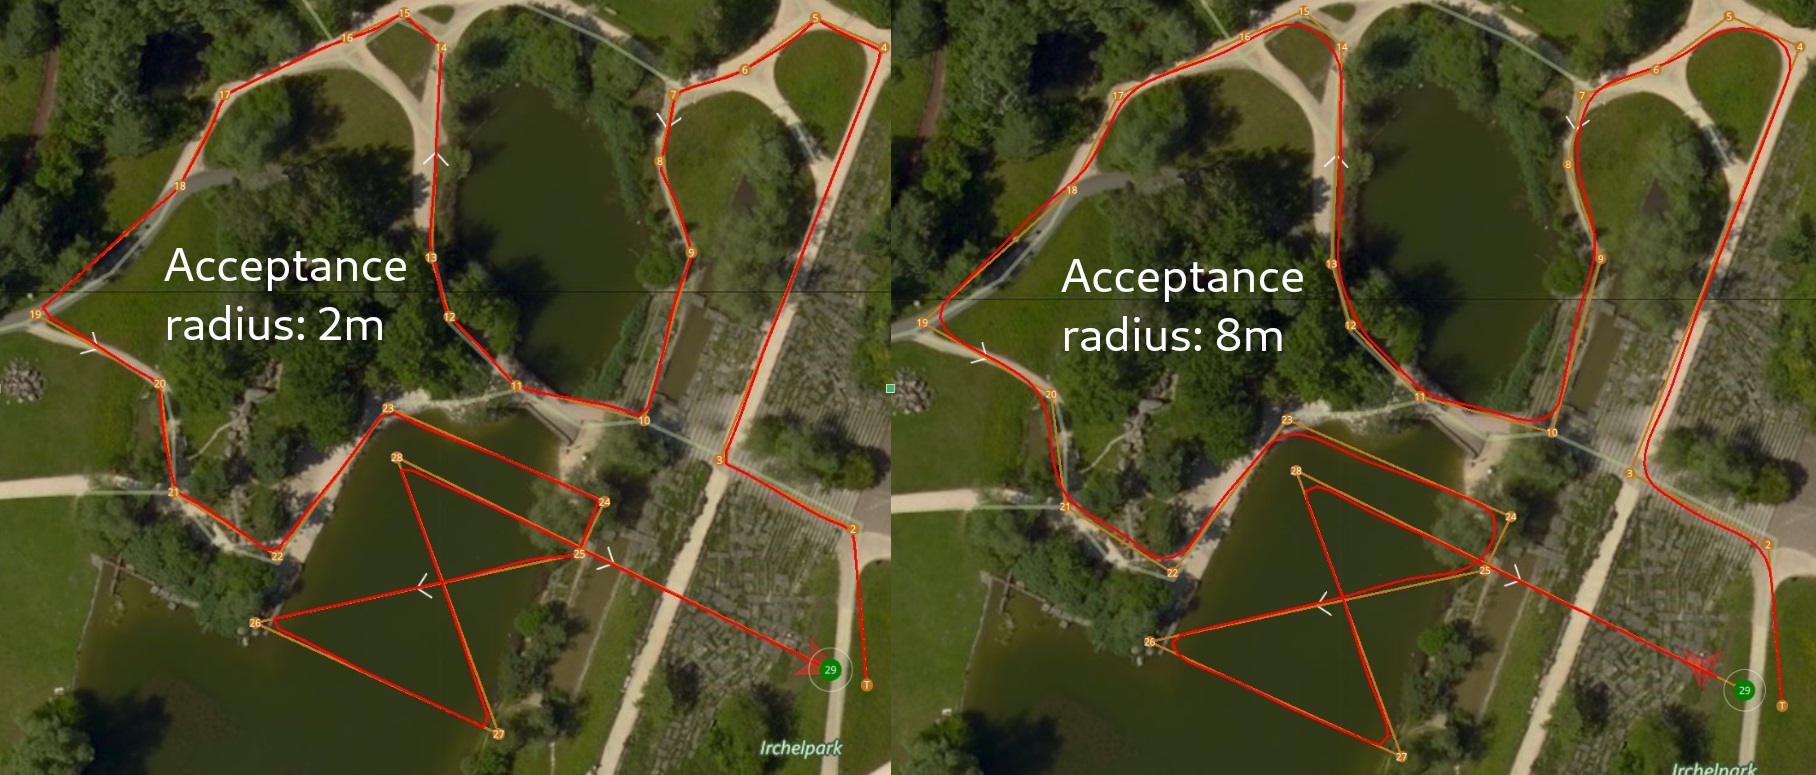
The speed in the turn is automatically computed based on the acceptance radius (= turning radius) and the maximum allowed acceleration and jerk (see Jerk-limited Type Trajectory for Multicopters).
提示
For more information about the impact of the acceptance radius around the waypoint see: Mission Mode > Inter-waypoint Trajectory.
# 执行飞行任务
Once the mission is uploaded, switch to the flight view. The mission is displayed in a way that makes it easy to track progress (it cannot be modified in this view).
