# Bootloader 更新
The PX4 Bootloader is used to load firmware for Pixhawk boards (PX4FMU, PX4IO).
Pixhawk controllers usually comes with an appropriate bootloader version pre-installed. However in some case it is not present, or an older version is present that needs to be updated.
此篇介绍了更新 Pixhawk bootloader 的几种常见方法。
注解
A case where you may need to update Pixhawk boards that install FMUv2 firmware: Firmware > FMUv2 Bootloader Update.
# Building the PX4 Bootloader
以 FMUv6X (STM32H7)开始的板子使用树内的 PX4 bootloader。
This can be built from within the PX4-Autopilot folder using the make command and the board-specific target with a _bootloader suffix. For FMUv6X the command is:
make px4_fmu-v6x_bootloader
This will build the bootloader binary as build/px4_fmu-v6x_bootloader/px4_fmu-v6x_bootloader.elf, which can be flashed via SWD or DFU. 如果你正准备构建 bootloader,你应该已经熟悉这些选项之一。
如果需要 HEX 文件而不是 ELF 文件,请使用 objcopy 参数:
arm-none-eabi-objcopy -O ihex build/px4_fmu-v6x_bootloader/px4_fmu-v6x_bootloader.elf px4_fmu-v6x_bootloader.hex
# Building the Legacy PX4 Bootloader
PX4 boards up to FMUv5X (before STM32H7) used a legacy PX4 bootloader (opens new window) repository.
请参考README中的说明来学习如何使用它。
# QGC Bootloader Update
The easiest approach is to first use QGroundControl to install firmware that contains the desired/latest bootloader. 然后,可以通过设置参数 SYS_BL_UPDATE 来在下次重启时启动 bootloader 更新。
注解
此方法只能在固件中存在 SYS_BL_UpDATE 时才能使用 (目前只是 FMUv2 和一些自定义固件)。
步骤如下:
插入 SD 卡(使能引导日志记录,便于调试任何可能的问题)。
使用包含 最新的/所需的 bootloader 的 image 文件来更新固件。
注解
已经更新的 bootloader 可能在自定义固件中提供(例如,来自开发团队的固件),或者可能在最新的 master 分支中。 :::
- 等待飞控重启。
- 找到并启用 参数 SYS_BL_UPDATE。
- 重新启动(断开/重新连接飞控板)。 Bootloader 更新只需要几秒钟即可完成。
通常,此时您可能想要使用 正确/新安装 的 bootloader 再次更新固件。
An specific example of this process for updating the FMUv2 bootloader is given below.
# FMUv2 Bootloader Update
If QGroundControl installs the FMUv2 target (see console during installation), and you have a newer board, you may need to update the bootloader in order to access all the memory on your flight controller.
注解
Early FMUv2 Pixhawk-series flight controllers had a hardware issue that restricted them to using 1MB of flash memory. The problem is fixed on newer boards, but you may need to update the factory-provided bootloader in order to install FMUv3 Firmware and access all 2MB available memory.
To update the bootloader:
插入 SD 卡(使能引导日志记录,便于调试任何可能的问题)。
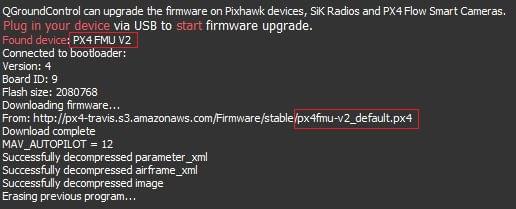
Update the Firmware to PX4 master version (when updating the firmware, check Advanced settings and then select Developer Build (master) from the dropdown list). QGroundControl will automatically detect that the hardware supports FMUv2 and install the appropriate Firmware.

等待飞控重启。
找到并启用 参数 SYS_BL_UPDATE。
重新启动(断开/重新连接飞控板)。 Bootloader 更新只需要几秒钟即可完成。
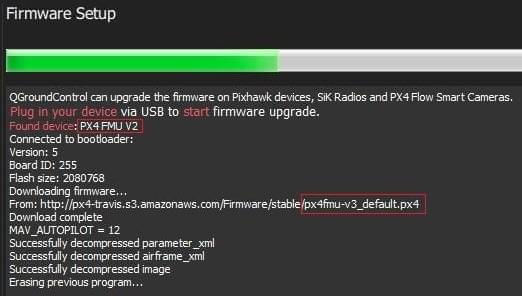
Then Update the Firmware again. This time QGroundControl should autodetect the hardware as FMUv3 and update the Firmware appropriately.

注解
If the hardware has the Silicon Errata it will still be detected as FMUv2 and you will see that FMUv2 was re-installed (in console). In this case you will not be able to install FMUv3 hardware.
# Dronecode Probe Bootloader 更新
以下步骤说明了如何使用 dronecode probe “手动” 更新 bootloader :
获取包含 bootloader 的二进制文件(从开发团队或自行编译获得)。
通过 USB 将 Dronecode Probe 连接到PC。
进入包含二进制文件的目录,然后在终端中运行以下命令 :
arm-none-eabi-gdb px4fmuv5_bl.elfThe gdb terminal appears and it should display the following output:
GNU gdb (GNU Tools for Arm Embedded Processors 7-2017-q4-major) 8.0.50.20171128-git
Copyright (C) 2017 Free Software Foundation, Inc.
License GPLv3+: GNU GPL version 3 or later <http://gnu.org/licenses/gpl.html>
This is free software: you are free to change and redistribute it.
There is NO WARRANTY, to the extent permitted by law.
Type "show copying"    and "show warranty" for details.
This GDB was configured as "--host=x86_64-linux-gnu --target=arm-none-eabi".
Type "show configuration" for configuration details.
For bug reporting instructions, please see:
<http://www.gnu.org/software/gdb/bugs/>.
Find the GDB manual and other documentation resources online at:
<http://www.gnu.org/software/gdb/documentation/>.
For help, type "help".
Type "apropos word" to search for commands related to "word"...
Reading symbols from px4fmuv5_bl.elf...done.
Find your
<dronecode-probe-id>by running an ls command in the /dev/serial/by-id directory.现在,使用以下命令连接到 Dronecode probe:
tar ext /dev/serial/by-id/<dronecode-probe-id>使用另一条 USB 线为 Pixhawk 供电,然后将 Dronecode probe 连接到 FMU-DEBUG 端口。
为了能够将 Dronecode probe 连接到 FMU-DEBUG 端口,您可能需要卸下外壳(例如,在Pixhawk 4 上,可以使用 T6 Torx 螺丝刀进行操作)。 :::
使用以下命令扫描 Pixhawk 的 swd 调试端口并连接到它 :
(gdb) mon swdp_scan
(gdb) attach 1
将二进制文件加载到 Pixhawk 中 :
(gdb) load
After the bootloader has updated you can Load PX4 Firmware using QGroundControl.
# 其他飞控板(非 Pixhawk)
不属于 Pixhawk 系列的板卡将具有自己的 bootloader 更新机制。
对于已预烧写 Betaflight 的板卡,请参见 Betaflight System 烧写 Bootloader 。