# 编译 PX4 软件
对于模拟目标和硬件目标,可以在控制台上或 IDE 中生成 PX4。
PX4 源代码存储在 PX4/Firmware (opens new window) 存储库中的 GitHub 上。 若要在您的计算机上获得最新的版本,请在终端中输入以下命令:
初次编译之前,我们会使用终端环境编译一个模拟目标。 这使我们能够在进入真正的硬件和 IDE 之前验证系统设置。
# 下载 PX4 源代码
The PX4 source code is stored on Github in the PX4/PX4-Autopilot (opens new window) repository. To get the very latest version onto your computer, enter the following command into a terminal:
git clone --recursive https://github.com/google/bloaty.git /tmp/bloaty \
      && cd /tmp/bloaty && cmake -GNinja . && ninja bloaty && cp bloaty /usr/local/bin/ \
      && rm -rf /tmp/*
注解
This is all you need to do just to build the latest code. GIT Examples > Contributing code to PX4 provides a lot more information about using git to contribute to PX4.
# 初次编译(使用 jMAVSim 模拟器)
First we'll build a simulated target using a console environment. This allows us to validate the system setup before moving on to real hardware and an IDE.
导航到 Firmware 目录,并使用以下命令启动 jMAVSim:
make px4_sitl jmavsim
This will bring up the PX4 console below:
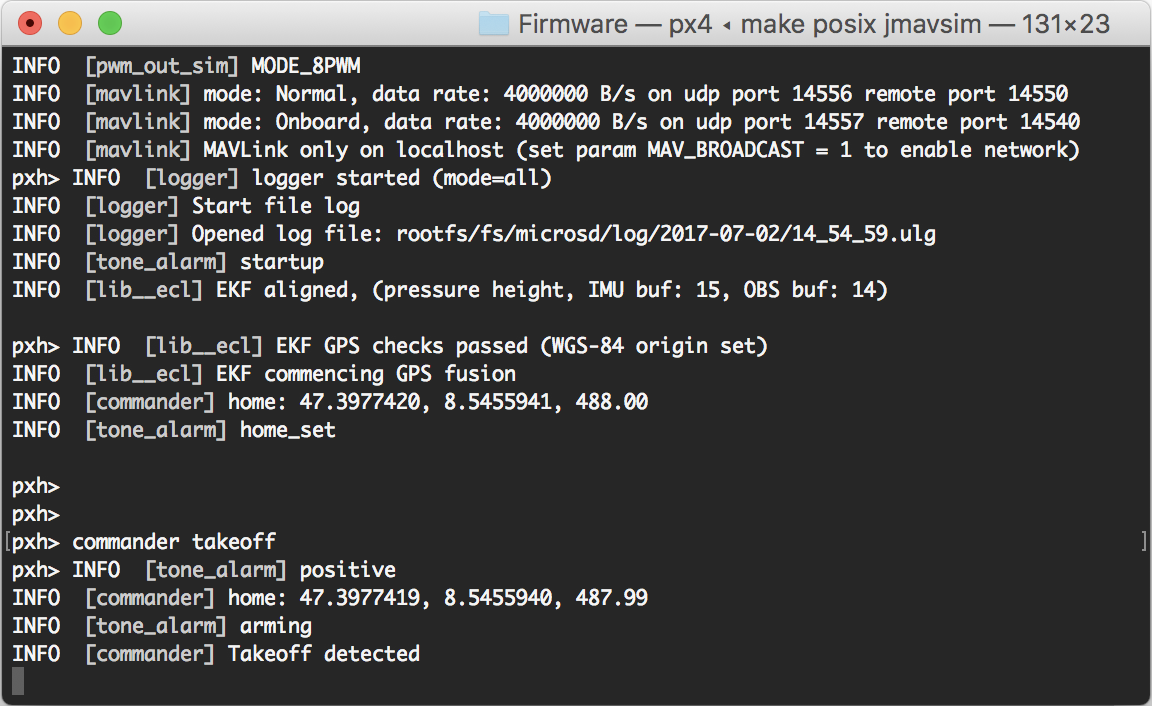
The drone can be flown by typing:
pxh> commander takeoff
无人机可以通过输入 commander land 着陆, 整个模拟可以通过 CTRL+C(或输入 shutdown)来停止。
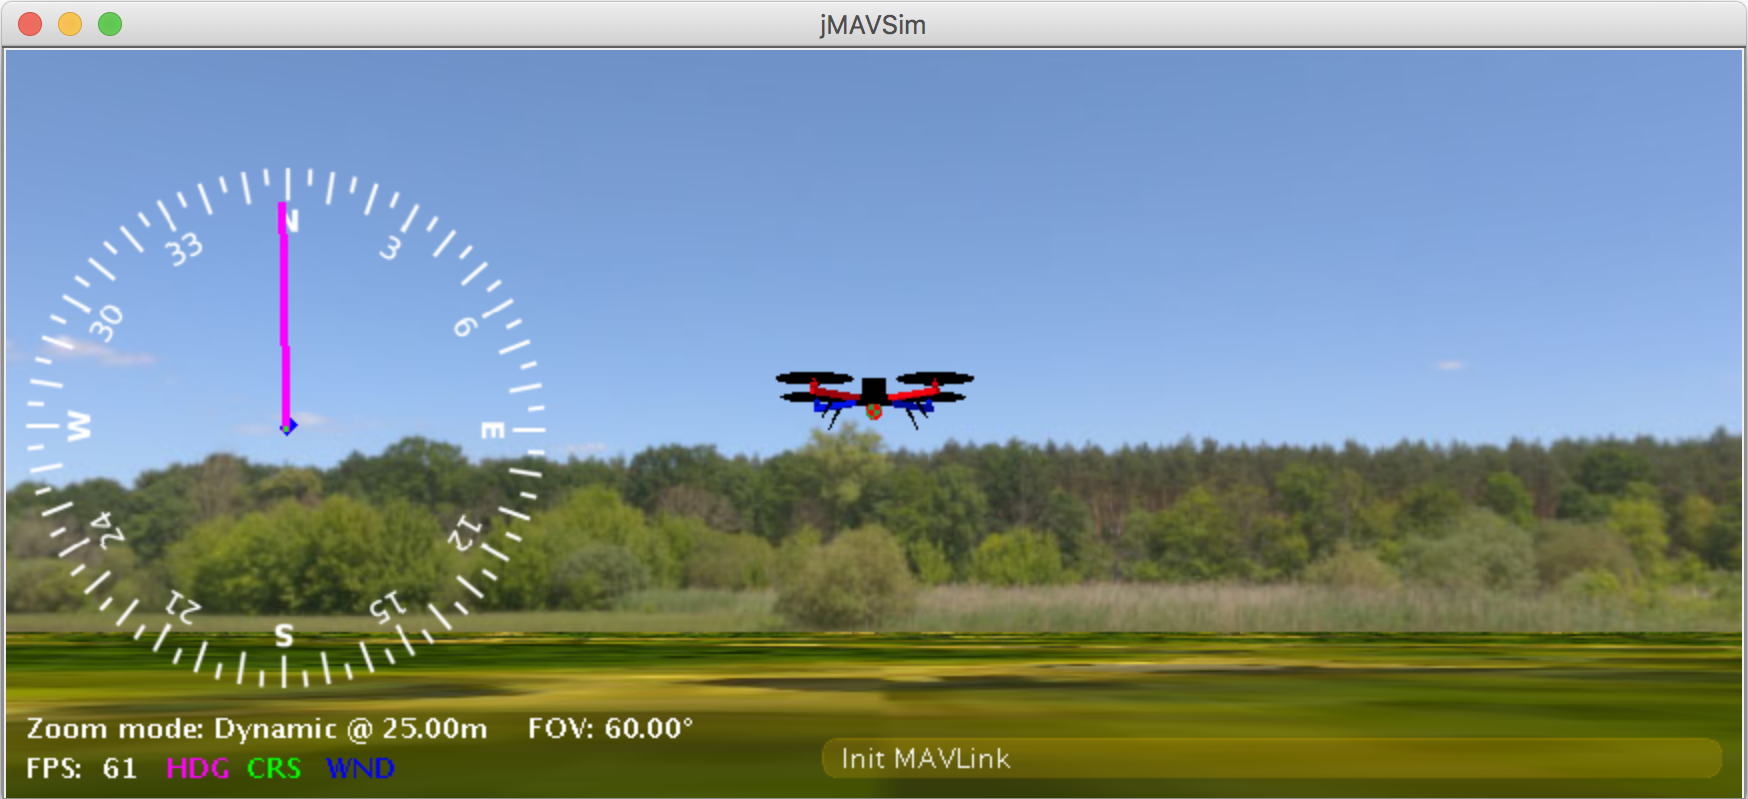
Flying the simulation with the ground control station is closer to the real operation of the vehicle. Click on a location in the map while the vehicle is flying (takeoff flight mode) and enable the slider. This will reposition the vehicle.

PX4 can be used with a number of other [Simulators](../simulation/README.md), including [Gazebo Simulation](../simulation/gazebo.md) and [AirSim Simulation](../simulation/airsim.md). These are also started with *make* - e.g.
-- Build files have been written to: /home/youruser/src/Firmware/build/px4_fmu-v4_default
[954/954] Creating /home/youruser/src/Firmware/build/px4_fmu-v4_default/px4_fmu-v4_default.px4
# 基于NuttX / Pixhawk 的飞控板
# 获取特定发行版本
运行成功后将输出类似结束:
下面的列表是常见飞控板的生成命令:
/data/ftp/internal_000/px4 -s /home/root/px4.config
A successful run will end with similar output to:
make px4_fmu-v4_default upload
The first part of the build target px4_fmu-v4 indicates the firmware for a particular flight controller hardware. The following list shows the build commands for the Pixhawk standard boards:
- 在 OS X 上,点击 ⌘-space 并搜索 “terminal” 。
- 在 Ubuntu 上,单击运行栏并搜索 “terminal”。
- 在 Windows 上,在“开始”菜单中找到 PX4 文件夹,然后单击 "PX4 Console"。
- HKPilot32 (opens new window):
make px4_fmu-v2_default - Crazyflie 2.0 (opens new window):
make bitcraze_crazyflie_default - Pixracer (opens new window):
make px4_fmu-v4_default - Pixhawk 3 Pro (opens new window):
make px4_fmu-v4pro_default - Pixhawk Mini (opens new window):
make px4_fmu-v3_default - Pixhawk 2 (opens new window):
make px4_fmu-v3_default - Holybro pix32:
make px4_fmu-v2_default - Pixfalcon:
make px4_fmu-v2_default - mRo Pixhawk (opens new window):
make px4_fmu-v3_default(支持 2MB 闪存) - Pixhawk 1:
make px4_fmu-v2_default:::warning You must use a supported version of GCC to build this board (e.g. the same as used by CI/docker) or remove modules from the build. Building with an unsupported GCC may fail, as PX4 is close to the board's 1MB flash limit. ::: - Pixhawk 1 with 2 MB flash:
make px4_fmu-v3_default
下列飞控板有一些更复杂的构建和部署说明。
注解
The _default suffix is the firmware configuration. This is optional (i.e. you can also build using make px4_fmu-v4, make bitcraze_crazyflie, etc.).
# 将固件烧录到飞控板
"PX4" 可执行文件位于目录 build/emlid_navio2_cross/ 中。 请确保您可以通过 ssh 连接到 RPi,请参阅 介绍如何访问您的 RPi (opens new window)。
make px4_fmu-v4_default upload
A successful run will end with this output:
Erase  : [====================] 100.0%
Program: [====================] 100.0%
Verify : [====================] 100.0%
Rebooting.
[100%] Built target upload
# 其他飞控板
并上传:
You can also list all configuration targets using the command:
make list_config_targets
# 用图形界面 IDE 编译
VSCode is the officially supported (and recommended) IDE for PX4 development. It is easy to set up and can be used to compile PX4 for both simulation and hardware environments.
# Qt Creator 功能
# 将固件烧录到飞控板
Many build problems are caused by either mismatching submodules or an incompletely cleaned-up build environment. Updating the submodules and doing a distclean can fix these kinds of errors:
sudo ./bin/px4 -s px4.config
# OcPoC-Zynq Mini
The region 'flash' overflowed by XXXX bytes error indicates that the firmware is too large for the target hardware platform. This is common for make px4_fmu-v2_default builds, where the flash size is limited to 1MB.
If you're building the vanilla master branch, the most likely cause is using an unsupported version of GCC. In this case, install the version specified in the Developer Toolchain instructions.
If building your own branch, it is possibly you have increased the firmware size over the 1MB limit. In this case you will need to remove any drivers/modules that you don't need from the build.
# Parrot Bebop
MacOS allows a default maximum of 256 open files in all running processes. The PX4 build system opens a large number of files, so you may exceed this number.
The build toolchain will then report Too many open files for many files, as shown below:
cd Firmware
make emlid_navio2_native # for native build
The solution is to increase the maximum allowed number of open files (e.g. to 300). You can do this in the macOS Terminal for each session:
- Run this script Tools/mac_set_ulimit.sh (opens new window), or
- Enter this command:
ulimit -S -n 300
# Qt creator 提供符号跳转、自动补全和编译固件的功能。
As of macOS Catalina 10.15.1 there may be problems when trying to build the simulator with cmake. If you have build problems on this platform then try run the following command in your terminal:
xcode-select --install
sudo ln -s /Library/Developer/CommandLineTools/SDKs/MacOSX.sdk/usr/include/* /usr/local/include/
# 基于 QuRT / Snapdragon 的飞控板
Build issues related to arm_none_eabi_gccmay be due to a broken g++ toolchain installation. You can verify that this is the case by checking for missing dependencies using:
<br />______ __ __ ___
| ___ \ \ \ / / / |
| |_/ / \ V / / /| |
| __/ / \ / /_| |
| | / /^\ \ \___ |
\_| \/ \/ |_/
px4 starting.
pxh>
运行 DSP 调试监控器:
arm-none-eabi-gdb --version
arm-none-eabi-gdb: command not found
This can be resolved by removing and reinstalling the compiler (opens new window).
# Ubuntu 18.04: Visual Studio Code is unable to watch for file changes in this large workspace
See Visual Studio Code IDE (VSCode) > Troubleshooting.
# Failed to import Python packages
"Failed to import" errors when running the make px4_sitl jmavsim command indicates that some Python packages are not installed (where expected).
Failed to import jinja2: No module named 'jinja2'
You may need to install it using:
    pip3 install --user jinja2
If you have already installed these dependencies this may be because there is more than one Python version on the computer (e.g. Python 2.7.16 Python 3.8.3), and the module is not present in the version used by the build toolchain.
You should be able to fix this by explicitly installing the dependencies as shown:
cd /home/pi && ./bin/px4 -d -s px4.config > px4.log
# PX4 创建生成目标
The previous sections showed how you can call make to build a number of different targets, start simulators, use IDEs etc. This section shows how make options are constructed and how to find the available choices.
The full syntax to call make with a particular configuration and initialization file is:
make [VENDOR_][MODEL][_VARIANT] [VIEWER_MODEL_DEBUGGER_WORLD]
VENDOR_MODEL_VARIANT: (also known as CONFIGURATION_TARGET)
- VENDOR: The manufacturer of the board:
px4,aerotenna,airmind,atlflight,auav,beaglebone,intel,nxp, etc. The vendor name for Pixhawk series boards ispx4. - MODEL: The board model "model":
sitl,fmu-v2,fmu-v3,fmu-v4,fmu-v5,navio2, etc. - VARIANT: Indicates particular configurations: e.g.
rtps,lpe, which contain components that are not present in thedefaultconfiguration. Most commonly this isdefault, and may be omitted.
提示
You can get a list of all available CONFIGURATION_TARGET options using the command below:
make list_config_targets
VIEWER_MODEL_DEBUGGER_WORLD:
- VIEWER: This is the simulator ("viewer") to launch and connect:
gazebo,jmavsim,none
提示
none can be used if you want to launch PX4 and wait for a simulator (jmavsim, gazebo, or some other simulator). For example, make px4_sitl none_iris launches PX4 without a simulator (but with the iris airframe).
- **MODEL:**要使用的 载具 模型(例如
iris(default)、rover、tailsitter等),该模型将由模拟器加载。 环境变量PX4_SIM_MODEL将设置为所选模型。 然后在 启动脚本 中使用该模型来选择适当的参数。 - **DEBUGGER:**要使用的调试器:
none(default)、ide、gdb、lldb、ddd、valgrind、callgrind。 有关详细信息,请参阅 < 0>Simulation 调试 </0>。 - WORLD: (Gazebo only). Set a the world (PX4/sitl_gazebo/worlds (opens new window)) that is loaded. Default is empty.world (opens new window). For more information see Gazebo > Loading a Specific World.
提示
You can get a list of all available VIEWER_MODEL_DEBUGGER_WORLD options using the command below:
make px4_sitl list_vmd_make_targets
Notes:
- Most of the values in the
CONFIGURATION_TARGETandVIEWER_MODEL_DEBUGGERhave defaults, and are hence optional. For example,gazebois equivalent togazebo_irisorgazebo_iris_none. - You can use three underscores if you want to specify a default value between two other settings. For example,
gazebo___gdbis equivalent togazebo_iris_gdb. - You can use a
nonevalue forVIEWER_MODEL_DEBUGGERto start PX4 and wait for a simulator. For example start PX4 usingmake px4_sitl_default noneand jMAVSim using./Tools/jmavsim_run.sh -l.
The VENDOR_MODEL_VARIANT options map to particular cmake configuration files in the PX4 source tree under the /boards (opens new window) directory. Specifically VENDOR_MODEL_VARIANT maps to a configuration file boards/VENDOR/MODEL/VARIANT.cmake (e.g. px4_fmu-v5_default corresponds to boards/px4/fmu-v5/default.cmake (opens new window)).
Additional make targets are discussed in relevant sections:
bloaty_compare_master: Binary Size Profiling- ...
# 列出所有发行版本(标签) sh git tag -l
The PX4 Firmware Version and Custom Firmware Version are published using the MAVLink AUTOPILOT_VERSION (opens new window) message, and displayed in the QGroundControl Setup > Summary airframe panel:
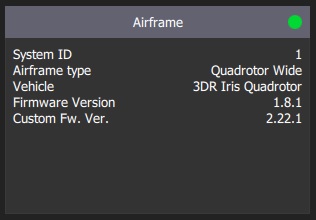
These are extracted at build time from the active git tag for your repo tree. The git tag should be formatted as <PX4-version>-<vendor-version> (e.g. the tag in the image above was set to v1.8.1-2.22.1).
注意
If you use a different git tag format, versions information may not be displayed properly.