Bootloader 更新
PX4 bootloader用于为Pixhawk板(PX4FMU, PX4IO)和PX4FLOW加载固件。
此篇介绍了更新Pixhawk bootloader的几种常见方法。
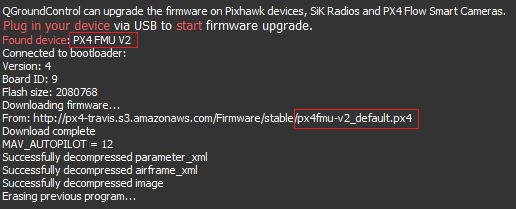
硬件通常会预先安装匹配版本的引导程序。 如果需要给新版本的 Pixhawk 板安装FMUv2固件,应先更新Bootloader:固件>FMUv2 Bootloader更新
QGC 地面站 Bootloader 更新
The easiest approach is to first use QGroundControl to install firmware with the desired/latest bootloader. 您可以通过设置参数:SYS_BL_UPDATE,以便在下次重新启动时启动 bootloader 更新。
This approach can only be used if SYS_BL_UPDATE is present in firmware (currently just FMUv2 and some custom firmware).
The steps are:
- 插入 SD 卡(启用引导日志记录,便于调试任何可能的问题。)
Update the Firmware with an image containing the new/desired bootloader.
The updated bootloader might be supplied in custom firmware (i.e. from the dev team), or it or may be included in the latest master.

等待飞控重启。
找到并启用 参数 SYS_BL_UPDATE。
- 重新启动(断开/重新连接飞控板)。 Bootloader 更新只需要几秒钟即可完成。
Generally at this point you may then want to update the firmware again using the correct/newly installed bootloader.
Dronecode Probe Bootloader Update
The following steps explain how you can "manually" update the bootloader using the dronecode probe:
- Get a binary containing the bootloader (either from dev team or build it yourself).
- Connect the Dronecode probe to your PC via USB.
Go into the directory containing the binary and run the following command in the terminal:
 cmd
 arm-none-eabi-gdb px4fmuv5_bl.elf
The gdb terminal appears and it should display the following output:
 cmd
 GNU gdb (GNU Tools for Arm Embedded Processors 7-2017-q4-major) 8.0.50.20171128-git
 Copyright (C) 2017 Free Software Foundation, Inc.
 License GPLv3+: GNU GPL version 3 or later <http://gnu.org/licenses/gpl.html>
 This is free software: you are free to change and redistribute it.
 There is NO WARRANTY, to the extent permitted by law.  Type "show copying"
 and "show warranty" for details.
 This GDB was configured as "--host=x86_64-linux-gnu --target=arm-none-eabi".
 Type "show configuration" for configuration details.
 For bug reporting instructions, please see:
 <http://www.gnu.org/software/gdb/bugs/>.
 Find the GDB manual and other documentation resources online at:
 <http://www.gnu.org/software/gdb/documentation/>.
 For help, type "help".
 Type "apropos word" to search for commands related to "word"...
 Reading symbols from px4fmuv5_bl.elf...done.
Find your
<dronecode-probe-id>by running an ls command in the /dev/serial/by-id directory.- Now connect to the Dronecode probe with the following command:
tar ext /dev/serial/by-id/<dronecode-probe-id> Power on the Pixhawk with another USB cable and connect the Dronecode probe to the FMU-DEBUG port.
To be able to connect the Dronecode probe to the FMU-DEBUG port, you may need to remove the case (e.g. on Pixhawk 4 you would do this using a T6 Torx screwdriver).
Use the following command to scan for the Pixhawk’s swd and connect to it:
 (gdb) mon swdp_scan
 (gdb) attach 1
- Load the binary into the Pixhawk:
(gdb) load
After the bootloader has updated you can Load PX4 Firmware using QGroundControl.
其他飞控板(非Pixhawk)
Boards that are not part of the Pixhawk Series will have their own mechanisms for bootloader update.
For boards that are preflashed with Betaflight, see Bootloader Flashing onto Betaflight Systems.

