罗盘校准
罗盘校准过程配置了所有连接的外部和内部 magnetometers。 QGroundControl 将指定您把飞行器定位在一系列方向并在指定轴上旋转飞行器。
如果您使用外部地磁计/罗盘(例如,集成GPS模块的罗盘),请确保正确安装外部罗盘并连接到飞行控制器硬件。 连接特定飞行器的 GPS 和罗盘的指南可以在 Basic Assembly 中找到。 Once connected, QGroundControl will automatically detect the external magnetometer.
You will need to calibrate your compass on first use, and you may need to recalibrate it if the vehicles is ever exposed to a very strong magnetic field, or if it is used in an area with abnormal magnetic characteristics. Indications of a poor compass calibration include multicopter circling during hover, toilet bowling (circling at increasing radius/spiraling-out, usually constant altitude, leading to fly-way), or veering off-path when attempting to fly straight.
执行校准
The calibration steps are:
- Choose a location away from large metal objects or magnetic fields. > Tip Metal is not always obvious! Avoid calibrating on top of an office table (often contain metal bars) or next to a vehicle. Calibration can even be affected if you're standing on a slab of concrete with uneven distribution of re-bar.
- Start QGroundControl and connect the vehicle.
- Select the Gear icon (Vehicle Setup) in the top toolbar and then Sensors in the sidebar.
Click the Compass sensor button.
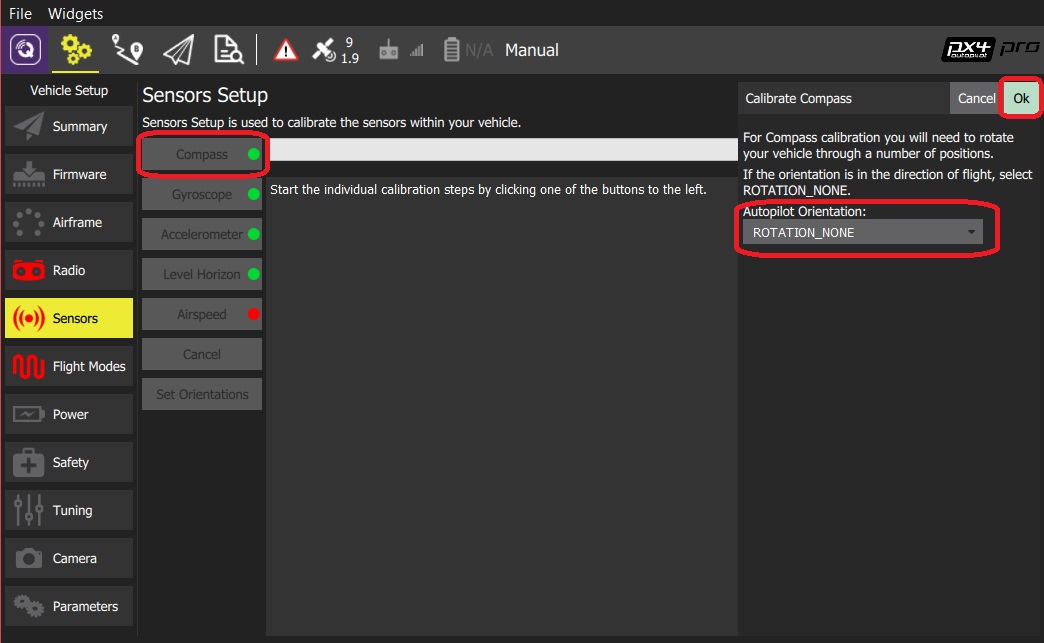
You should already have set the Autopilot Orientation. If not, you can also set it here.
Click OK to start the calibration.
Place the vehicle in any of the orientations shown in red (incomplete) and hold it still. Once prompted (the orientation-image turns yellow) rotate the vehicle around the specified axis in either/both directions. Once the calibration is complete for the current orientation the associated image on the screen will turn green.
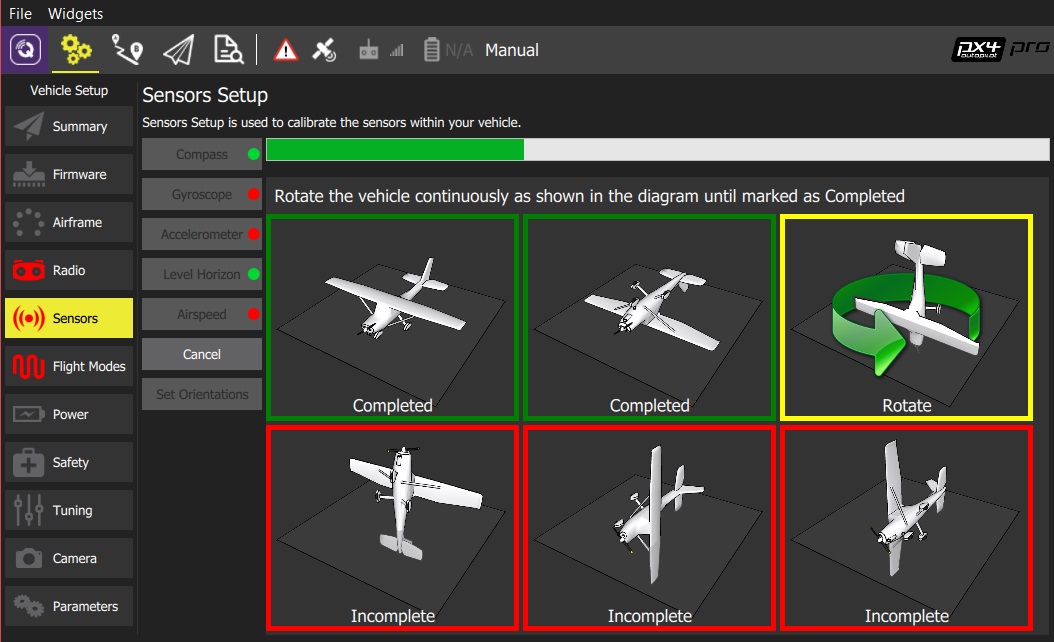
Repeat the calibration process for all vehicle orientations.
Once you've calibrated the vehicle in all the positions QGroundControl will display Calibration complete (all orientation images will be displayed in green and the progress bar will fill completely). You can then proceed to the next sensor.
更多信息:
- QGroundControl 用户手册 > 传感器
- PX4 Setup Video - @2m38s (Youtube)
- Compass Power Compensation (Advanced Configuration)