Bootloader Update Pixhawk V6X-RT via USB
This topic explains explains to flash Pixhawk FMUv6X-RT bootloader via USB without needing a debug probe.
Overview
The PX4 Bootloader is used to load firmware for Pixhawk boards (PX4FMU, PX4IO).
Pixhawk controllers usually comes with an appropriate bootloader version pre-installed. However in some cases it may not be present, or an older version may be present that needs to be updated. It is also possible that the device is bricked, so the device has to be erased and a new bootloader must be flashed.
Most flight controllers require a Debug probe in order to update the bootloader, as discussed in Bootloader Update > Debug Probe Bootloader Update. You can use this approach for the Pixhawk FMUv6X-RT, but if you don't have a debug probe you can use the instructions outlined in this topic instead.
Building the PX4 FMUv6X-RT Bootloader
This can be built from within the PX4-Autopilot folder using the make command and the board-specific target with a _bootloader suffix. For FMUv6X-RT the command is:
sh
make px4_fmu-v6xrt_bootloaderThis will build the bootloader binary as build/px4_fmu-v6xrt_bootloader/px4_fmu-v6xrt_bootloader.bin, which can be flashed via SWD or ISP. If you are building the bootloader you should be familiar with one of these options already.
If you need a HEX file instead of an ELF file, use objcopy:
sh
arm-none-eabi-objcopy -O ihex build/px4_fmu-v6xrt_bootloader/px4_fmu-v6xrt_bootloader.elf px4_fmu-v6xrt_bootloader.hexFlashing the bootloader through USB
The Pixhawk V6X-RT comes with a build-in bootloader located on the ROM. To flash a new bootloader through USB you've got to download the NXP MCUXpresso Secure Provisioning tool. The tool is available for Windows, Linux and macOS.
Install the MCUXpresso Secure Provisioning application and launch the application:
On first start you have to create a "New Workspace". Select
i.mX RT11xxand then selectMIMXRT1176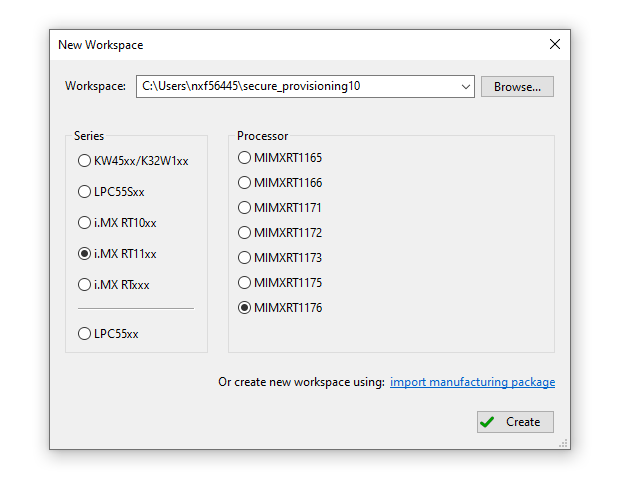
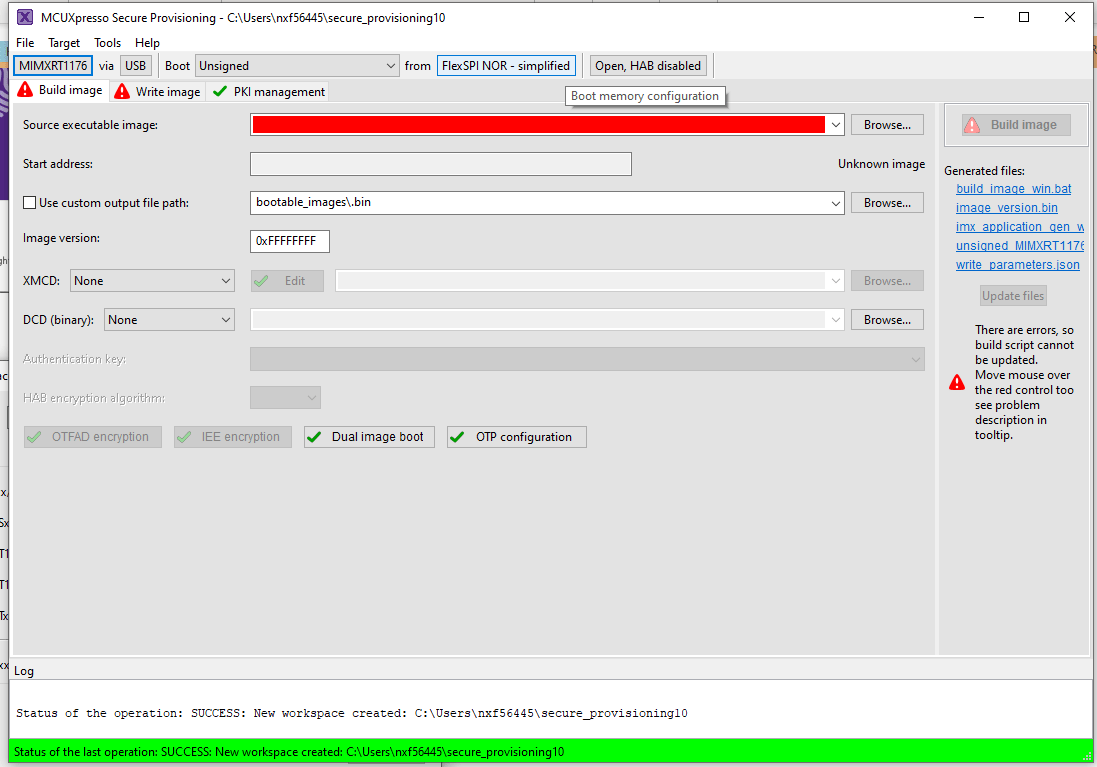
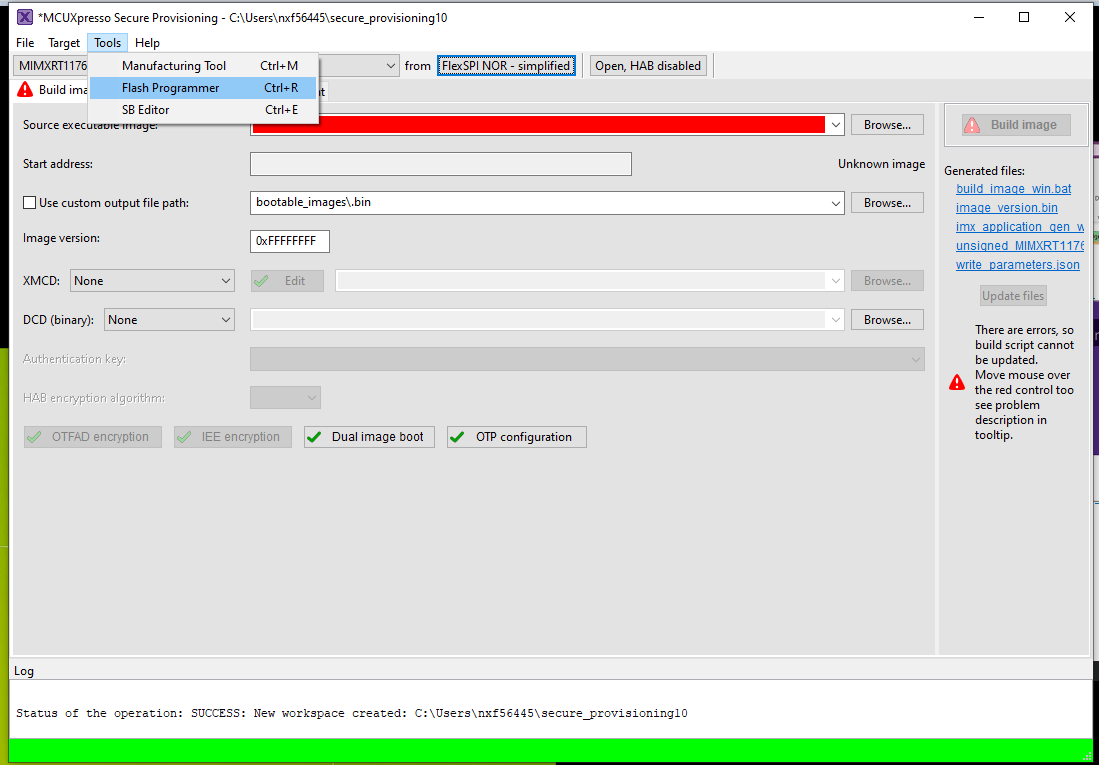
After creating a "New Workspace" click on the FlexSPI NOR - simplified button
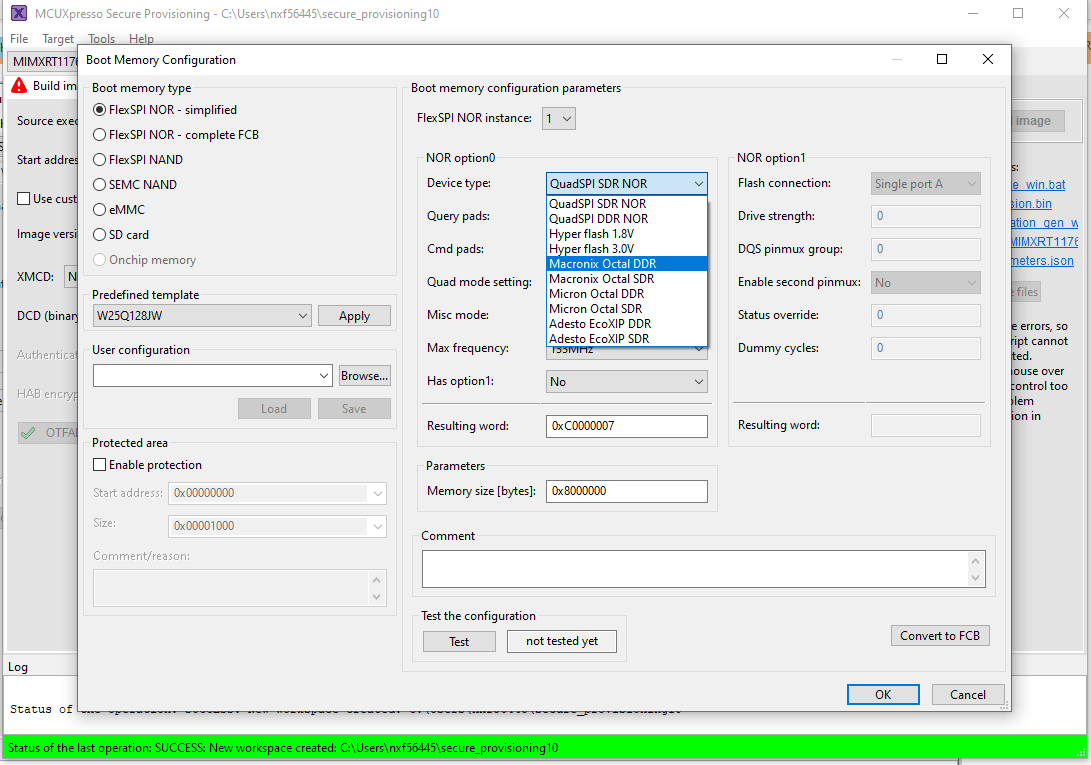
On the Boot Memory Configuration window change the "Device type" to
Macronix Octal DDRand press OK.
On the menu bar select Tools > Flash Programmer:
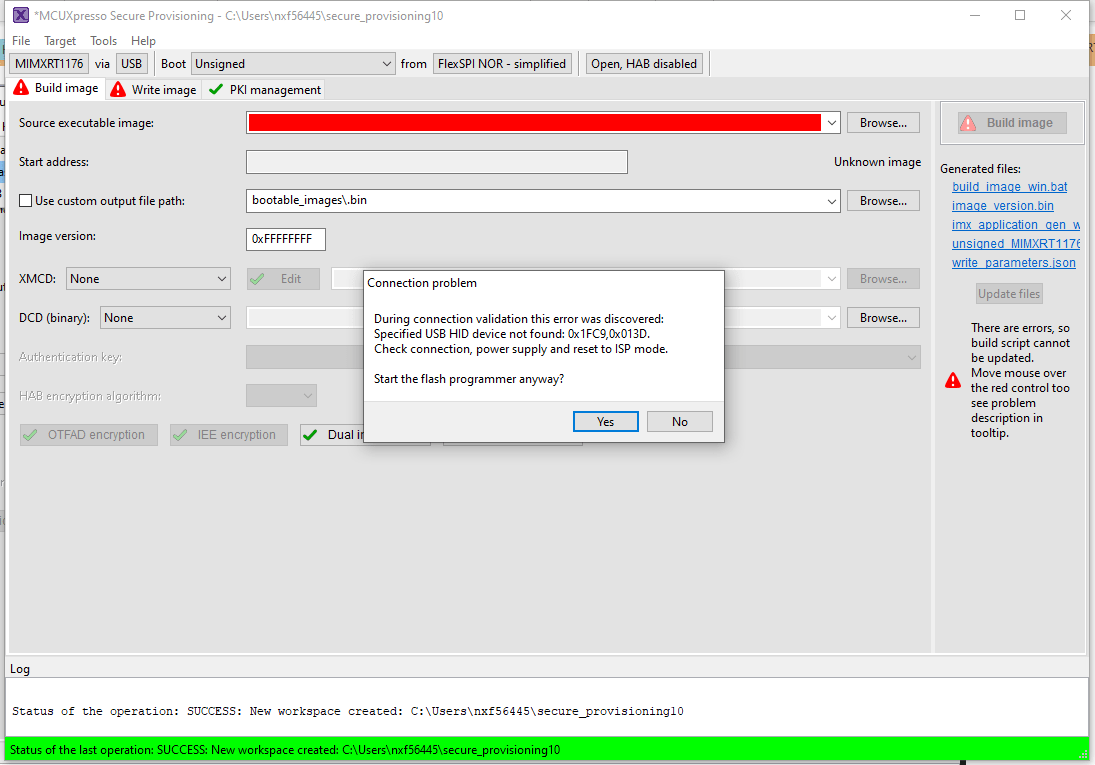
You should get this pop-up indicating the Pixhawk V6X-RT is not in the "ISP bootloader mode".
To get the Pixhawk V6X-RT into "ISP bootloader mode" there are 2 options:
Launch QGC connect the Pixhawk select Analayze Tools and then MAVLINK Console. On the console type
reboot -i. This will put the Pixhawk V6X-RT into "ISP bootloader mode"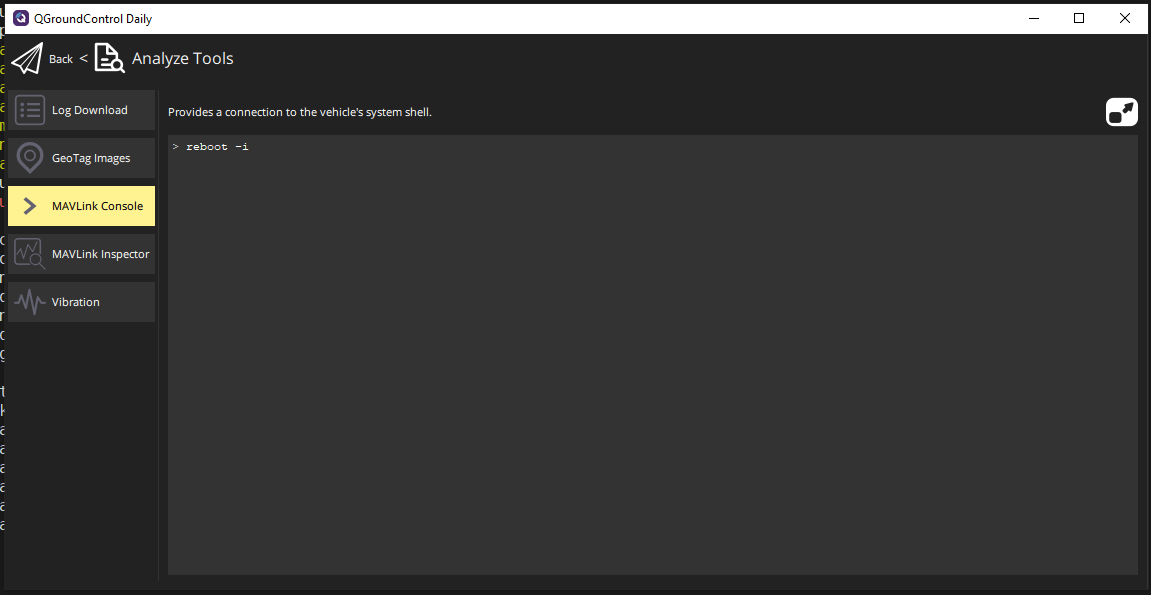
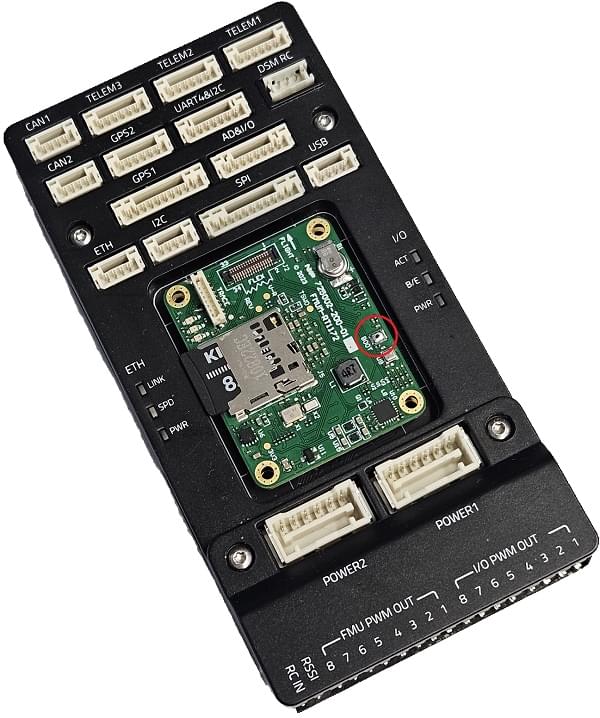
If the board is bricked and connecting to QGC is not possible you've open the FMUM module and press the BOOT button (circled in red in the picture below) while powering the board.
Press YES to launch the Flash Programmer Tool.
When the Flash Programming has started you get a popup to configure the target memory press Yes
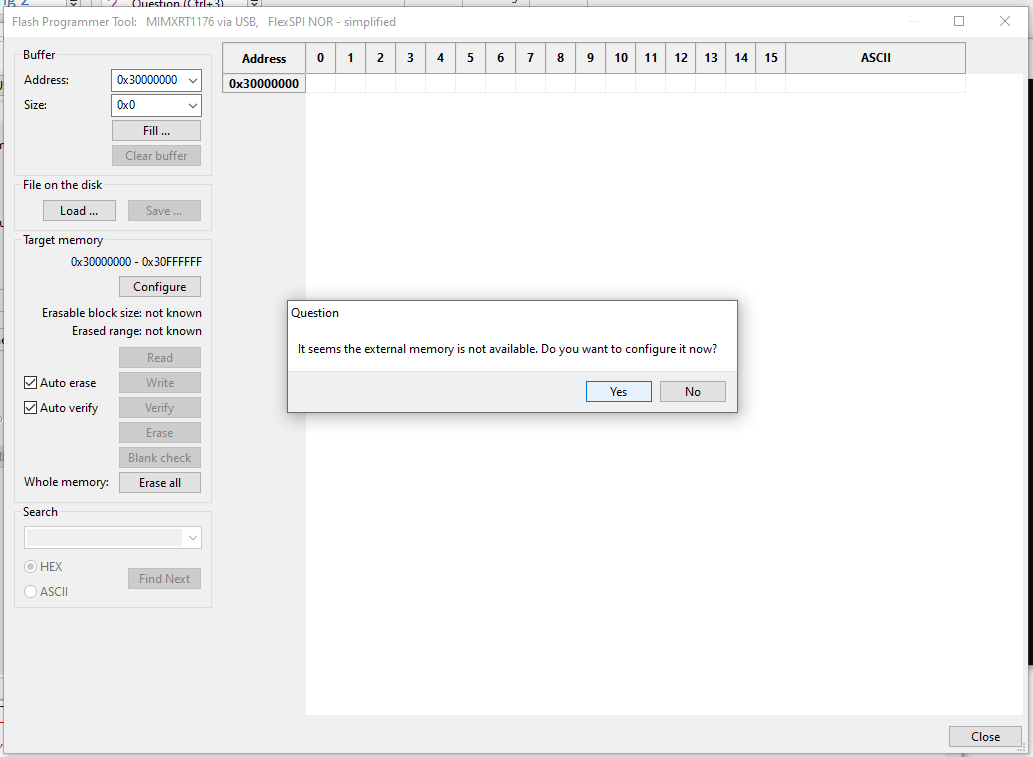
When the Target Memory configuration is succesful you can press the the Erase All button
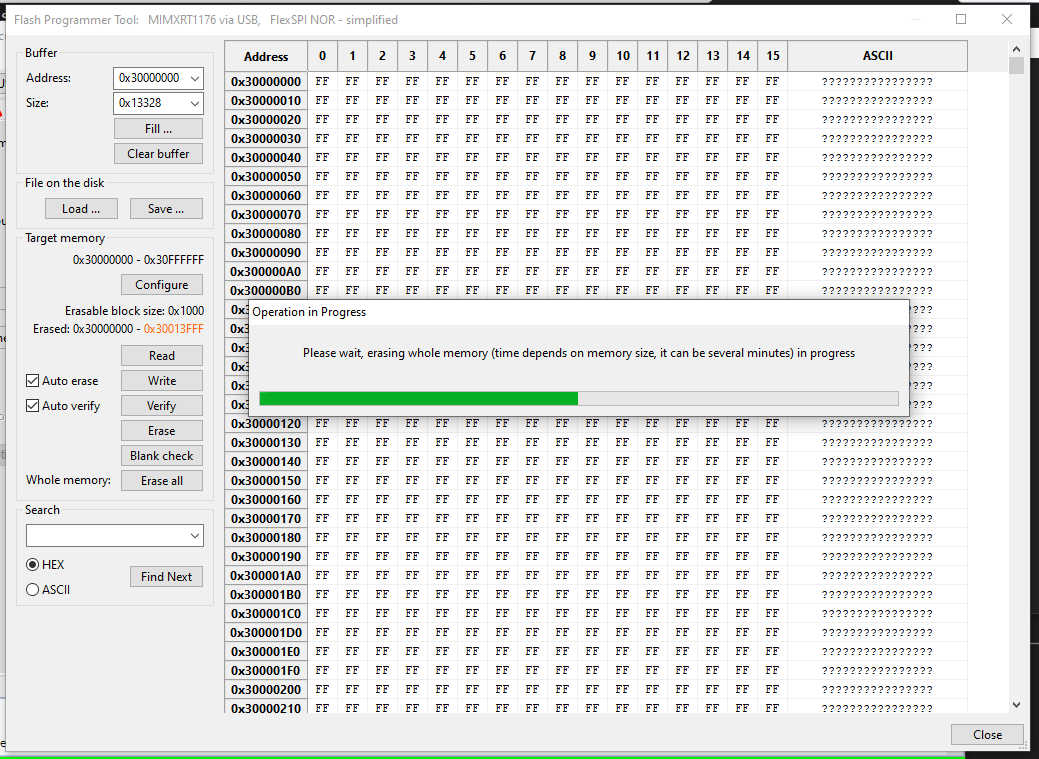
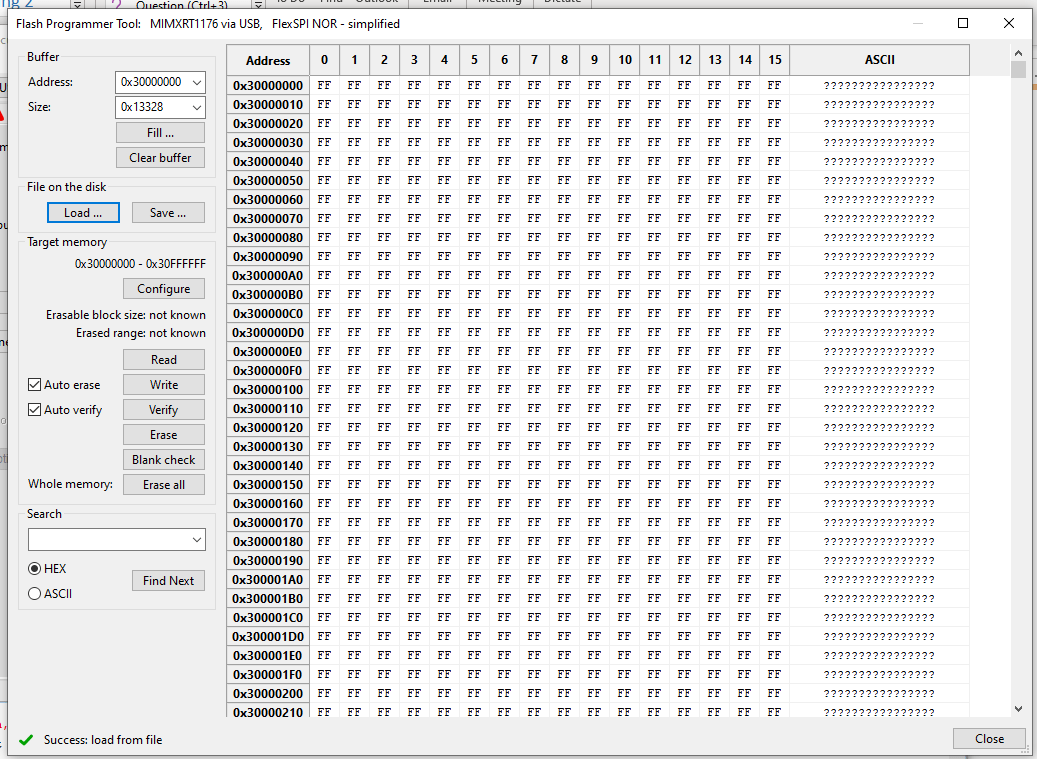
After erasing the flash press the Load ... button and then press the Browse button
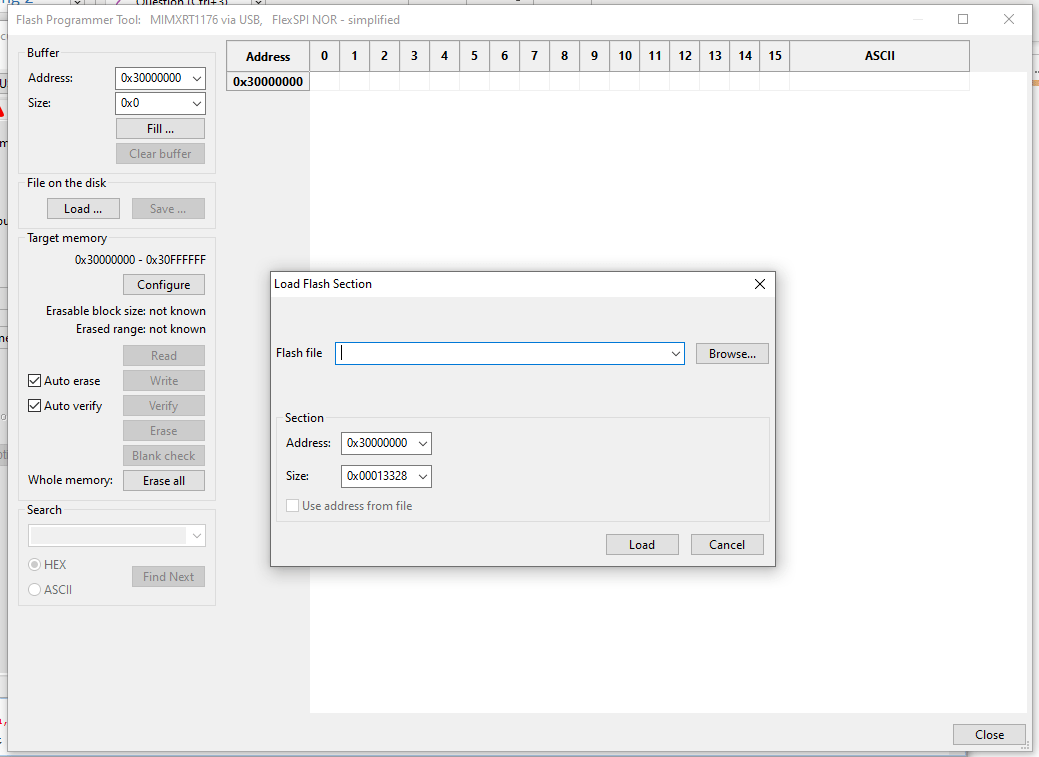
Locate the
px4_fmu-v6xrt_bootloader.binfile and press Open and then press on Load.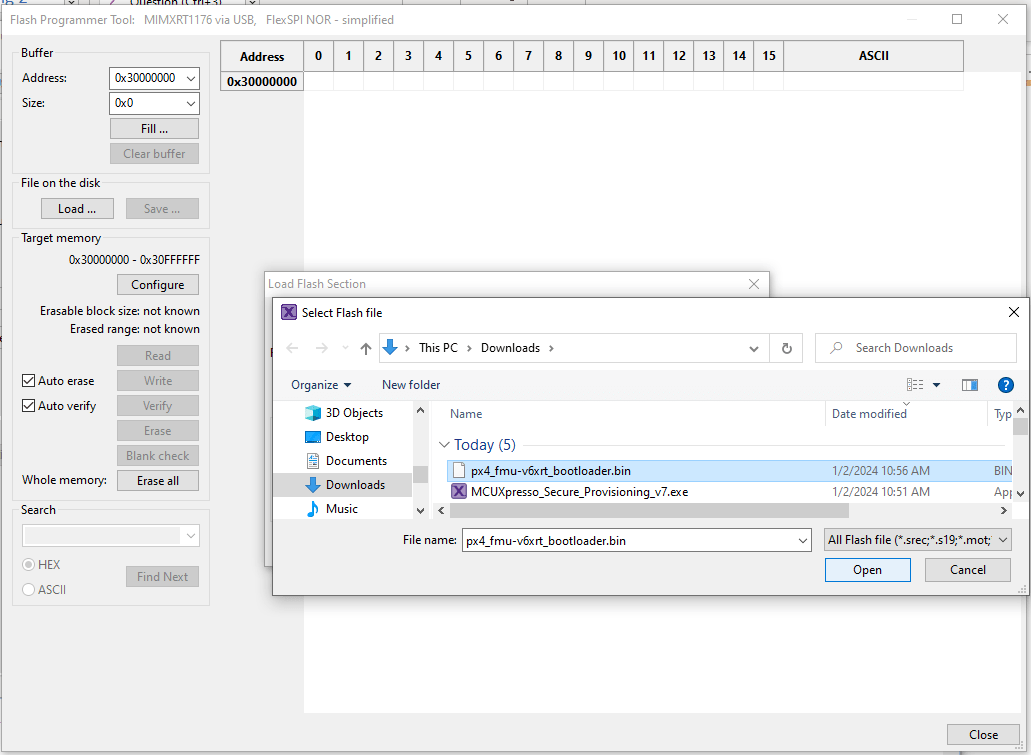
If the load is successful you should see the "Success: load from file" at the bottom right
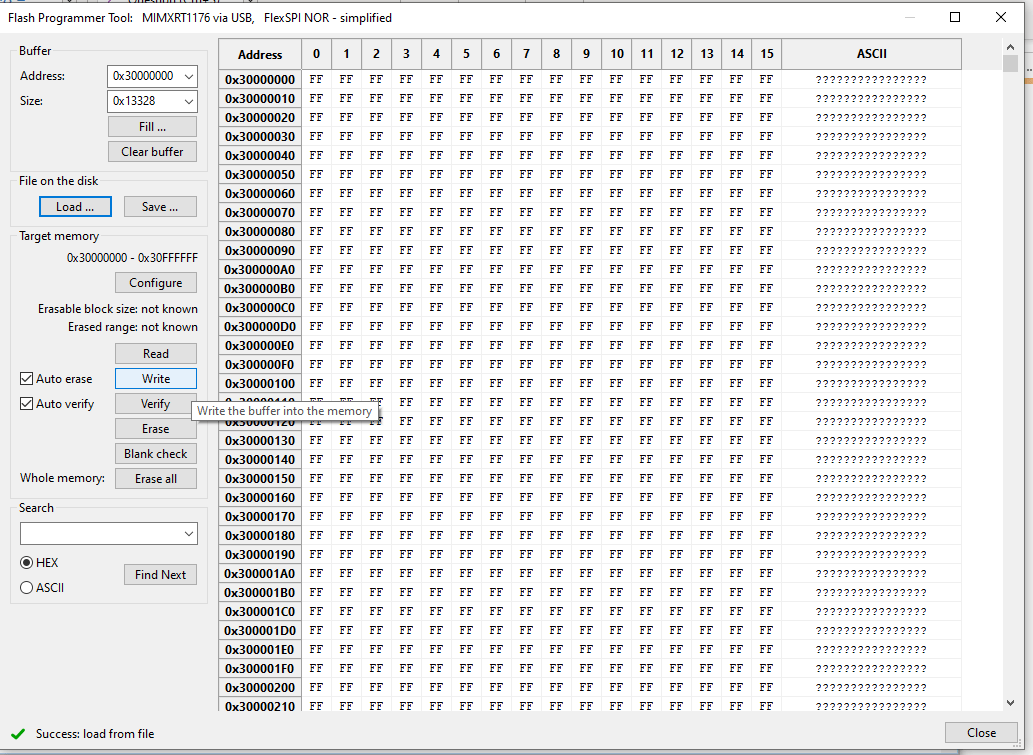
Press the Write button to flash the PX4 bootloader
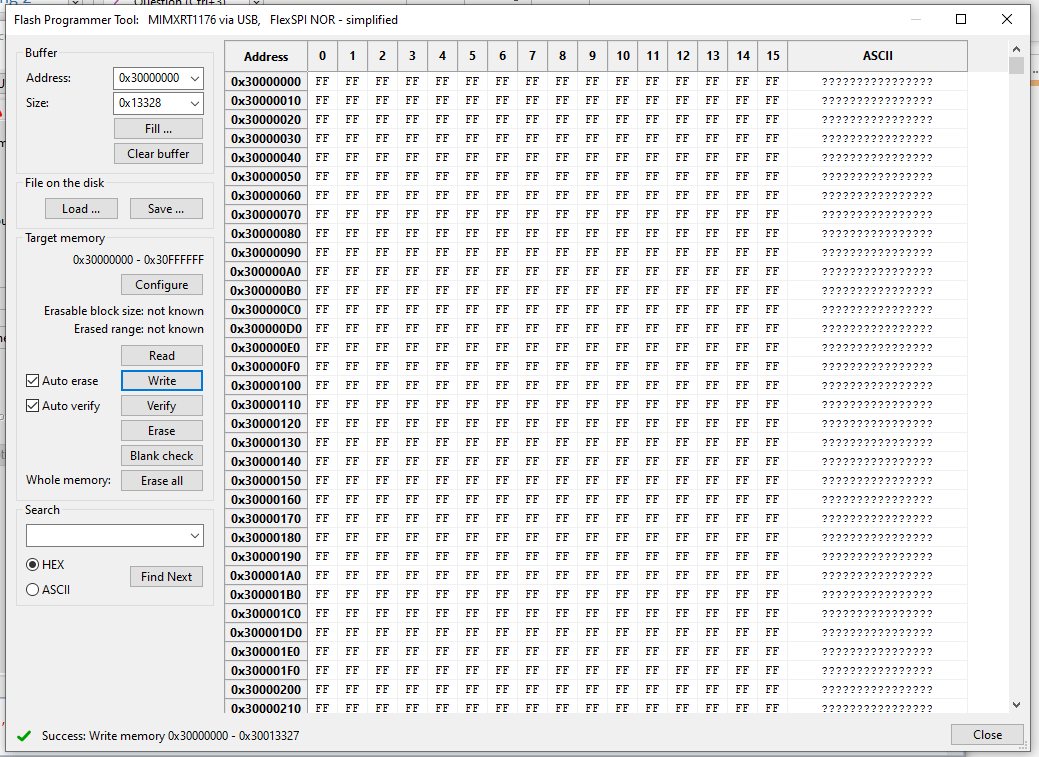
On success it should show "Success: Write memory 0x30000000 - 0x3XXXXXXX" Note: values might differ due to bootloader changes.
Now unplug the Pixhawk V6X-RT and re-power the board. After the bootloader has updated you can Load PX4 Firmware using QGroundControl.