Accelerometer Calibration
The accelerometer must be calibrated on first use or if the flight controller orientation is changed. Otherwise it should not need to recalibrated (except perhaps in winter, if the flight controller was not thermally calibrated in the factory).
INFO
Poor accelerometer calibration is generally caught by preflight checks and arming-denied messages (QGC warnings typically refer to "high accelerometer bias" and "consistency check failures").
TIP
This is similar to compass calibration except that you hold the vehicle still (rather than rotate it) in each orientation.
Performing the Calibration
QGroundControl will guide you to place and hold your vehicle in a number of orientations (you will be prompted when to move between positions).
The calibration steps are:
Start QGroundControl and connect the vehicle.
Select "Q" icon > Vehicle Setup > Sensors (sidebar) to open Sensor Setup.
Click the Accelerometer sensor button.
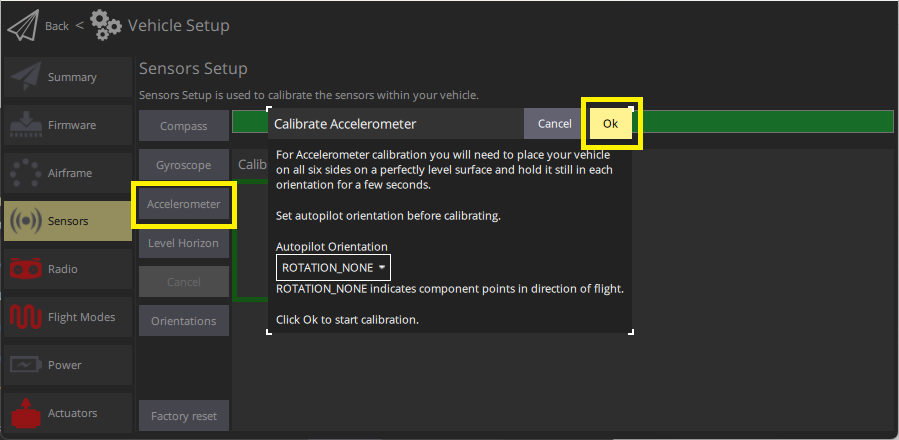
INFO
You should already have set the Autopilot Orientation. If not, you can also set it here.
Click OK to start the calibration.
Position the vehicle as guided by the images on the screen. Once prompted (the orientation-image turns yellow) hold the vehicle still. Once the calibration is complete for the current orientation the associated image on the screen will turn green.
INFO
The calibration uses a least squares 'fit' algorithm that doesn't require you to have "perfect" 90 degree orientations. Provided each axis is pointed mostly up and down at some time in the calibration sequence, and the vehicle is held stationary, the precise orientation doesn't matter.
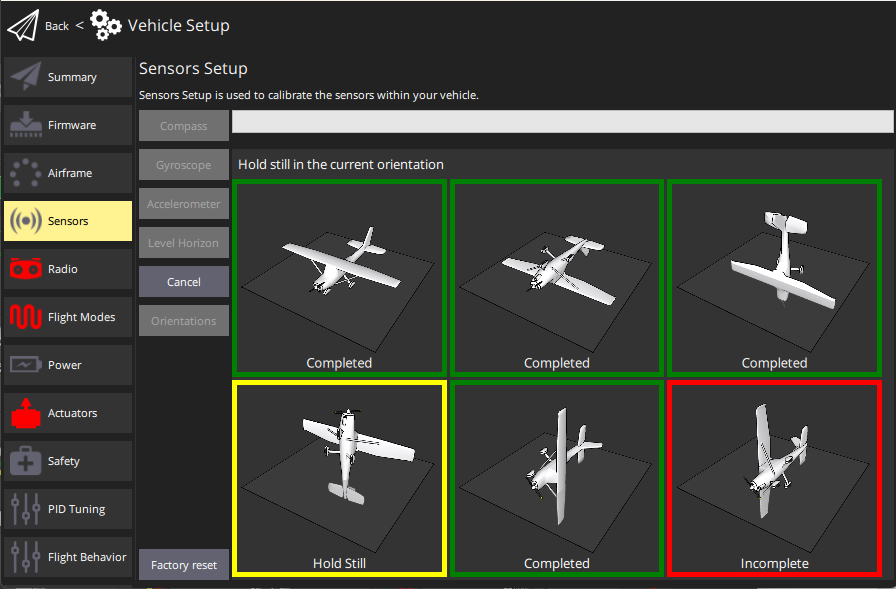
Repeat the calibration process for all vehicle orientations.
Once you've calibrated the vehicle in all the positions QGroundControl will display Calibration complete (all orientation images will be displayed in green and the progress bar will fill completely). You can then proceed to the next sensor.