Vehicle (Frame) Selection
After installing firmware you need to select a vehicle type and frame configuration. This applies appropriate initial parameter values for the selected frame, such as the vehicle type, number of motors, relative motor position, and so on. These can later be customised for your vehicle in Actuator Configuration & Testing.
TIP
Choose the frame that matches your vehicle brand and model if one exists, and otherwise select the closest "Generic" frame option matching your vehicle.
Set the Frame
To set the airframe:
Start QGroundControl and connect the vehicle.
Select "Q" icon > Vehicle Setup > Airframe (sidebar) to open Airframe Setup.
Select the broad vehicle group/type that matches your airframe and then use the dropdown within the group to choose the airframe that best matches your vehicle.
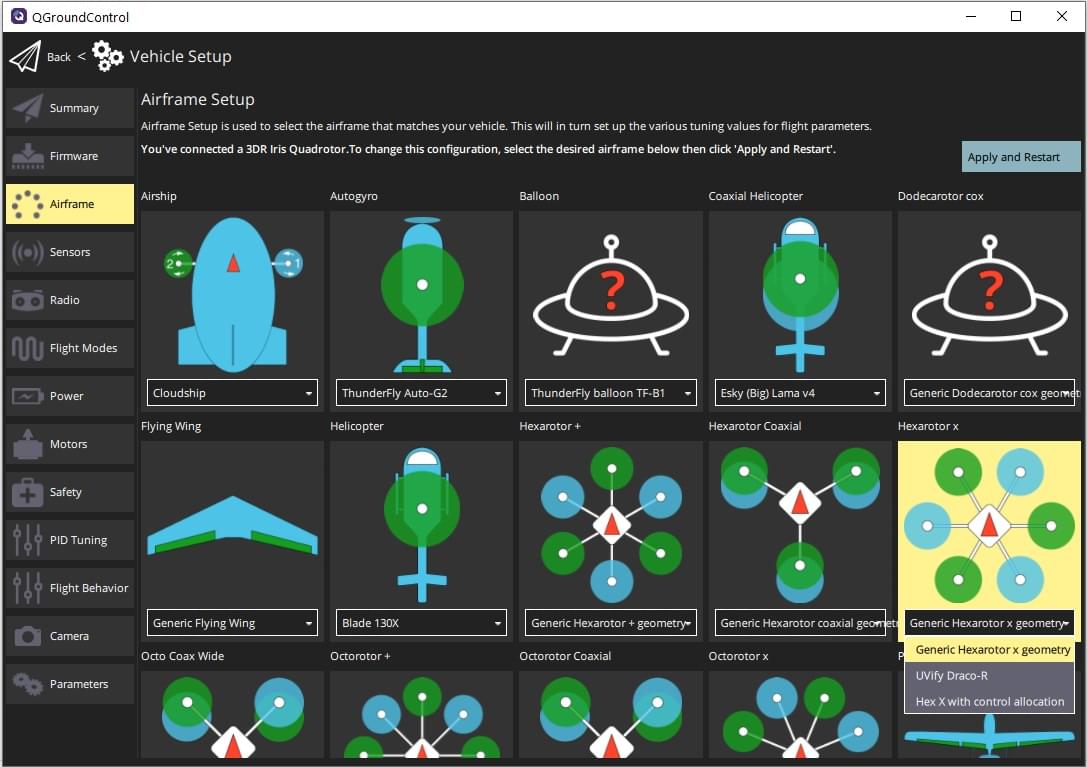
The example above shows Generic Hexarotor X geometry selected from the Hexarotor X group.
Click Apply and Restart. Click Apply in the following prompt to save the settings and restart the vehicle.

Next Steps
Actuator Configuration & Testing shows how to set the precise geometry of the vehicle motors and actuators, and their mapping to flight controller outputs. After mapping actuators to outputs you should perform ESC Calibration if using PWM or OneShot ESCs.