문서화에 기여
PX4 사용자 가이드에 대한 기여를 매우 환영합니다. 간단한 수정 작업 뿐만 아니라, 철자 및 문법, 새로운 주제 등에서 문서화 작업이 필요합니다.
이 항목에서는 변경 사항을 적용하고 테스트하는 방법을 설명합니다. 마지막에는 기본 스타일 가이드가 있습니다.
TIP
Note You will need a (free) GitHub account to contribute to the guides.
Github의 빠른 변경 사항
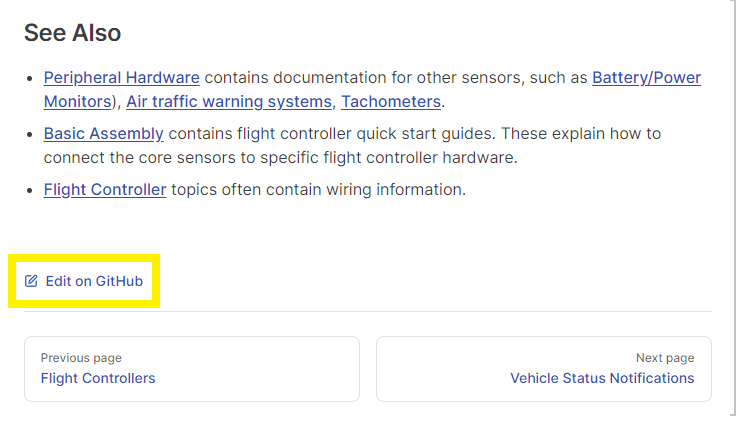
Simple changes to existing content can be made by clicking the Edit on GitHub link that appears at the bottom of every page (this opens the page on Github for editing).
To edit an existing English page:
- 해당 페이지를 엽니다.
- Click the Edit on GitHub link below the page content.
- 파일을 편집합니다.
- Below the Github page editor you'll be prompted to create a separate branch and then guided to submit a pull request.
문서 팀은 요청을 검토하고, 병합하거나 업데이트하기 위하여 귀하와 협력할 것입니다.
Note that you can only make changes to the English version directly in the source. Translations are handled in Crowdin.
Changes using Git
새 페이지 추가 또는 이미지 추가/수정을 포함하여 보다 실질적인 변경은 Github에서 수행(또는 적절하게 테스트)하는 것처럼 간단하지 않습니다.
For these kinds of changes we suggest using the same approach as for code:
- Use the git toolchain to get the PX4 source code onto your local computer.
- 필요한 문서를 수정합니다(추가, 변경, 삭제).
- Test that it builds properly using Vitepress.
- Create a branch for your changes and create a pull request (PR) to pull it back into the PX4-Autopilot repo.
다음에는 소스 코드를 가져오고, 로컬에서 빌드(테스트용)하고, 코드를 수정하는 방법을 설명합니다.
Get Documentation Source Code
Documentation sources are in the PX4-Autopilot repo, alongside all the other PX4 source code. The sources are markdown files located the /docs subdirectory. The English source files are in the /docs/en/ subdirectory and can be edited directly. Translation sources are in language specific subdirectories, such as ko for korean and zh for Chinese: these are edited via the Crowdin tool, and should not be edited directly.
TIP
If you already have a clone of the PX4-Autopilot you can ignore this section.
라이브러리 소스를 로컬 컴퓨터로 가져오려면 git 명령어를 사용하여야 합니다. 아래 지침은 git을 가져와 로컬 컴퓨터에서 사용하는 방법을 설명합니다.
Download git for your computer from https://git-scm.com/downloads/
Sign up for Github if you haven't already
Create a copy (Fork) of the PX4-Autopilot repo on Github (instructions here).
복사된 저장소를 로컬 컴퓨터에 복제합니다.
shcd ~/wherever/ git clone https://github.com/<your git name>/PX4-Autopilot.gitFor example, to clone PX4 source fork for a user with Github account "john_citizen":
shgit clone https://github.com/john_citizen/PX4-Autopilot.git로컬 저장소로 이동합니다.
shcd ~/wherever/PX4-AutopilotAdd a remote called "upstream" to point to the "official" PX4 version of the library:
shgit remote add upstream https://github.com/PX4/PX4-AutopilotTIP
A "remote" is a handle to a particular repository. The remote named origin is created by default when you clone the repository, and points to your fork of the guide. Above you create a new remote upstream that points to the PX4 project version of the documents.
:::
Make/Push Documentation Changes
Within the repository you created above:
Bring your copy of the repository
mainbranch up to date:shgit checkout main git fetch upstream main git pull upstream mainCreate a new branch for your changes:
shgit checkout -b <your_feature_branch_name>This creates a local branch on your computer named
your_feature_branch_name.필요에 따라 문서를 변경합니다(다음 섹션에서 이에 대한 일반 지침).
변경 사항에 완료되면 "커밋"을 사용하여, 로컬 브랜치에 추가합니다.
shgit add <file name> git commit -m "<your commit message>"For a good commit message, please refer to the Source Code Management section.
로컬 분기(추가된 커밋 포함)를 Github의 분기된 저장소에 푸시합니다.
shgit push origin your_feature_branch_nameGo to your forked repository on Github in a web browser, e.g.:
https://github.com/<your git name>/PX4-Autopilot.git. 새 분기가 분기된 저장소로 푸시되었다는 메시지가 표시되어야 합니다.풀 요청(PR) 생성:
- On the right hand side of the "new branch message" (see one step before), you should see a green button saying "Compare & Create Pull Request". 클릭합니다.
- 풀 요청 템플릿이 생성됩니다. 그것은 당신의 커밋을 나열하고 의미 있는 제목(하나의 커밋 PR의 경우 일반적으로 커밋 메시지)과 메시지(어떤 이유에서 수행했는지 설명)를 추가할 수 있습니다(반드시). Check other pull requests for comparison).
- Add the "Documentation" label.
완료하였습니다.
PX4 사용자 가이드 유지 관리자는 이제 귀하의 기여를 검투한 후에, 통합 여부를 결정합니다. 때때로 변경 사항에 대한 질문을 확인하십시오.
로컬에서 라이브러리 구축
로컬에서 라이브러리를 빌드하여, 변경 사항이 제대로 반영되었는 지를 테스트합니다.
Install the Vitepress prerequisites:
Navigate to your local repository and the
/docssubdirectory:shcd ~/wherever/PX4-Autopilot/docs종속성(Vuepress 포함)들을 설치합니다.
shyarn install(Optional) Build the docs for PX4 metadata if your source contains changes to parameter or module docs that you want to check.
Preview and serve the library:
shyarn docs:dev- Once the development/preview server has built the library (less than a minute for the first time) it will show you the URL you can preview the site on. This will be something like:
http://localhost:5173/px4_user_guide/. - Stop serving using CTRL+C in the terminal prompt.
- Once the development/preview server has built the library (less than a minute for the first time) it will show you the URL you can preview the site on. This will be something like:
Open previewed pages in your local editor:
First specify a local text editor file using the
EDITORenvironment variable, before callingyarn startto preview the library. For example, you can enable VSCode as your default editor by entering:Windows:
shset EDITOR=codeLinux:
shexport EDITOR=code
The Open in your editor link at the bottom of each page will then open the current page in the editor (this replaces the Open in GitHub link).
다음을 사용하여 라이브러리를 빌드합니다.
sh# Ubuntu yarn docs:build # Windows yarn docs:buildwin
TIP
Use yarn start to preview changes as you make them (documents are updated and served very quickly). Before submitting a PR you should also build it using yarn docs:build, as this can highlight issues that are not visible when using yarn start.
Building PX4 docs metadata
PX4 Metadata is not automatically updated in the local docs tree when you make changes to source. This can result in broken links showing up during testing if you link to new parameters, modules, airframes, or other content that is generated from source.
You can generate the metadata and copy it into the tree on Ubuntu (only) using the convenient yarn command:
# Ubuntu
yarn build_docs_metadata_ubuntu
INFO
The generated metadata docs should not be included in PRs as they will complicate reveiwing (metadata is automatically generated when a PR merges in main). It is not a problem if you do add such metadata, as it will be swamped on merge.
Check for broken links
You can use the following command to check for broken links in the whole document:
# Ubuntu
yarn linkcheck
소스 코드 구조
The guide uses the Vitepress toolchain.
개요:
페이지는 마크다운을 사용하여 별도의 파일에 작성됩니다.
- 문법은 Github 위키에서 사용하는 것과 매우 유사합니다.
- Vitepress also supports some markdown extensions. We try and avoid using these, except for tips, warning, etc.. This might be revisited - there are some interesting options provided!
This is a multilingual book:
- 각 언어의 페이지는 관련 언어 코드의 이름이 지정된 폴더에 저장됩니다(예: 중국어의 경우 "zh", 한국어의 경우 "ko").
- Only edit the ENGLISH (
/en) version of files. We use Crowdin to manage the translations.
All pages must be in an appropriately named sub-folder of
/en(e.g. this page is in folderen/contribute/).- 이렇게 하면 다른 페이지와 이미지가 항상 동일한 상대 수준이므로 연결이 더 용이해집니다.
The structure of the book is defined in
SUMMARY.md.If you add a new page to the guide you must also add an entry to this file!
TIP
This is not "standard vitepress" way to define the sidebar (the summary file is imported by .vitepress/get_sidebar.js).
:::
Images must be stored in a sub folder of
/assets. 이것은 콘텐츠 폴더에서 두 개의 폴더 아래에 있으므로, 이미지를 추가하면 다음과 같이 참조하게 됩니다.txtA file named package.json defines any dependencies of the build.
웹 후크는 파일이 이 저장소의 마스터 분기에 병합되어, 책이 다시 빌드될 때마다 추적하는 데 사용됩니다.
새 페이지 추가
When you add a new page you must also add it to en/SUMMARY.md!
스타일 가이드
파일/파일명
- Put new markdown files in an appropriate sub-folder of
/en/, such as/en/contribute/. 폴더를 중첩하지 마십시오. - Put new image files in an appropriate nested sub-folder of
/assets/. Deeper nesting is allowed/encouraged. - Use descriptive names for folders and files. In particular, image filenames should describe what they contain (don't name as "image1.png")
- Use lower case filenames and separate words using underscores (
_).
- Put new markdown files in an appropriate sub-folder of
이미지
- 이미지는 최대한 가장 작은 크기와 가장 낮은 해상도를 사용합니다(이렇게 하면 대역폭이 좋지 않은 사용자의 다운로드 비용이 줄어듭니다).
- New images should be created in a sub-folder of
/assets/(so they can be shared between translations). - SVG files are preferred for diagrams. PNG files are preferred over JPG for screenshots.
내용
- Use "style" (bold, emphasis, etc.) consistently and sparingly (as little as possible).
- Bold for button presses and menu definitions.
- Emphasis for tool names such as QGroundControl or prettier.
codefor file paths, and code, parameter names that aren't linked, using tools in a command line, such asprettier.
- Headings and page titles should use "First Letter Capitalisation".
- The page title should be a first level heading (
#). All other headings should be h2 (##) or lower. - 제목에는 스타일을 추가하지 마십시오.
- Don't translate the text indicating the name of an
info,tiporwarningdeclaration (e.g.::: tip) as this precise text is required to render the aside properly. - Break lines on sentences by preference. Don't break lines based on some arbitrary line length.
- Format using prettier (VSCode is a has extensions can be used for this).
- Use "style" (bold, emphasis, etc.) consistently and sparingly (as little as possible).
Videos:
- Youtube videos can be added using the format
<lite-youtube videoid="<youtube-video-id>" title="your title"/>(supported via the https://www.npmjs.com/package/lite-youtube-embed custom element, which has other parameters you can pass).- Use instructional videos sparingly as they date badly, and are hard to maintain.
- Cool videos of airframes in flight are always welcome.
- Youtube videos can be added using the format
어디에서 변경 사항을 추가합니까?
Add new files in folders that cover similar topics. Then reference them in the sidebar (/en/SUMMARY.md) in line with the existing structure!
번역
For information about translation see: Translation.
라이센스
All PX4/Dronecode documentation is free to use and modify under terms of the permissive CC BY 4.0 license.