Holybro QAV250 + Pixhawk 4 Mini Build (Discontinued)
INFO
The Holybro Pixhawk 4 Mini QAV250 Kit is no longer available.
The instructions have been left here because very similar kits based on the Pix32 v6 are available here. These instructions can therefore still be followed (and might be updated to Pix32 v6).
The complete kits include a carbon-fibre QAV250 racing frame, flight controller and almost all other components needed (except battery and receiver). FPV 지원 유무에 따라 키트가 조금씩 달라집니다. This topic provides full instructions for building the kit and configuring PX4 using QGroundControl.
주요 정보
- Frame: Holybro QAV250
- Flight controller: Pixhawk 4 Mini
- Assembly time (approx.): 3.5 hours (2 for frame, 1.5 autopilot installation/configuration)
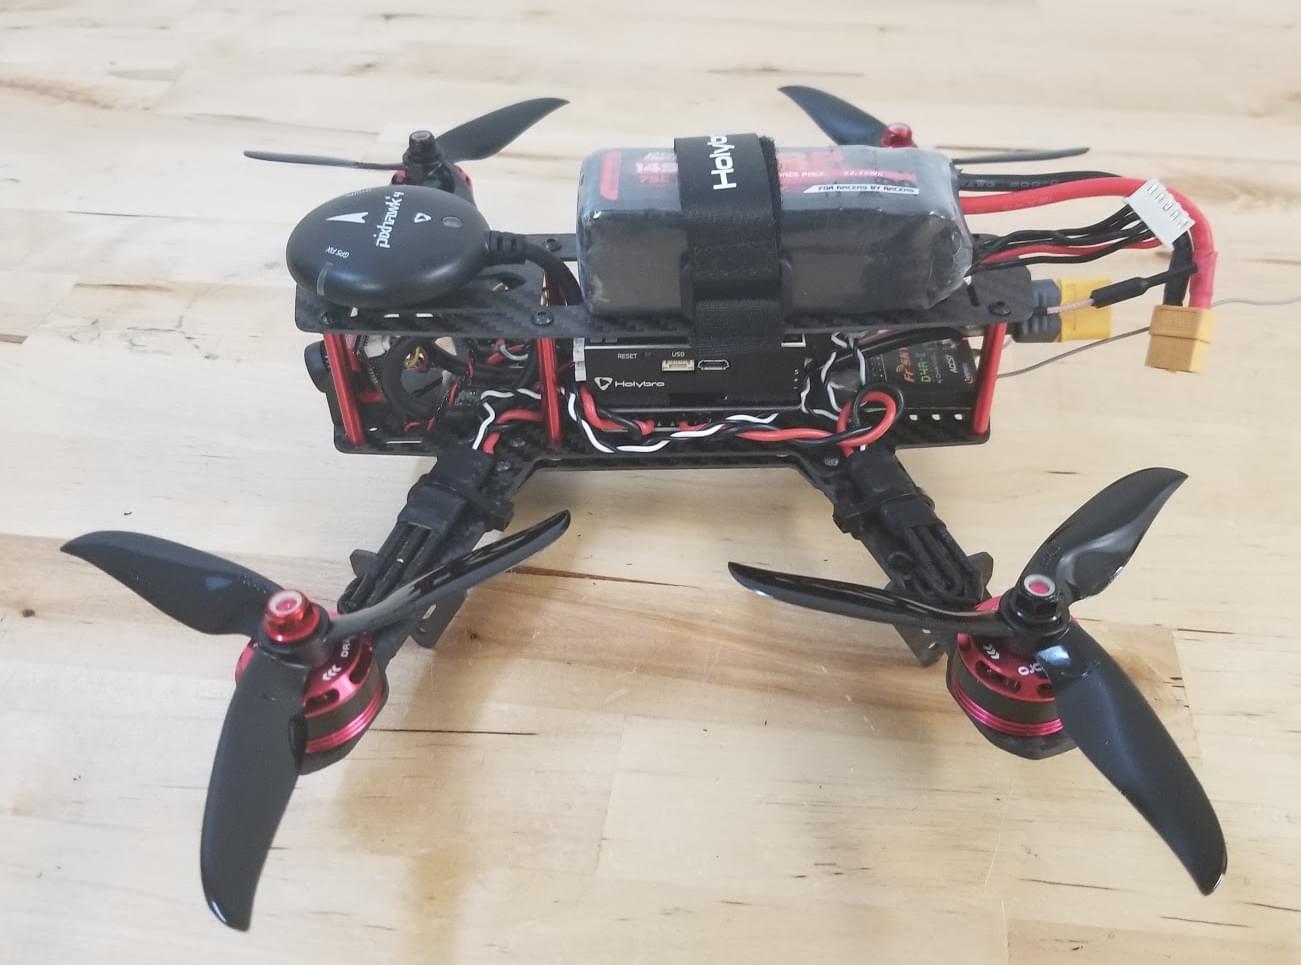
퀵 스타트 가이드
Pixhawk 4 Mini QAV250 Kit Quickstart Guide
부품 명세서
The Holybro QAV250 Kit kits includes almost all required components:
- Holybro Transceiver Telemetry Radio V3
- 전원 모듈 holybro
- 조립된 ESC 전원 관리 보드
- 모터- DR2205 KV2300
- 5 인치 플라스틱 프로펠러
- 탄소 섬유 250 기체 (하드웨어 포함)
- Foxer 카메라
- Vtx 5.8ghz
또한, 배터리와 수신기 및 수신기와 호환되는 송신기가 필요합니다. 이 조립 예제에서는 다음의 부품들을 사용합니다.
- Receiver: FrSSKY D4R-II
- Battery: 4S 1300 mAh
하드웨어
프레임 및 자동 조종 장치 설치를 위한 하드웨어들 입니다.
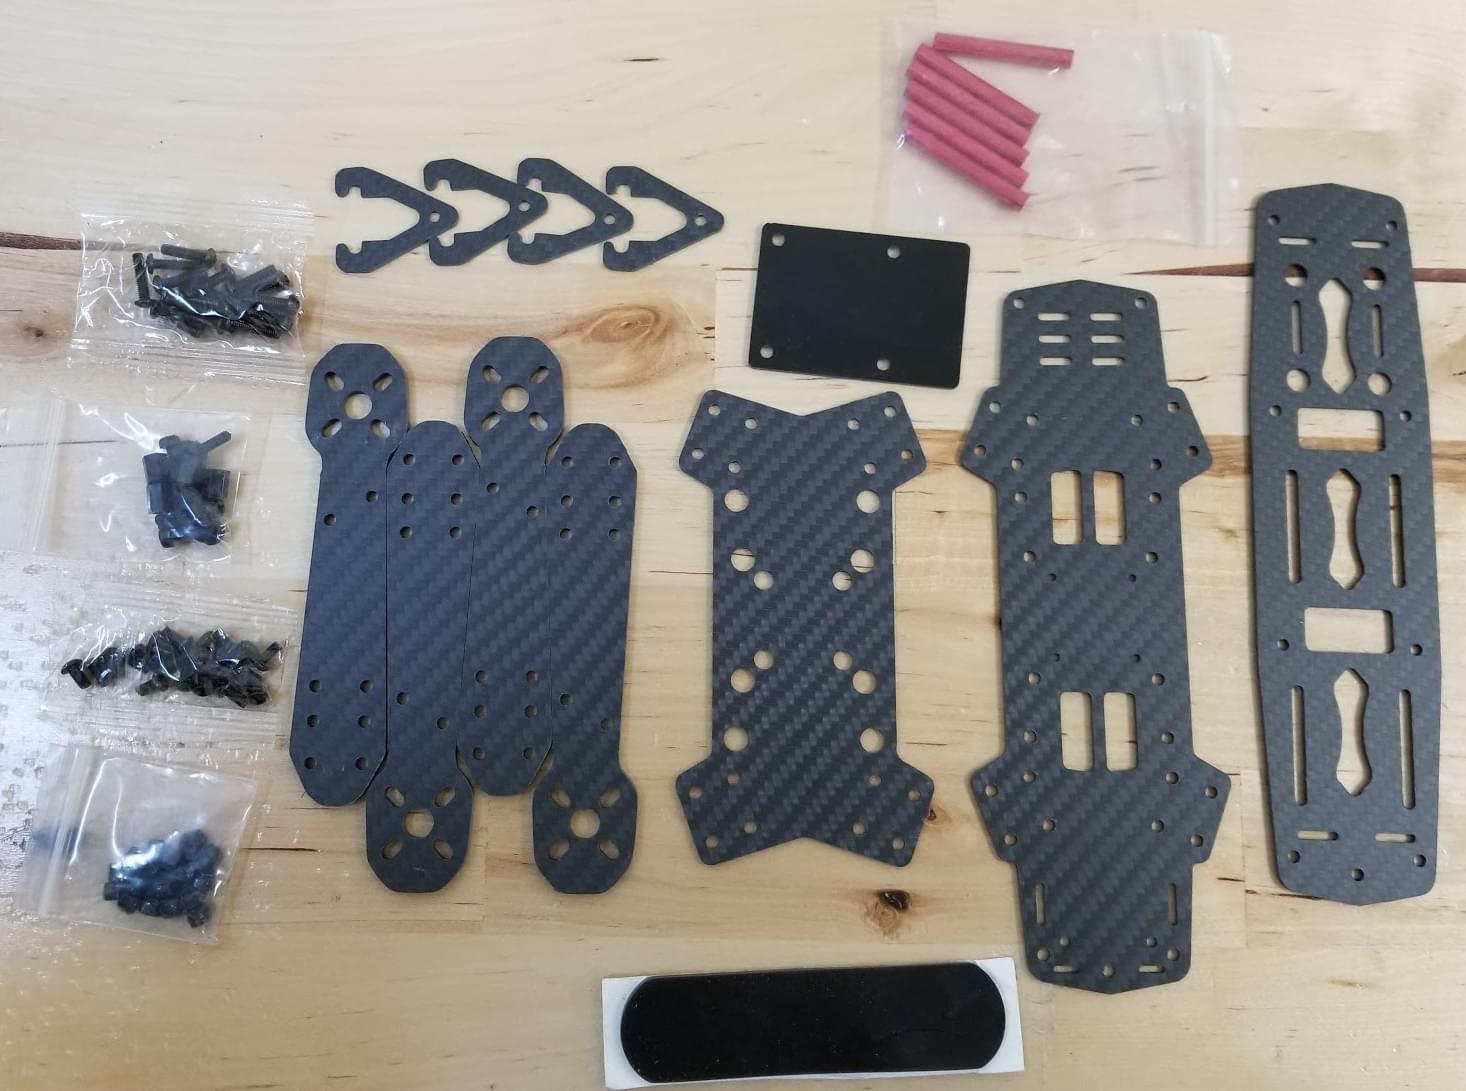
프레임 QAV250
| 설명 | 수량 |
|---|---|
| 유니 바디 프레임 플레이트 | 1 |
| 비행 컨트롤러 커버 플레이트 | 1 |
| PDB | 1 |
| 카메라 플레이트 | 1 |
| 35mm 스탠드 오프 | 6 |
| 비닐 나사 및 너트 | 4 |
| 15mm 강철 나사 | 8 |
| 강철 너트 | 8 |
| 7mm 강철 나사 | 12 |
| 벨크로 배터리 스트랩 | 1 |
| 배터리용 폼 | 1 |
| 착륙 패드 | 4 |
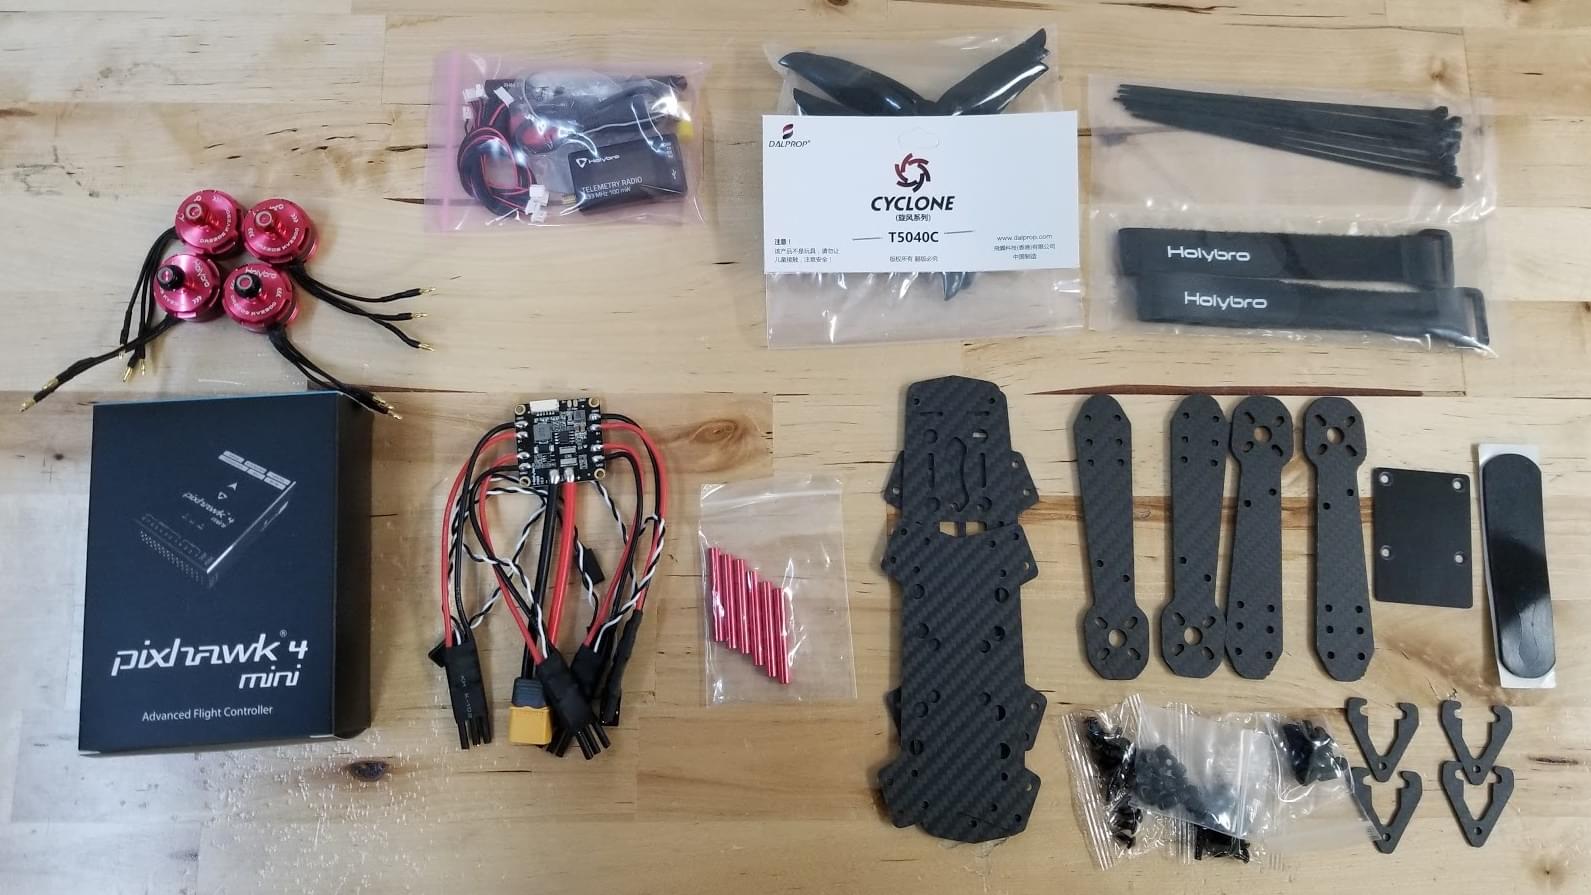
전자부품
| 설명 | 수량 |
|---|---|
| 모터- DR2205 KV2300 | 4 |
| 조립된 ESC 전원 관리 보드 | 4 |
| Holybro 전원 모듈 | 1 |
| Fr-sky D4R-II 수신기 | 1 |
| Pixhawk 4 mini | 1 |
| Holybro GPS Neo-M8N | 1 |
| Holybro Transceiver Telemetry Radio V3 | 1 |
| 배터리 lumenier 1300 mAh 4S 14.8V | 1 |
| Vtx 5.8ghz | 1 |
| FPV 카메라 (전체 키트 전용) | 1 |
아래의 이미지는 프레임과 전자 부품들을 나타냅니다.
조립
Estimated time to assemble frame is 2 hours and 1.5 hours installing the autopilot and configuring the airframe in QGroundControl.
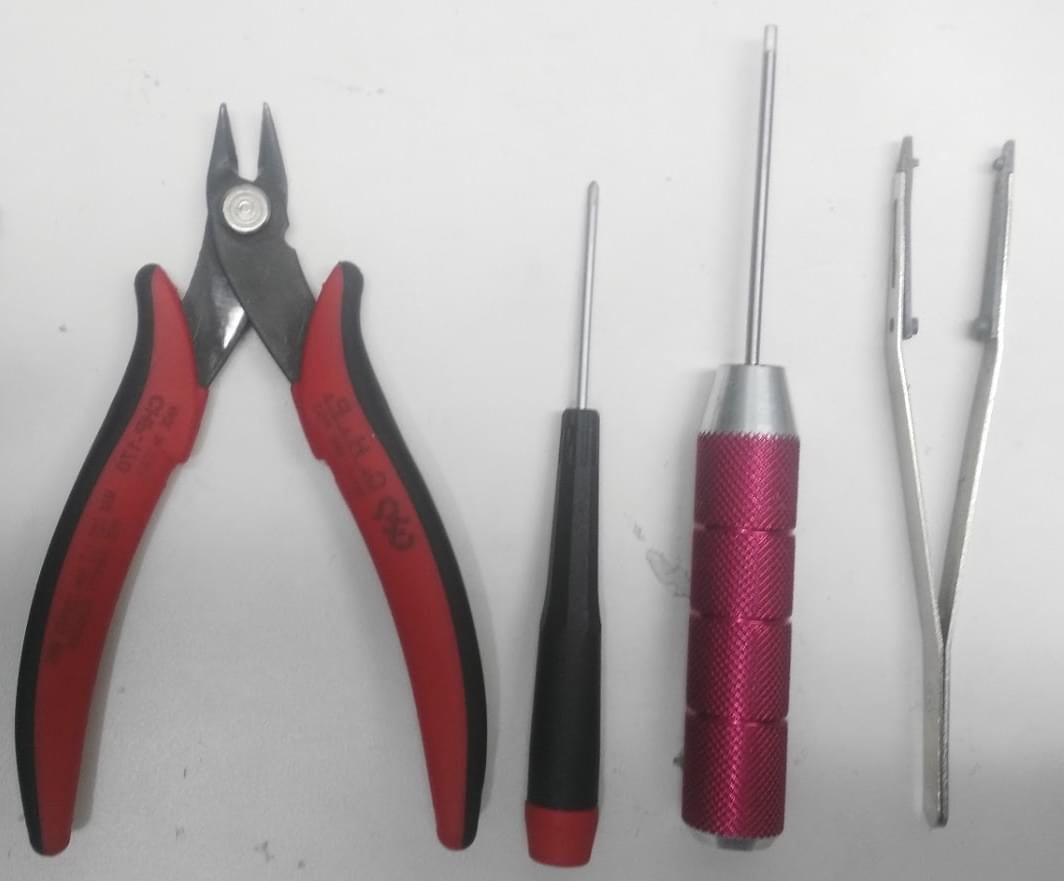
필요한 공구들
조립시에 필요한 공구들입니다.
- 2.0mm 육각 스크류드라이버
- 3mm Phillips 스크류드라이버
- 전선 커터
- 정밀 트위저
프레임 조립
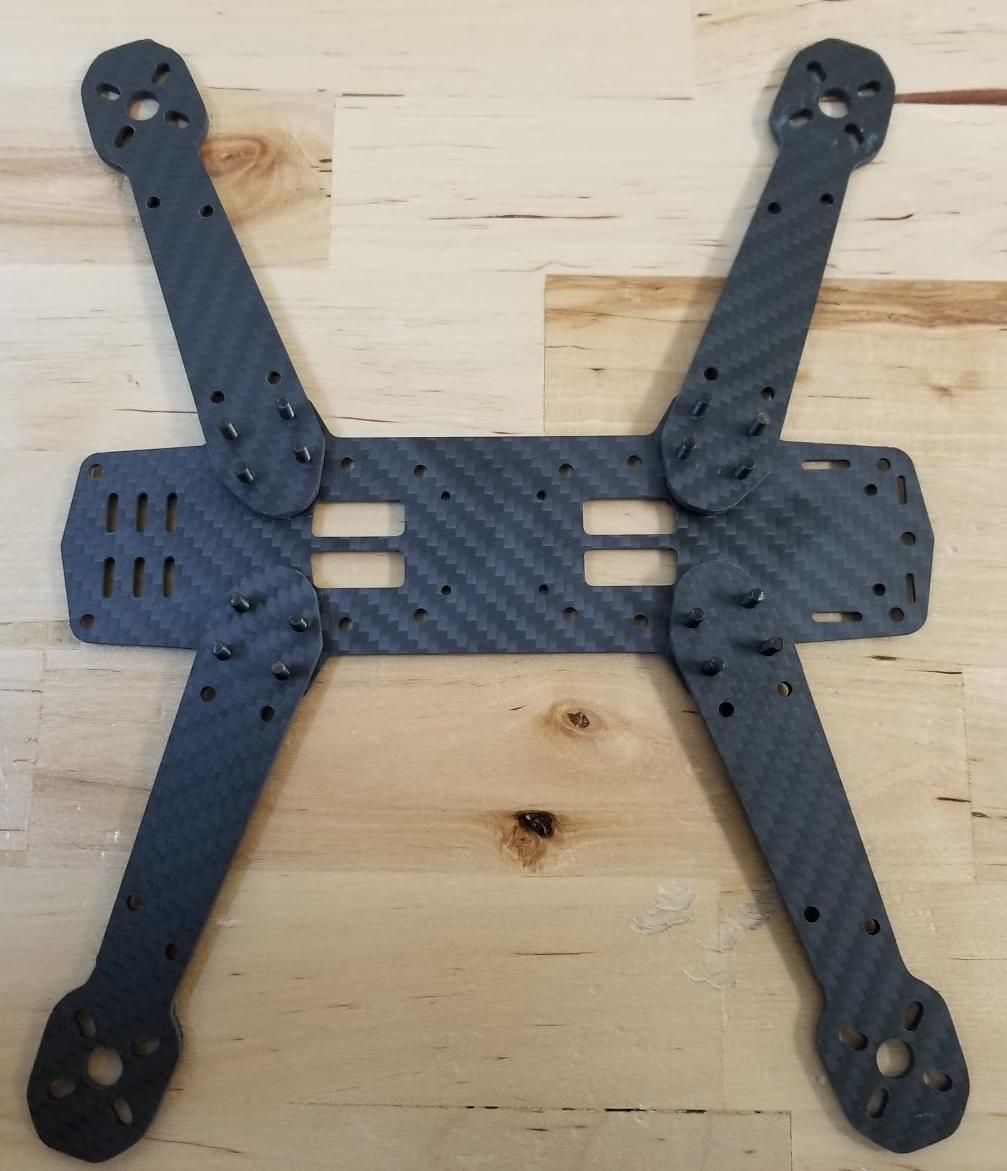
그림과 같이 15mm 나사를 사용하여 암을 버튼 플레이트에 부착합니다.
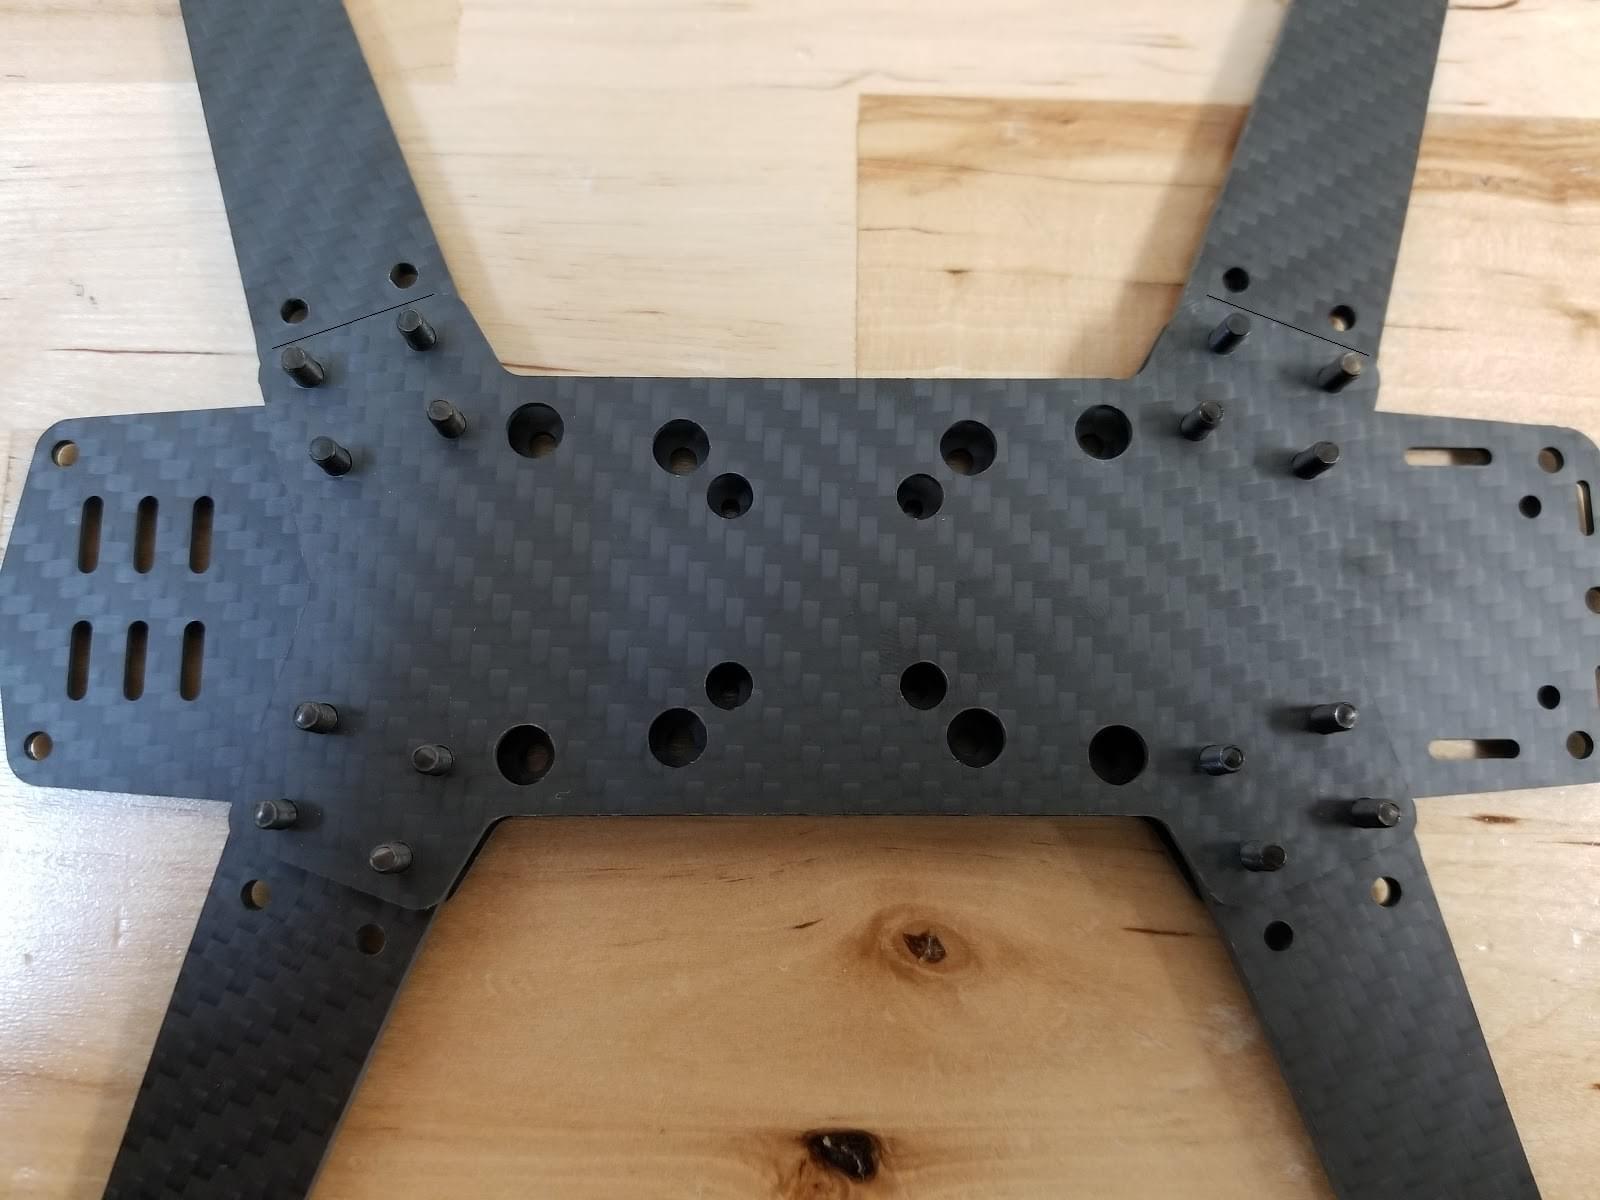
짧은 판을 팔 위에 올려 놓습니다.
15mm 나사에 너트를 끼웁니다 (다음 단계 참조).
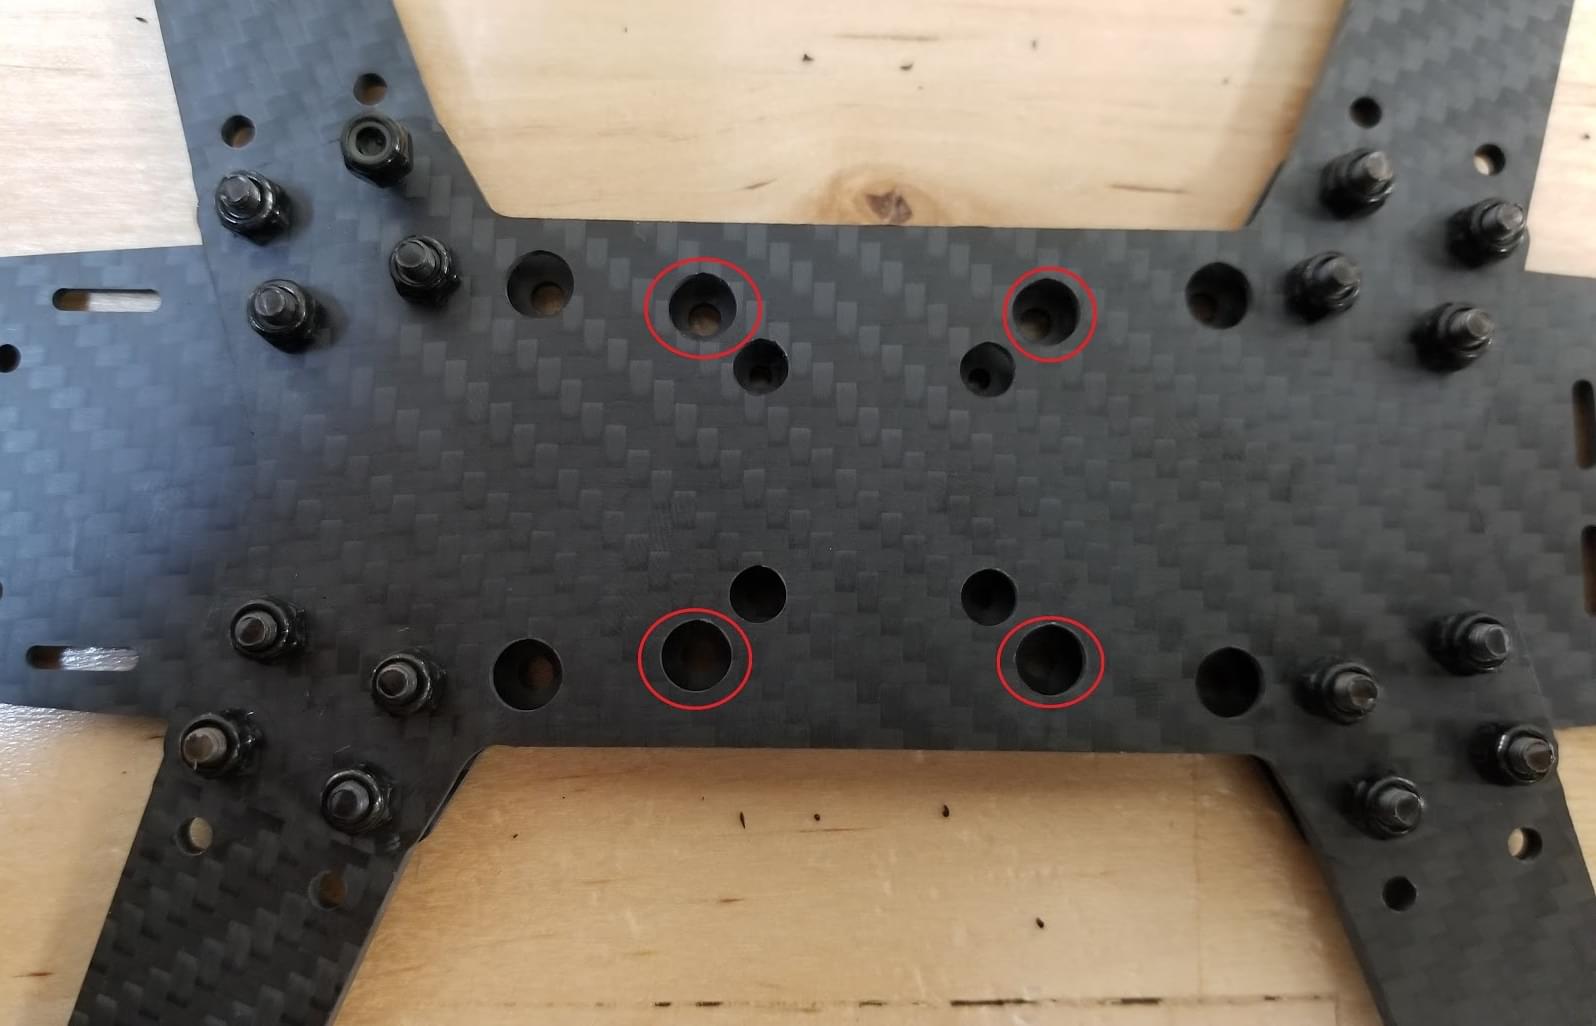
Insert the plastic screws into the indicated holes (note that this part of the frame faces down when the vehicle is complete).
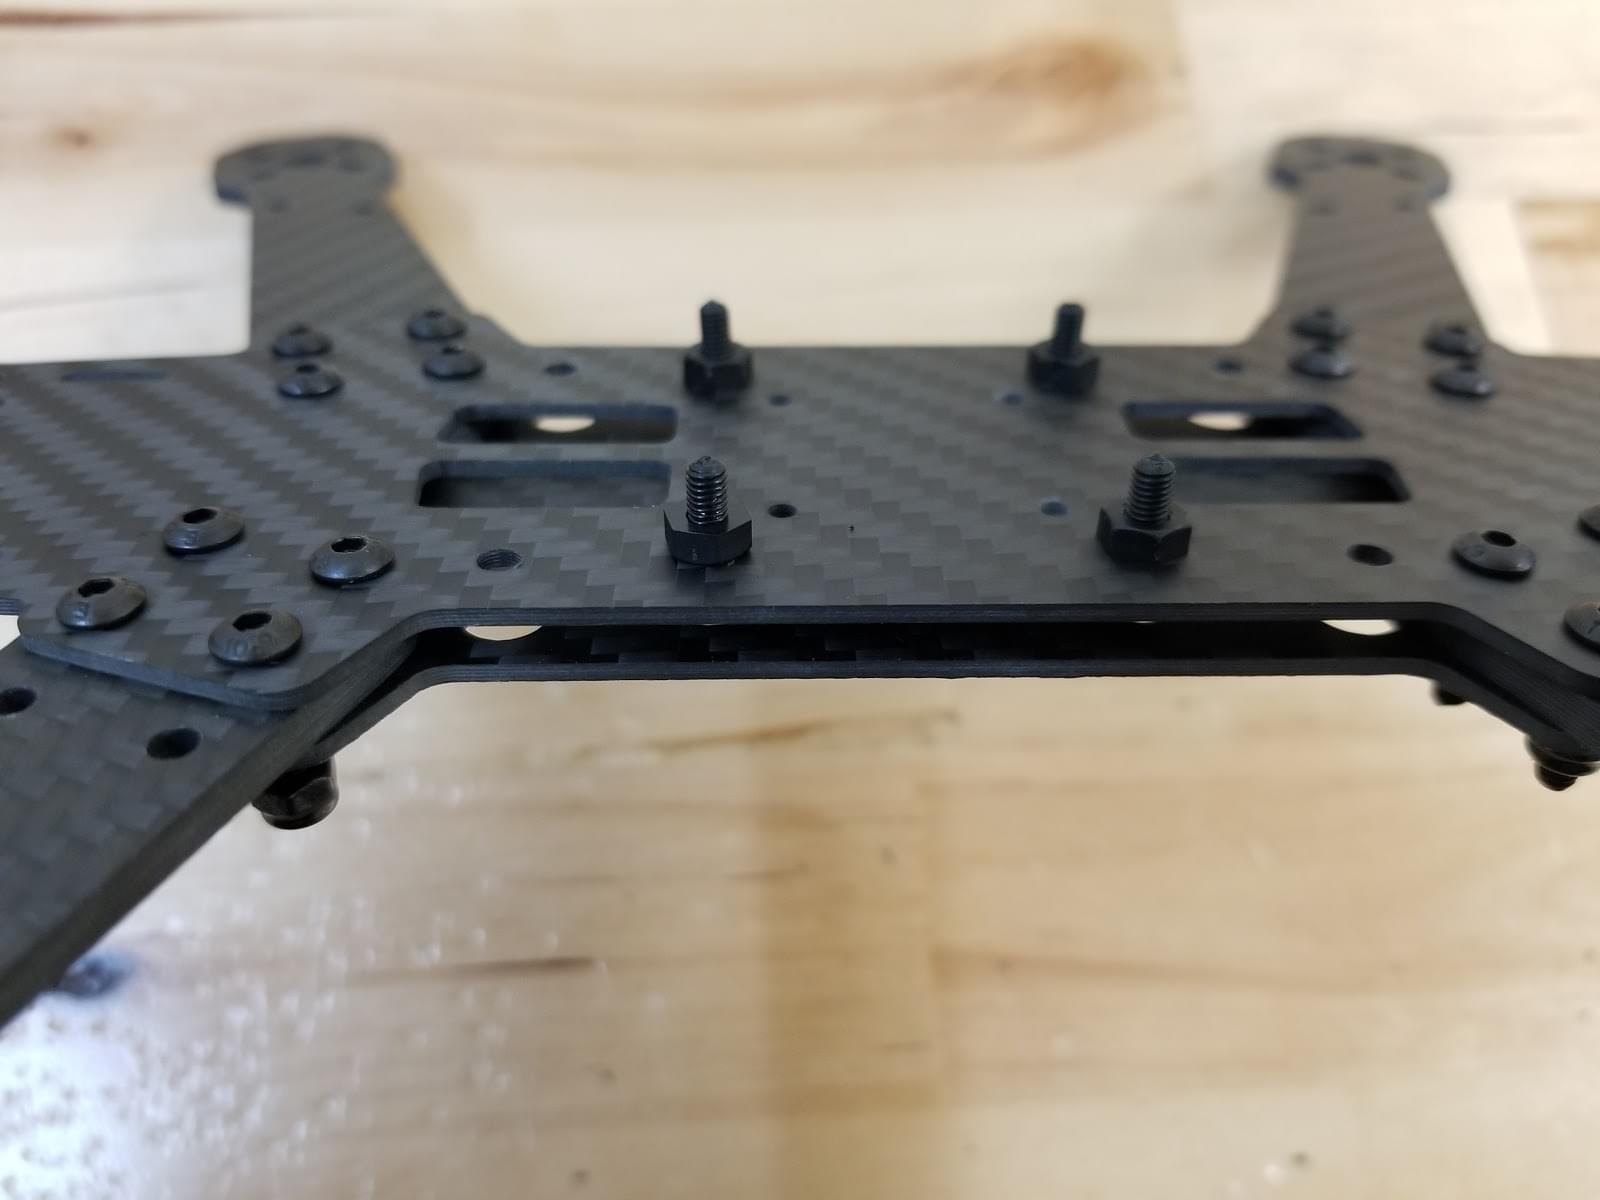
Add the plastic nuts to the screws (turn over, as shown)
Lower the power module over the plastic screws and then add the plastics standoffs
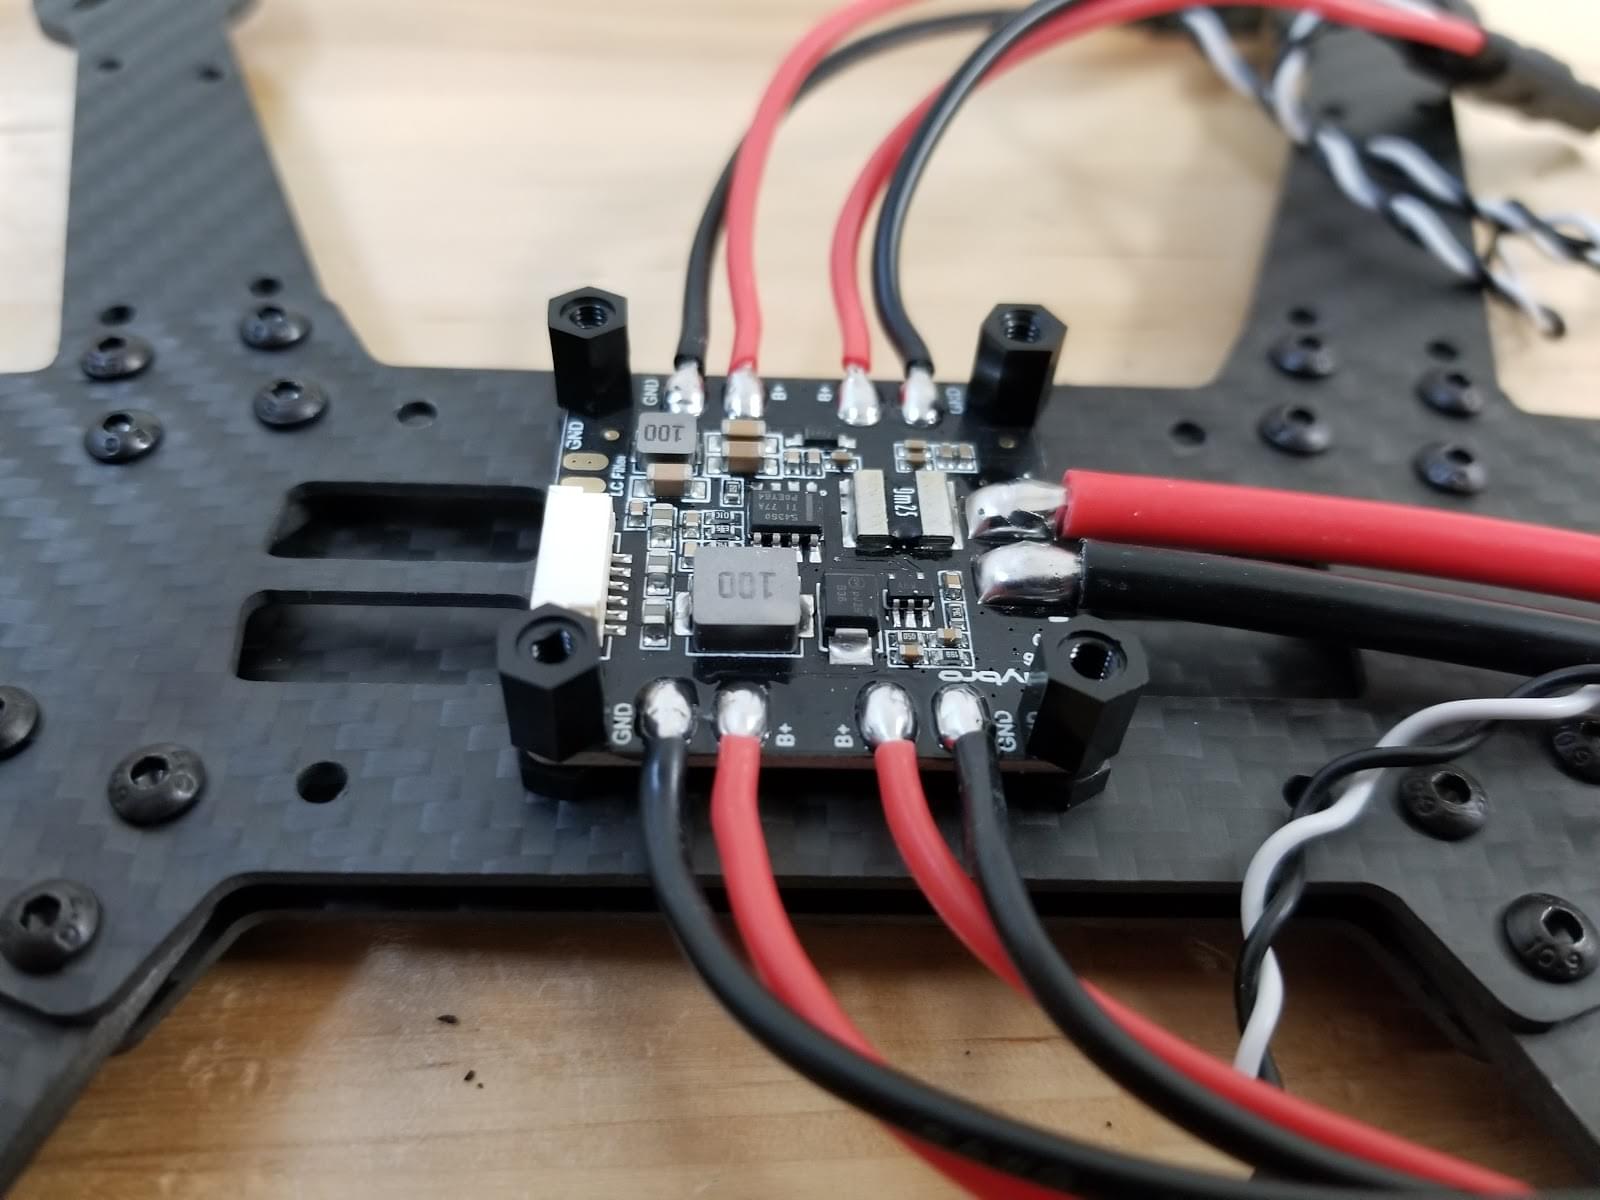
Put the flight controller plate on the standoffs (over the power module)
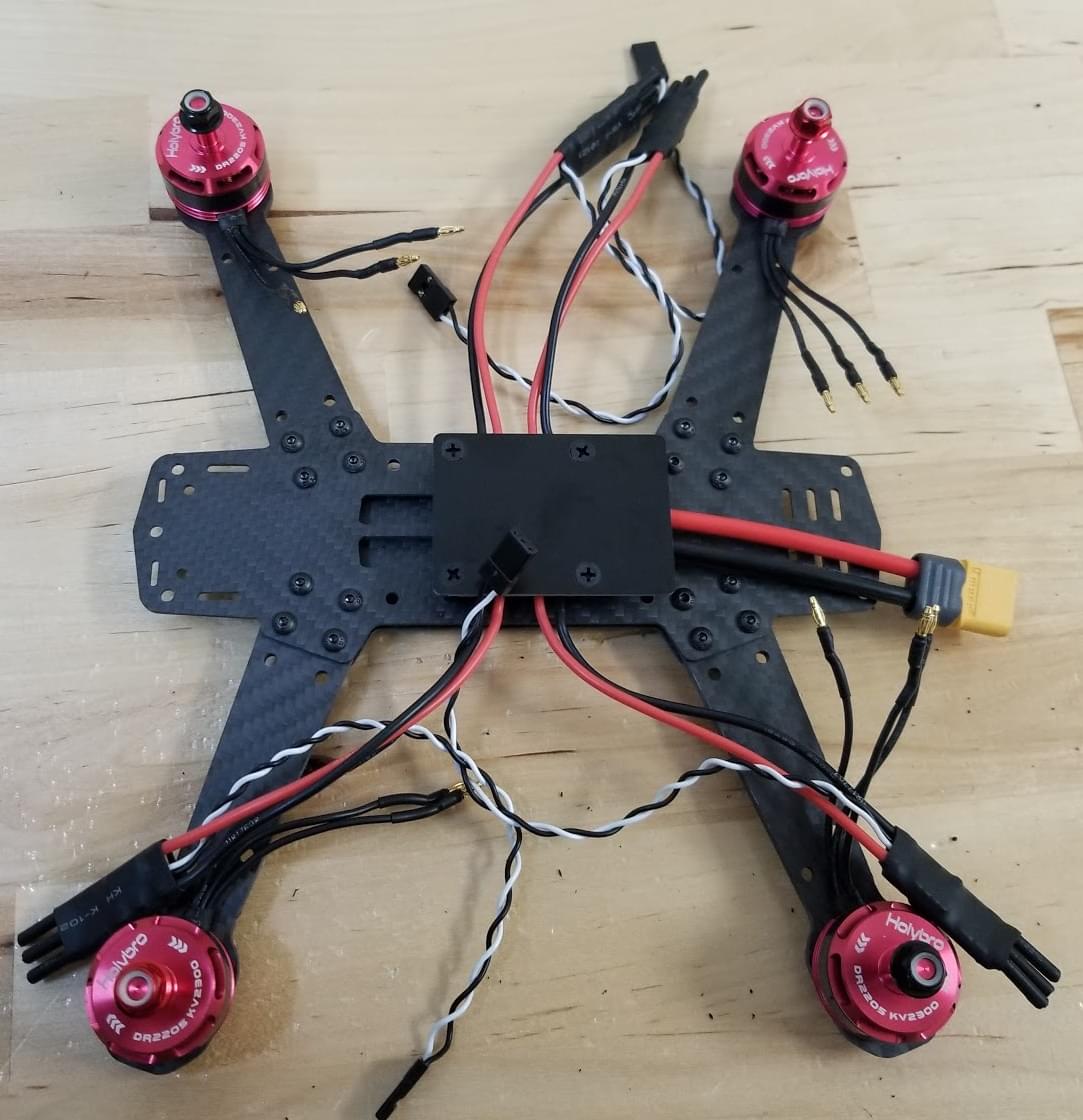
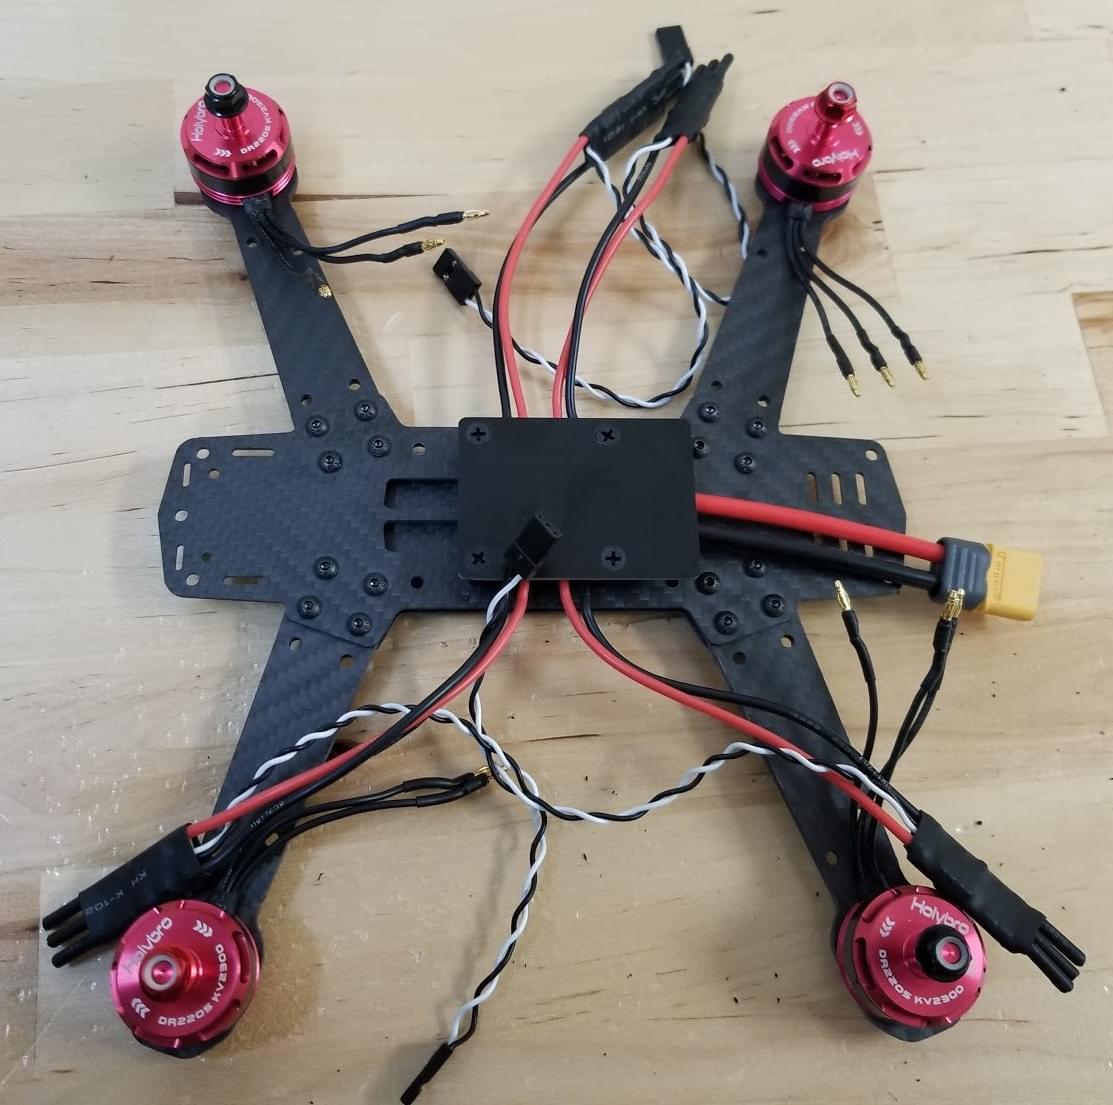
모터를 부착합니다. 모터에는 회전 방향을 나타내는 화살표가 있습니다.
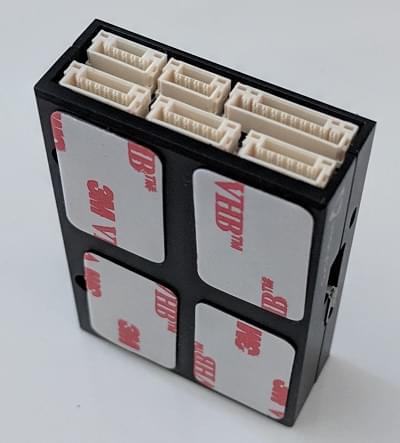
Use double sided tape from kit to attach the Pixhawk 4 Mini to the flight controller plate.
Connect the power module's "power" cable to Pixhawk 4 mini.
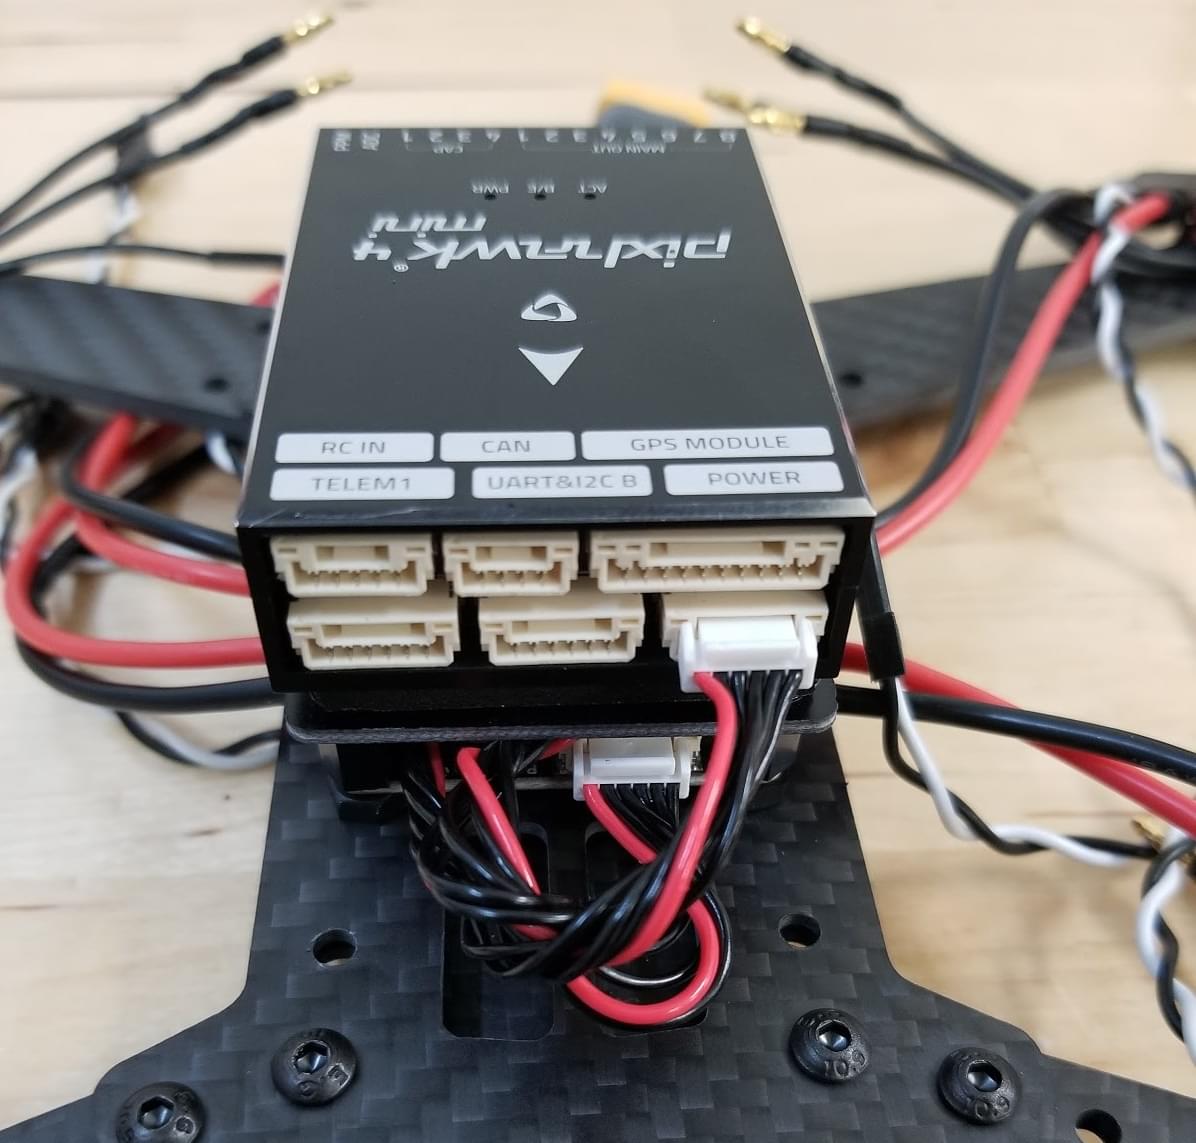
Attach the aluminium standoffs to the button plate
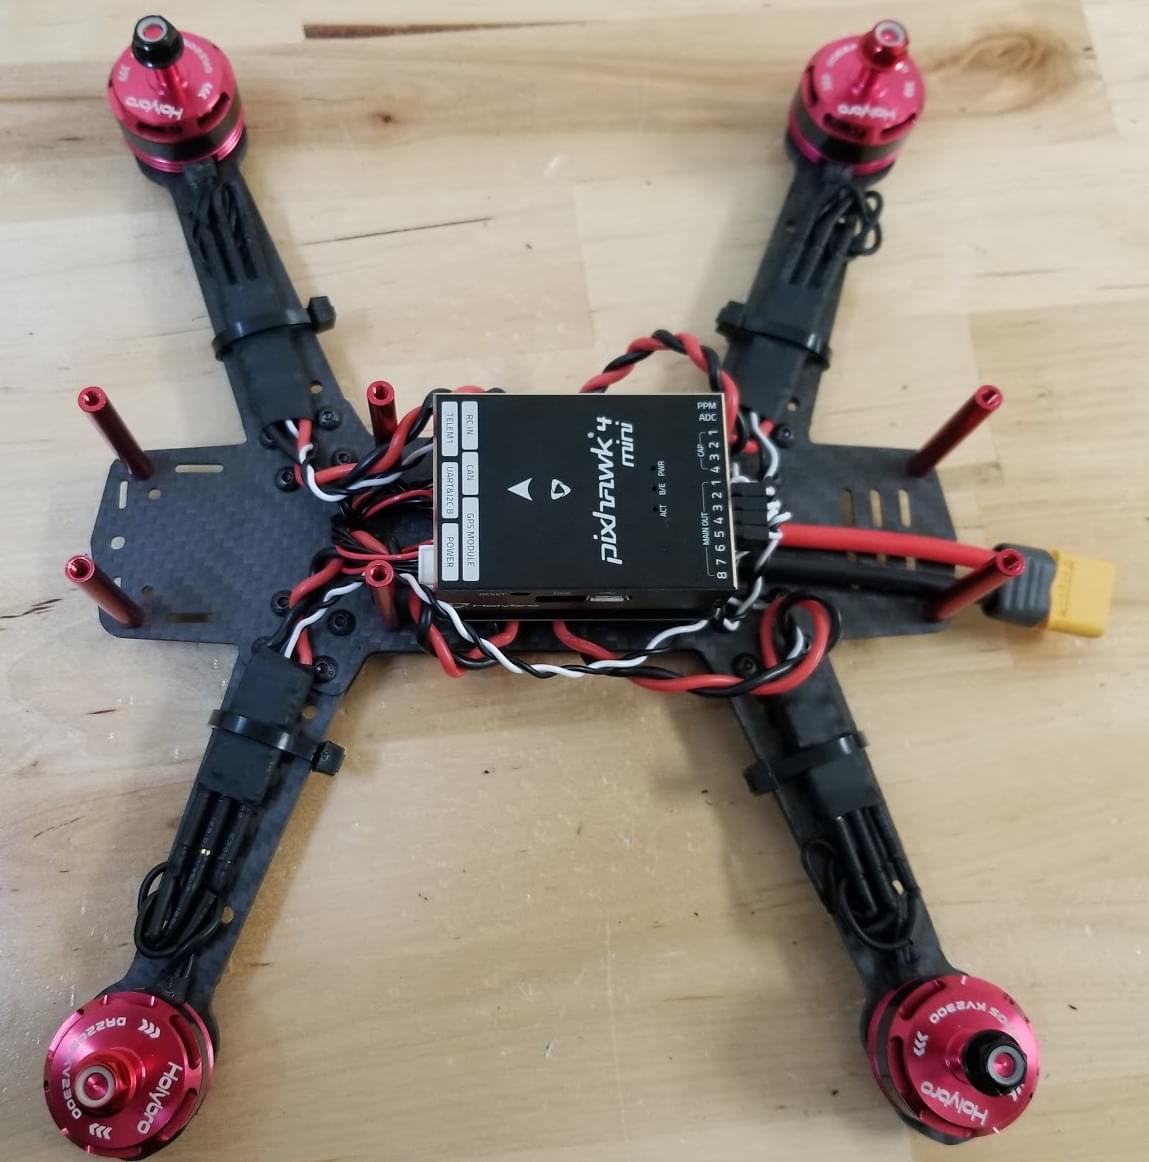
Esc를 모터에 연결합니다. 이 이미지는 모터의 순서와 회전 방향을 나타냅니다.
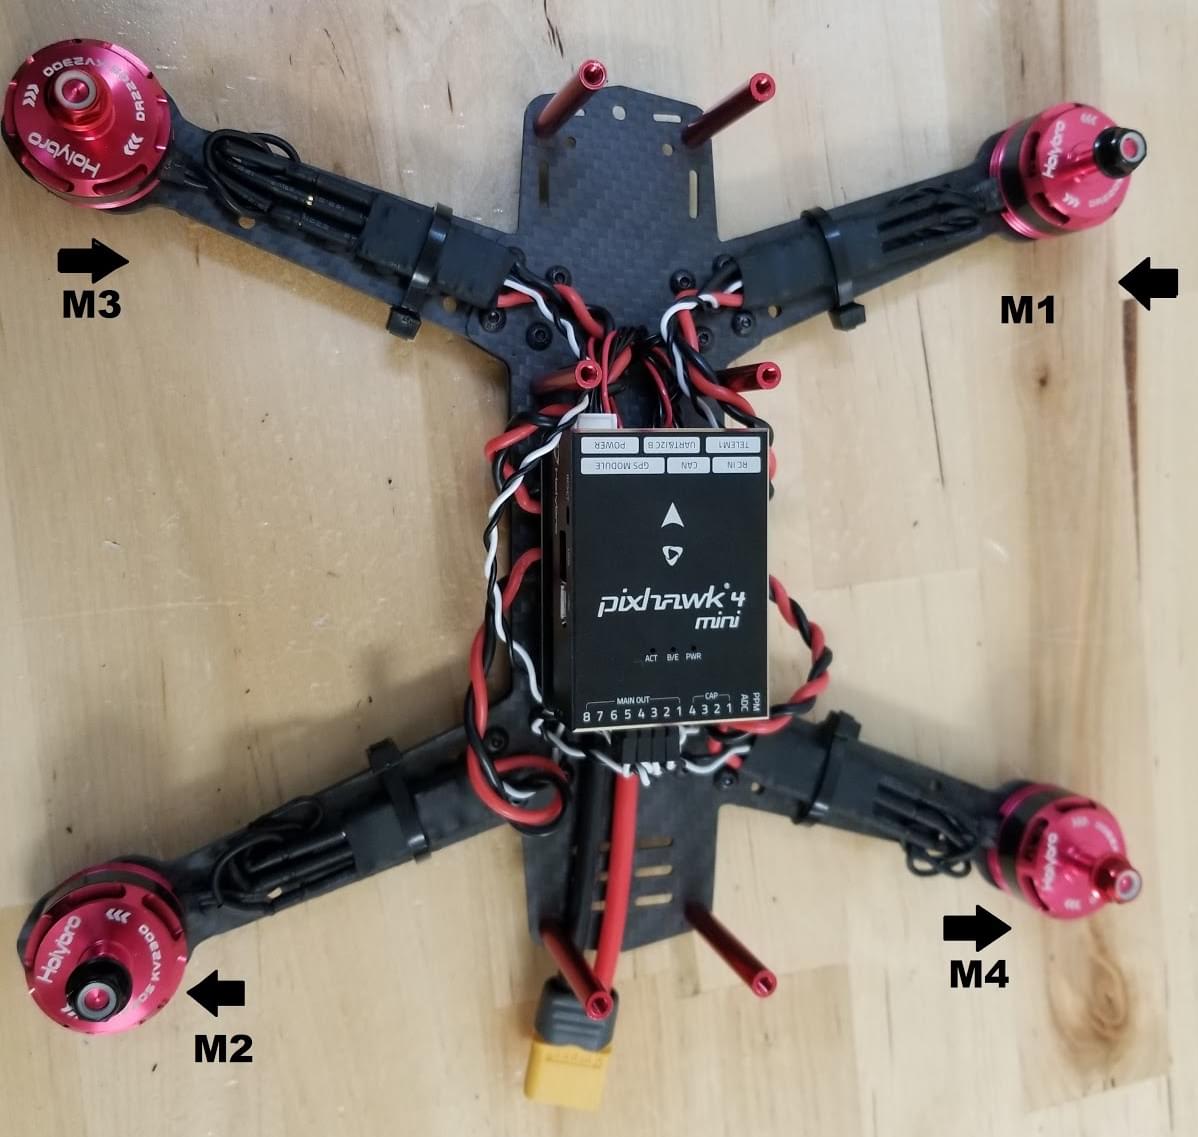
ESC의 모터를 연결하고 모터가 올바른 방향으로회전하는 지 확인하십시오. 모터가 반대쪽으로 회전하면 케이블 A를 패드 C로, C를 ESC의 패드 A로 변경하십시오.
WARNING
Test motor directions with propellers removed.
:::

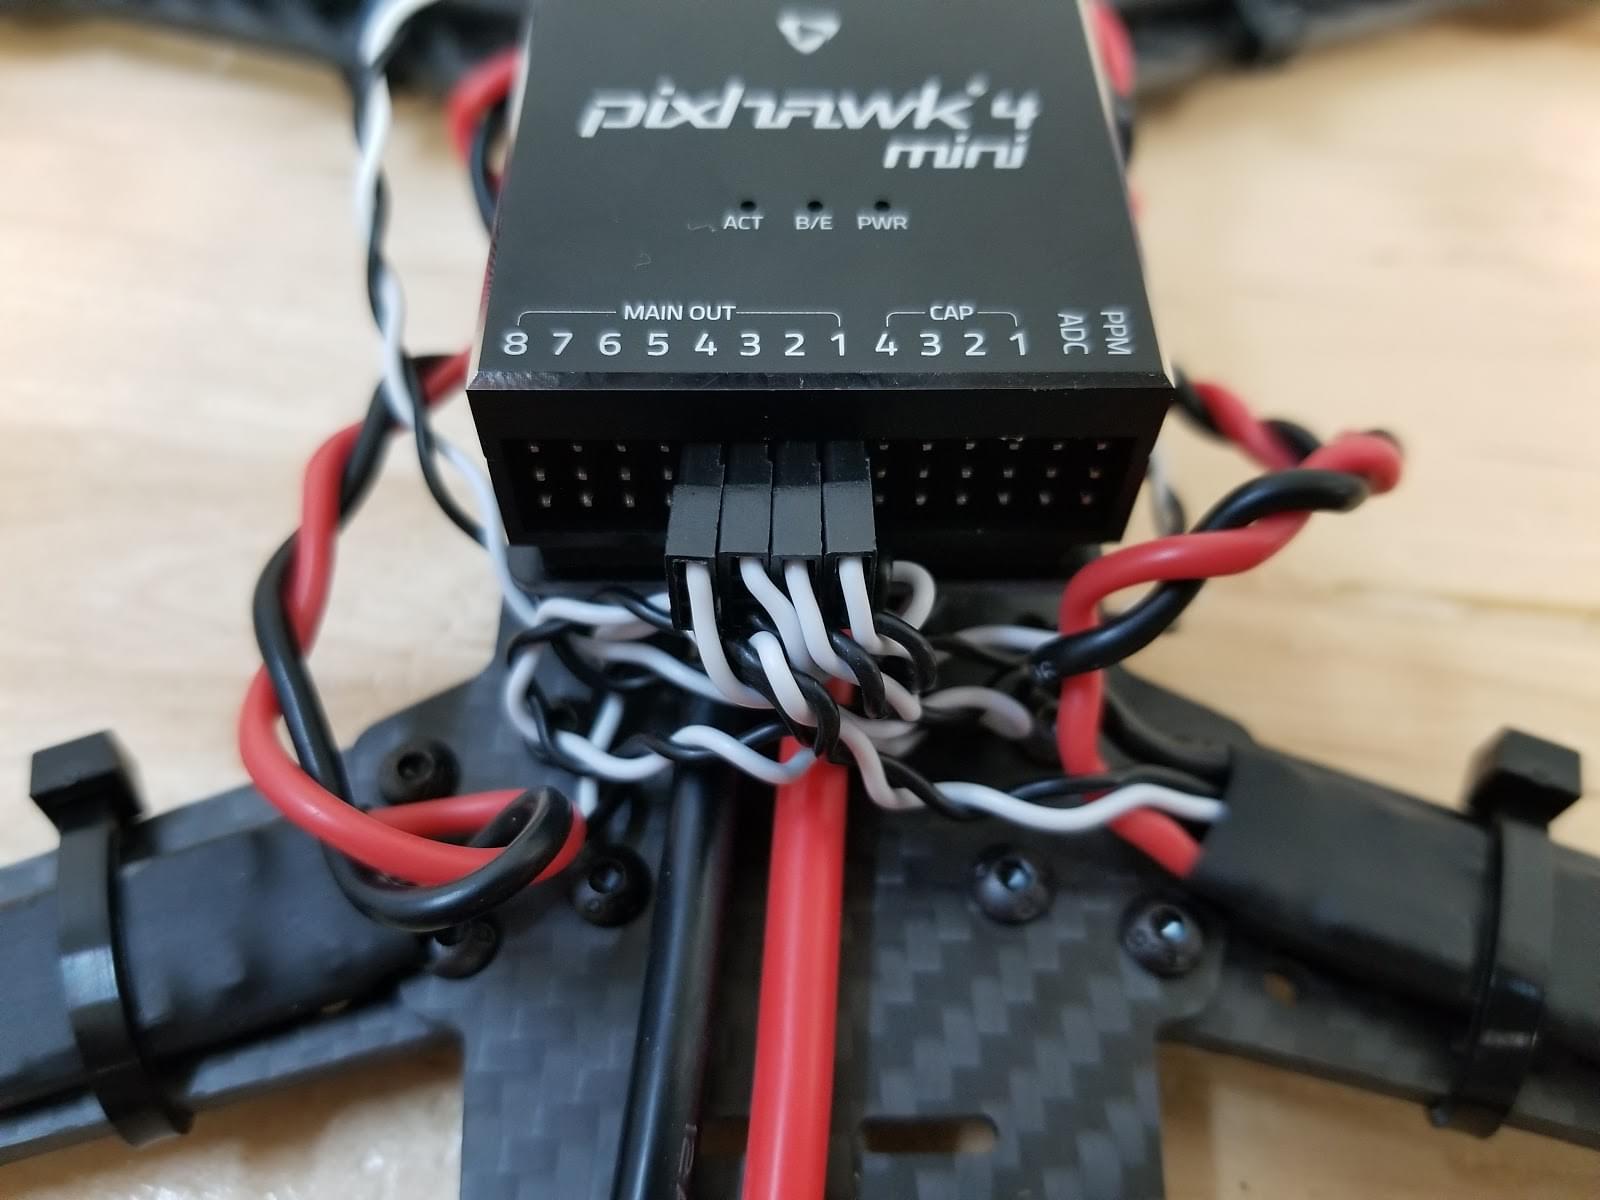
신호 ESC 케이블을 Pixhawk의 PWM 출력에 올바른 순서로 연결합니다 (이전 이미지 참조).
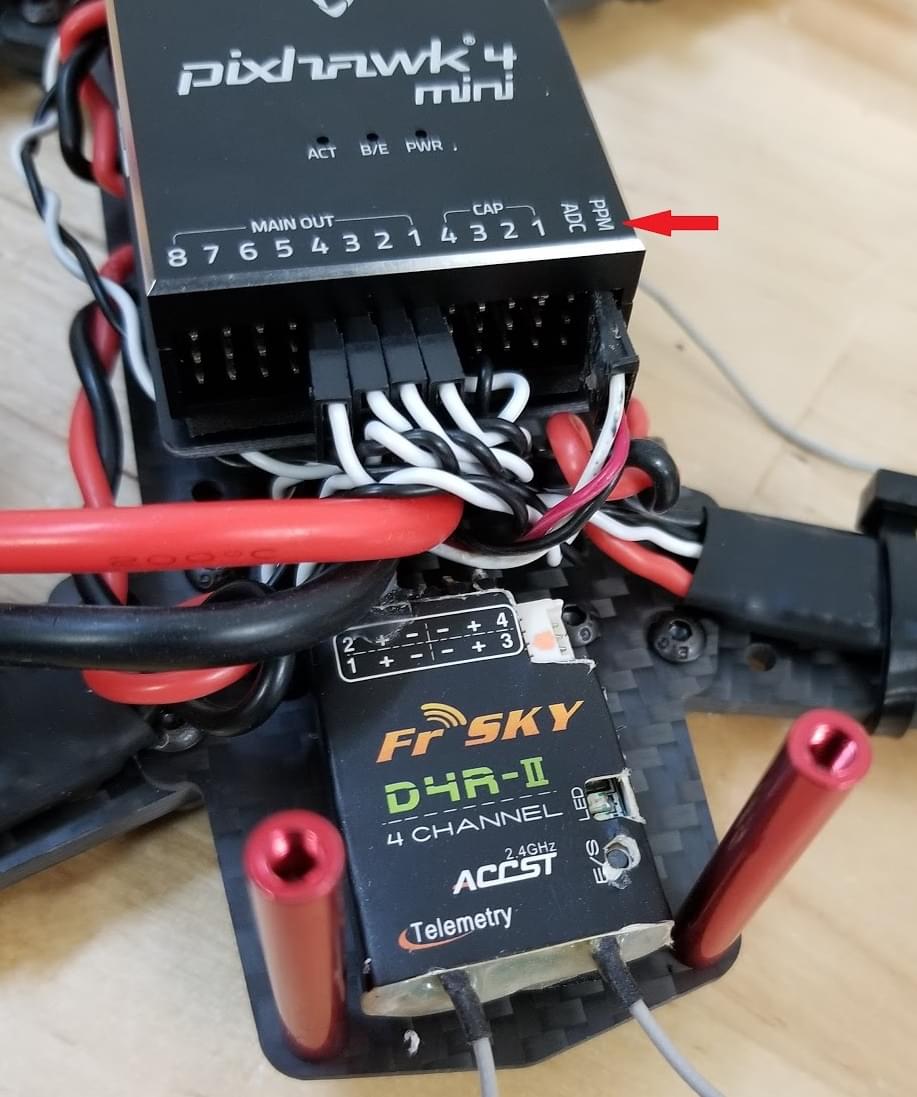
수신기 연결합니다.
PPM 수신기를 사용하는 경우 PPM 포트에 연결하십시오.
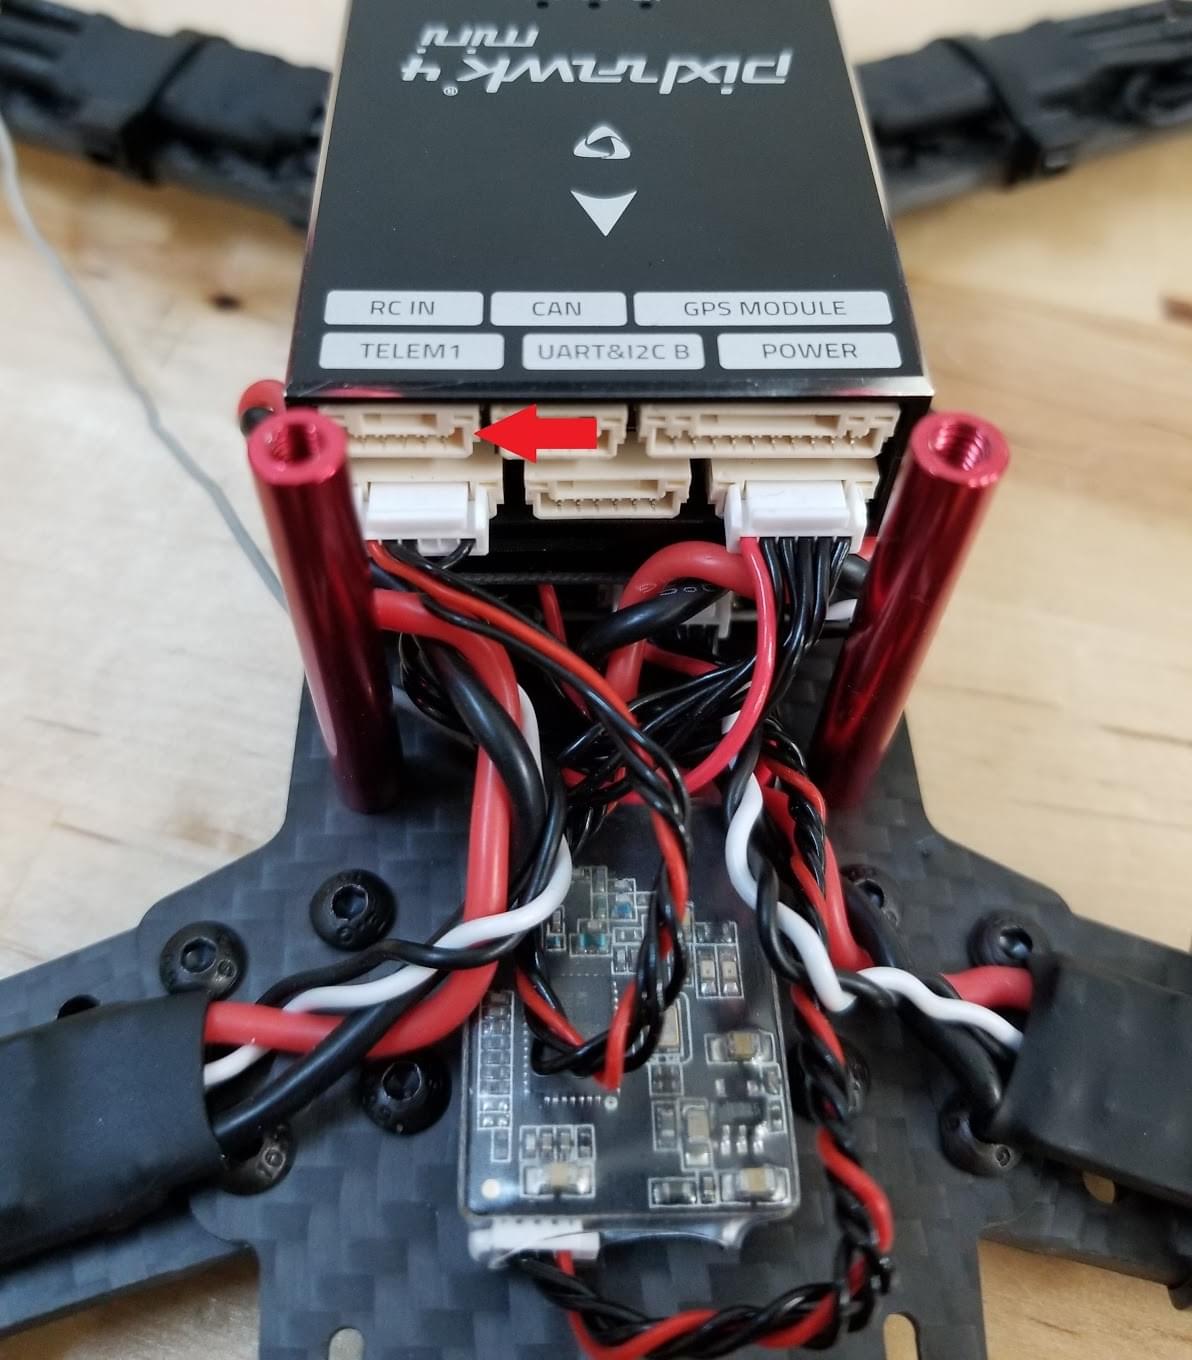
SBUS 수신기를 사용하는 경우 RC IN 포트에 연결합니다.
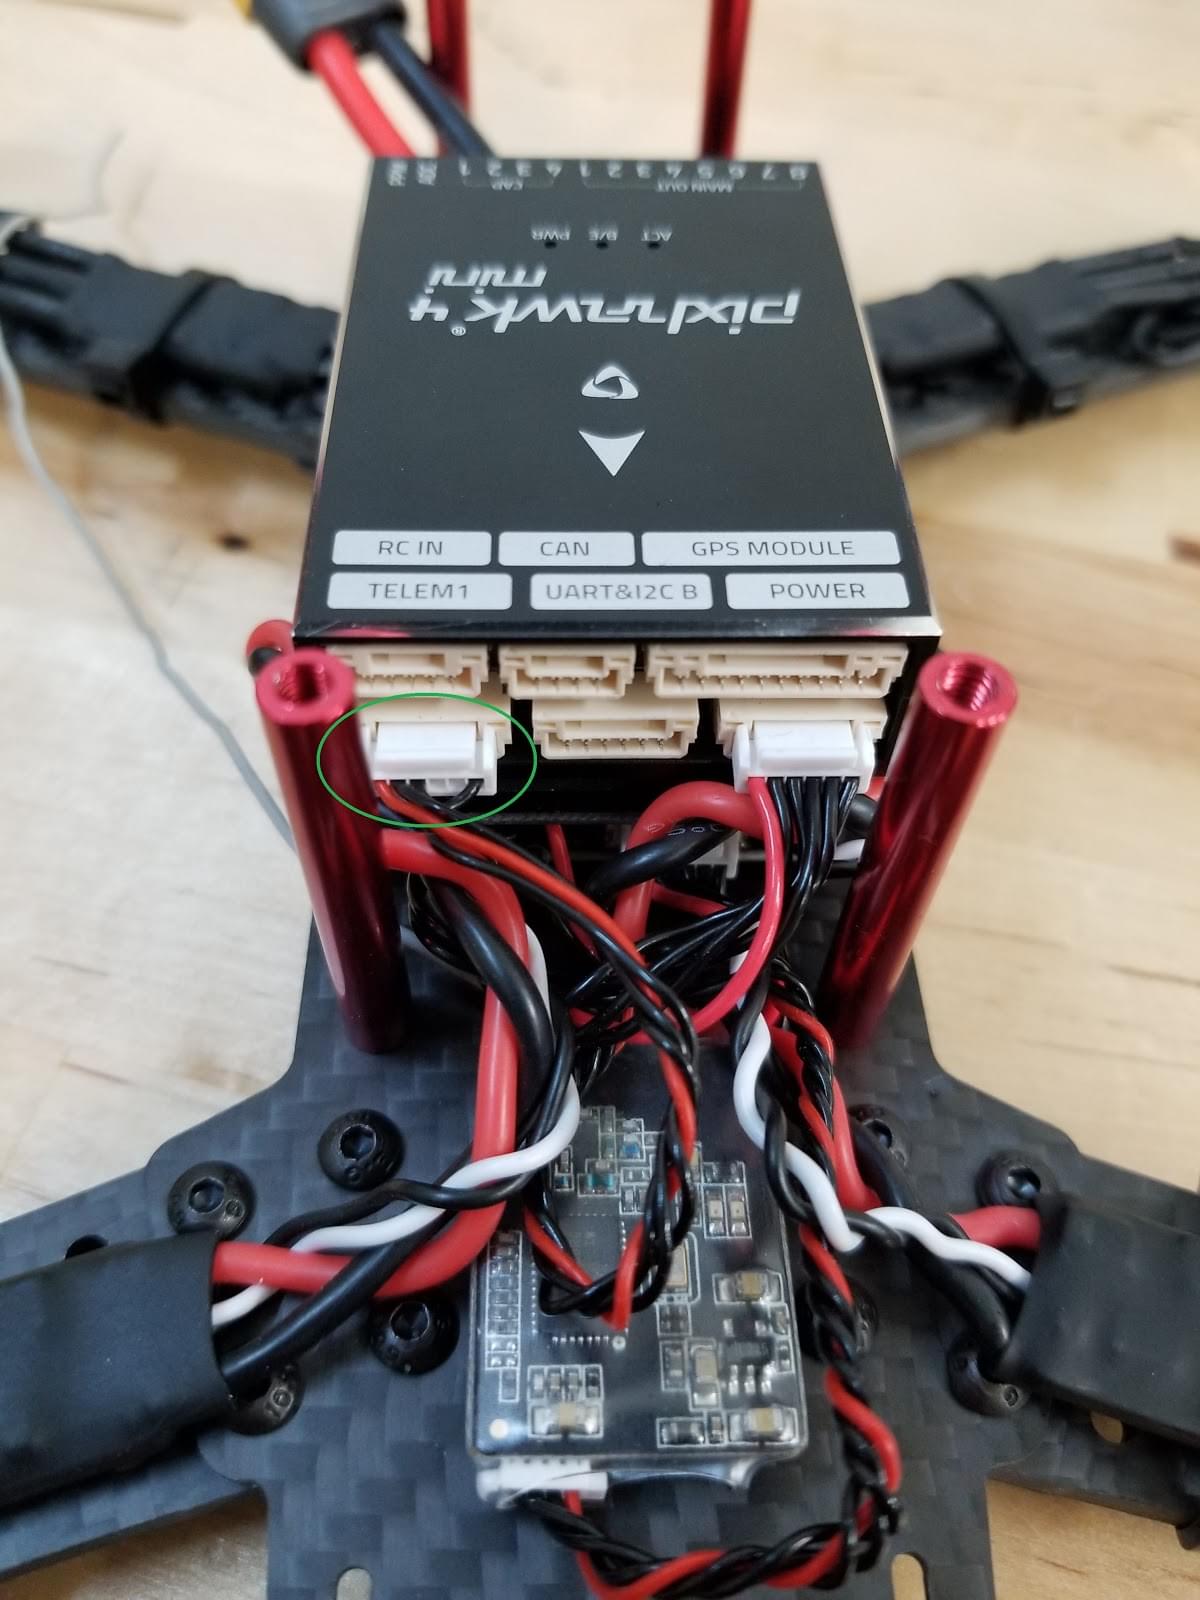
텔레메트리 모듈을 연결합니다. 이중 테이프로 모듈을 붙여넣고 텔레메트리 포트에 연결합니다.
GPS 모듈 연결
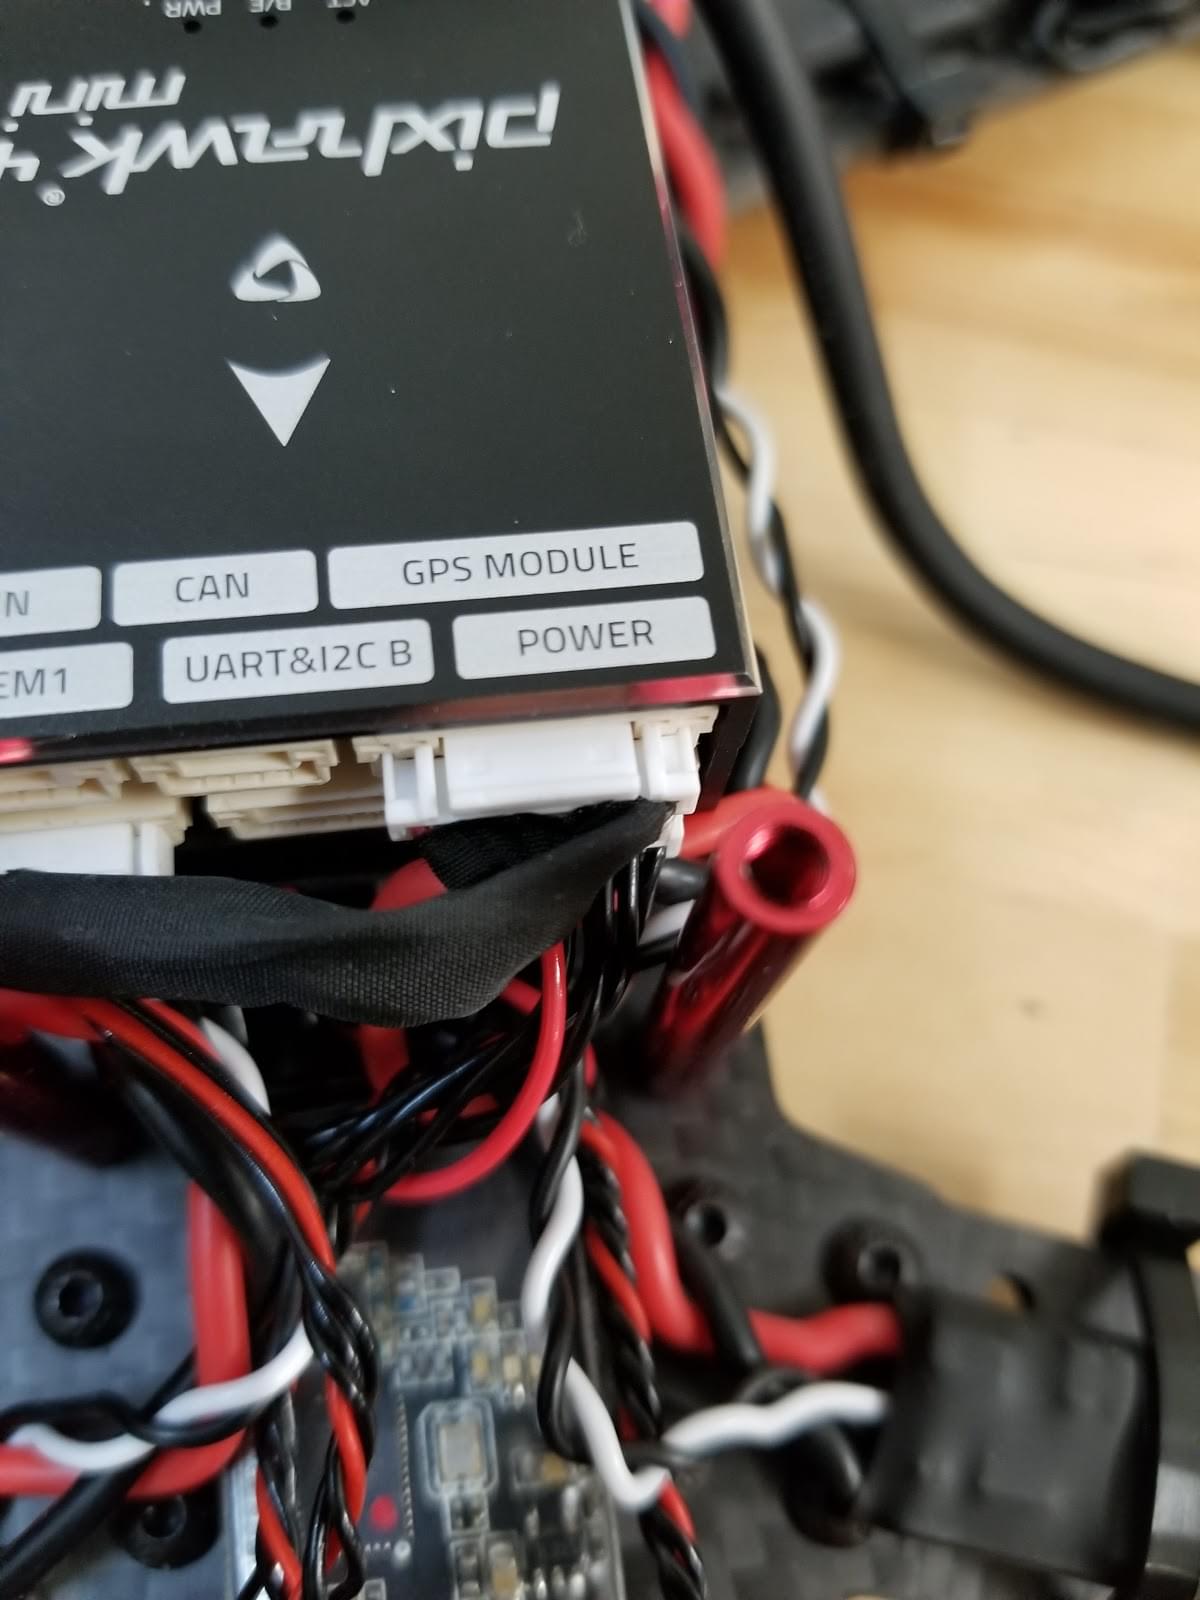
제공된 3M 테이프 또는 페이스트를 사용하여 상단 플레이트에 모듈을 부착합니다. 그런 다음 그림과 같이 스탠드오프에 상단 플레이트를 놓습니다.
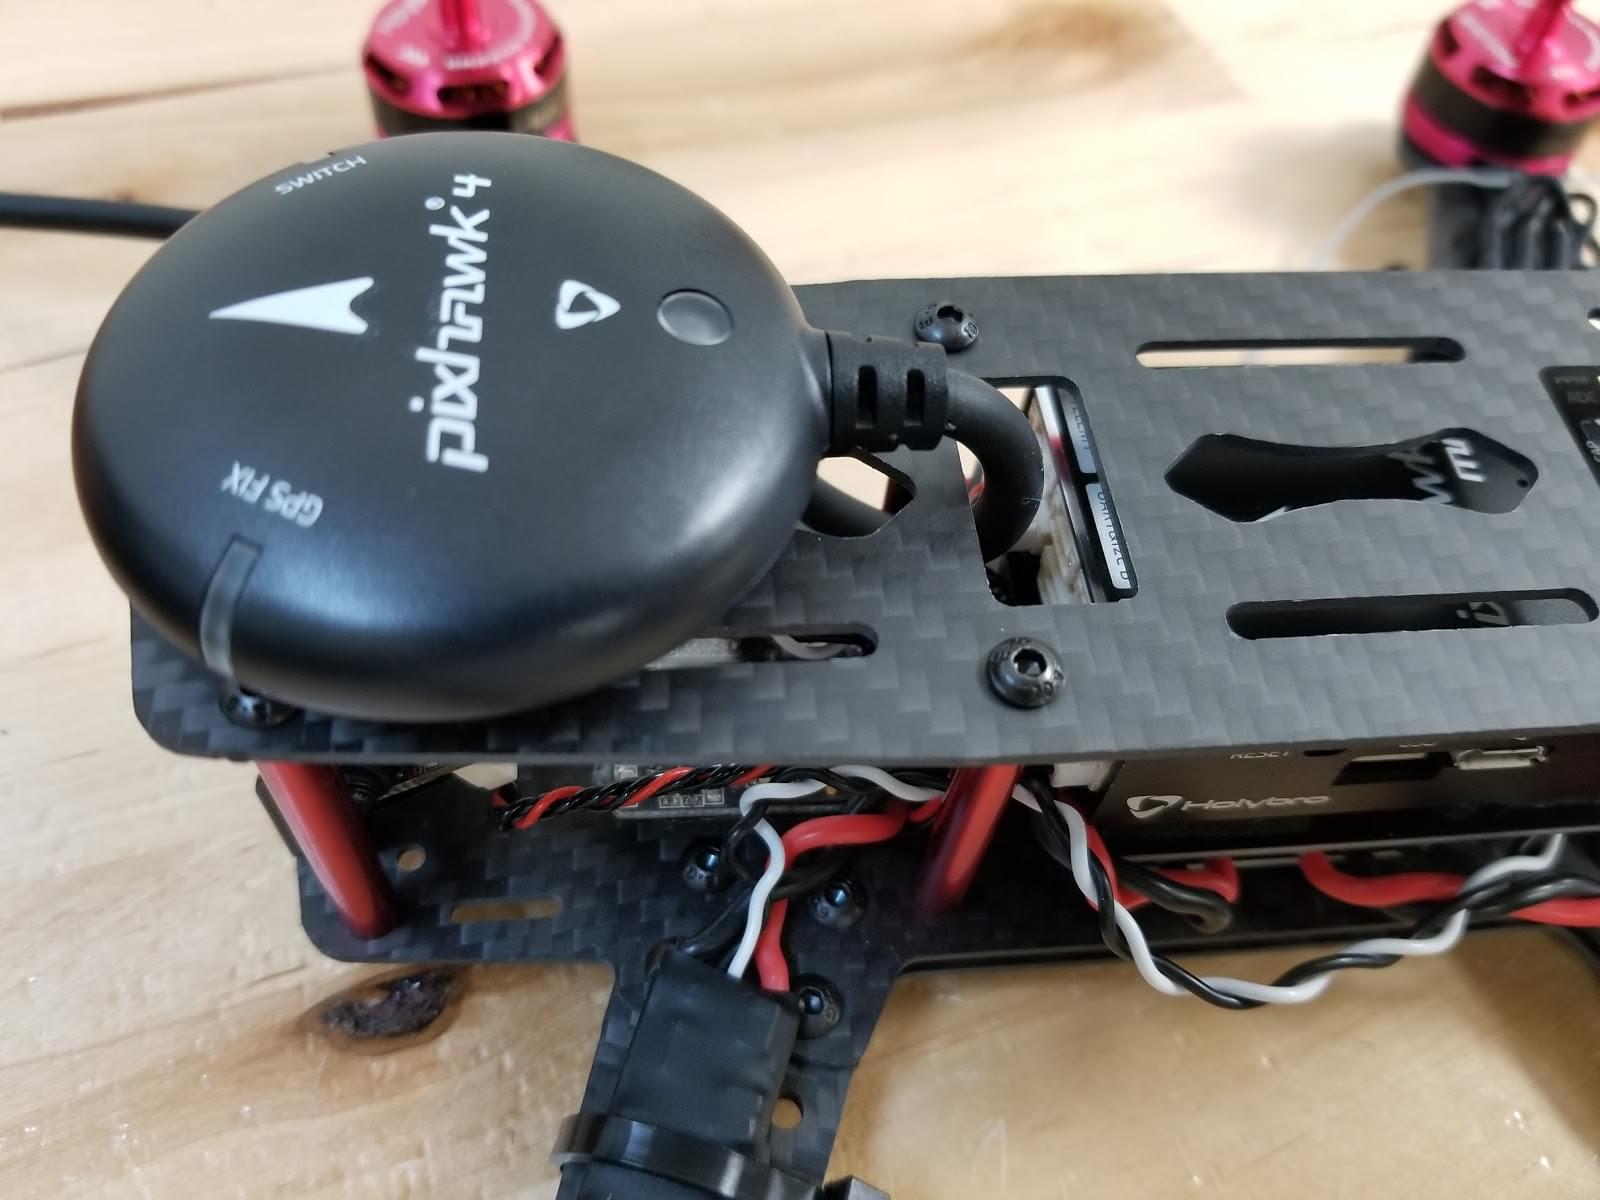
마지막 "필수"조립 단계는 배터리를 고정하기 위해 벨크로를 추가하는 것입니다.
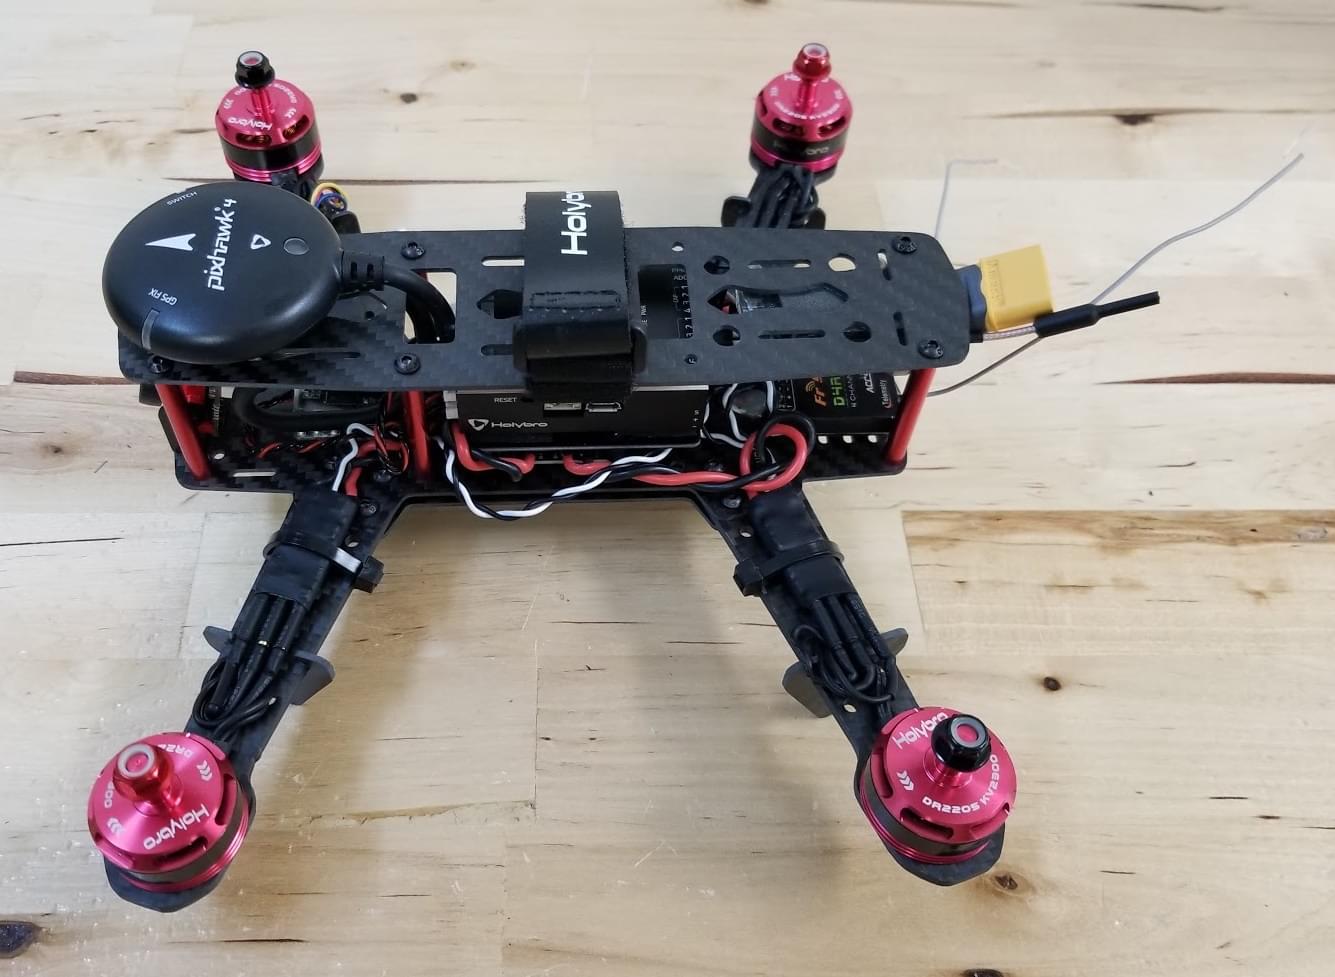
The "basic" frame build is now complete (though if you need them, you can find more information about connecting components in the Pixhawk 4 Wiring Quickstart).
If you have the "basic" version of the kit, you can now jump ahead to instructions on how to Install/Configure PX4.
FPV 조립
키트의 "전체" 버전에는 그림과 같이 차량 전면에 장착된 FPV 시스템이 추가로 제공됩니다.
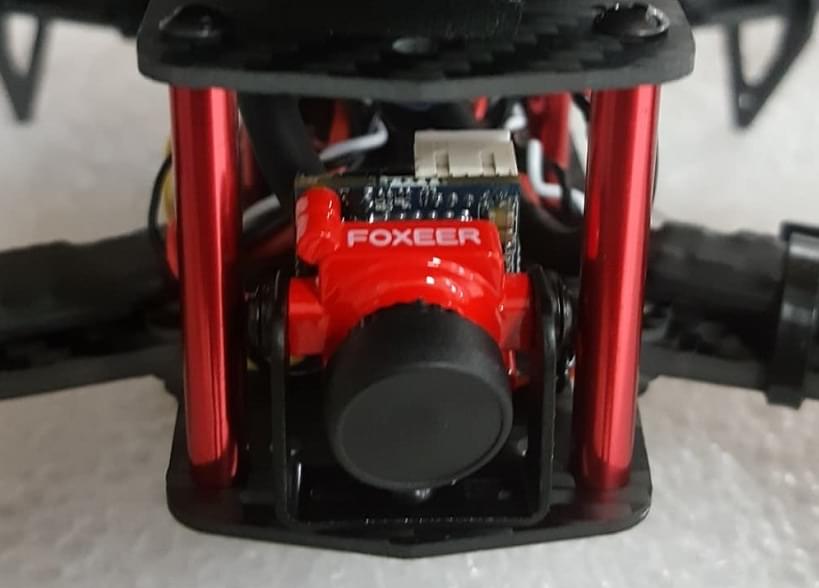
키트를 설치하는 단계는 다음과 같습니다.
- Install the camera bracket on the frame
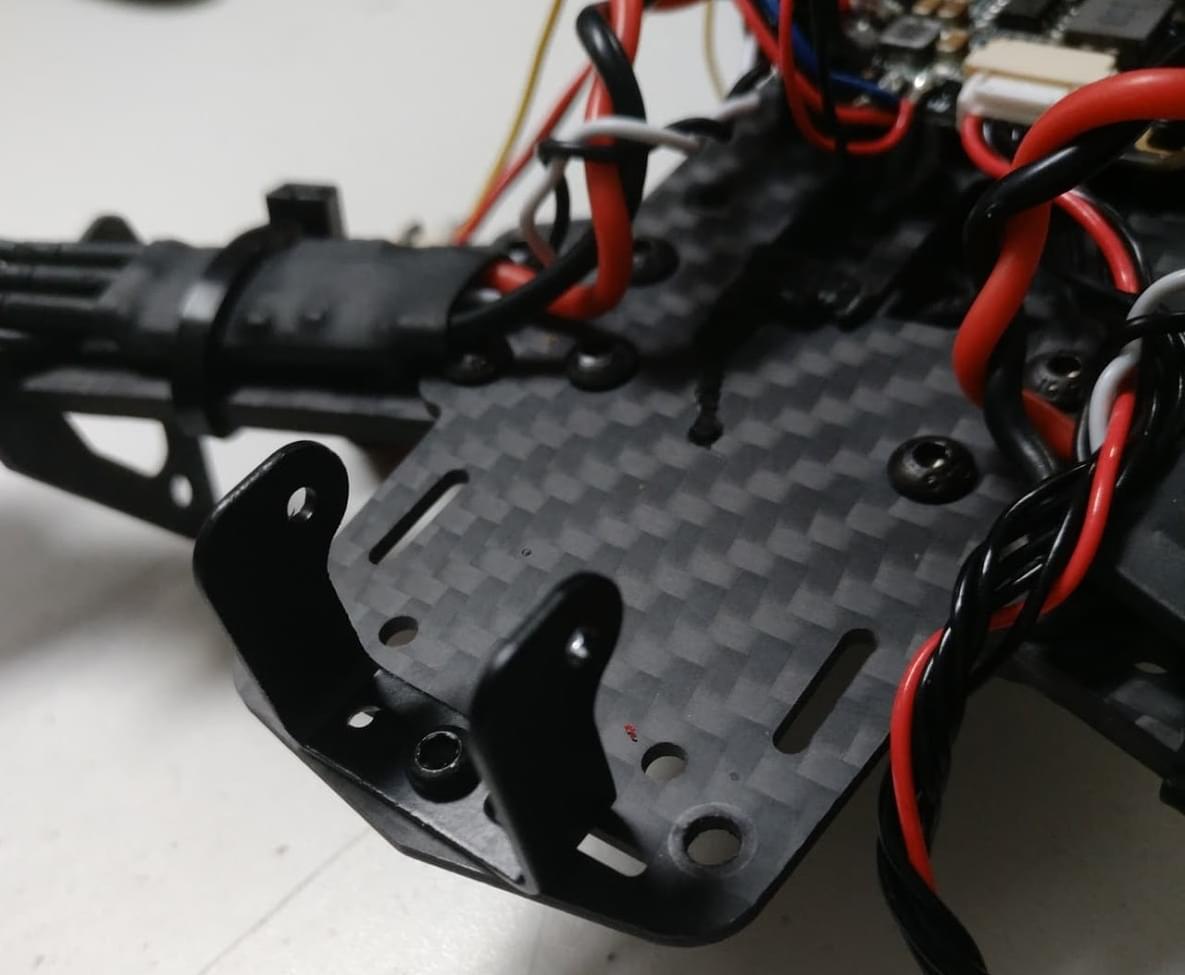
- Install the camera on the bracket
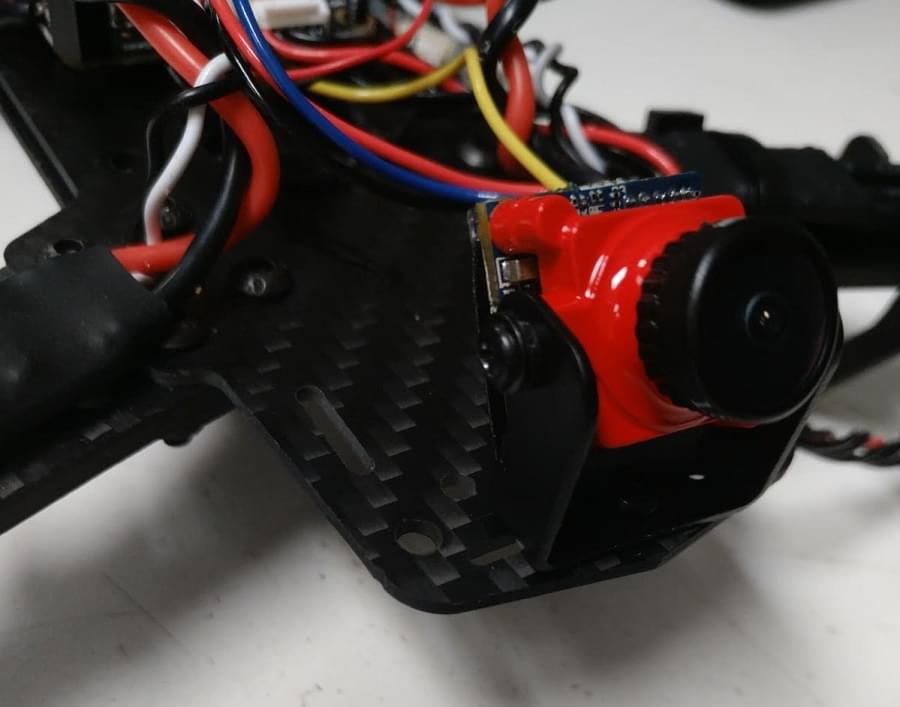
- The power module on the complete kit comes with wiring ready to connect the Video Transmitter and Camera:
- Attach the camera connector
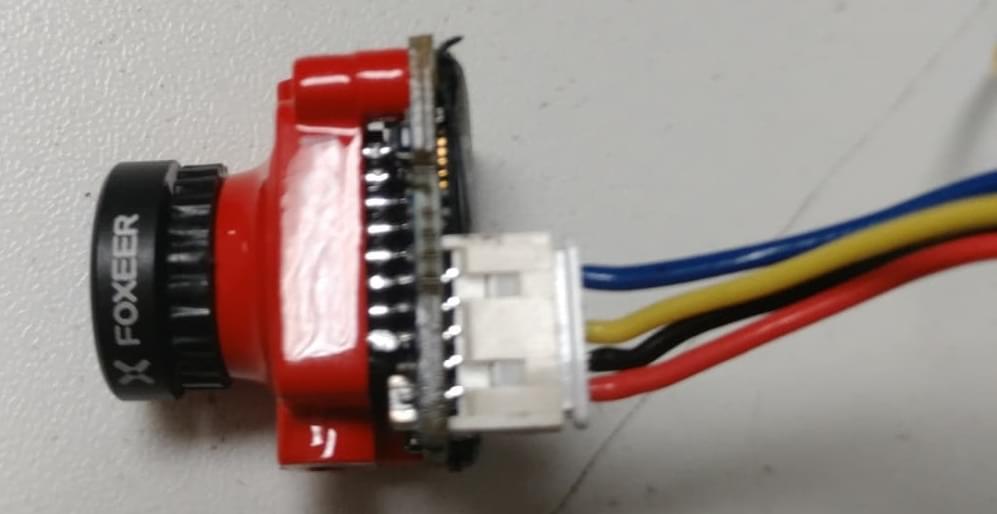 The wires are: blue=voltage sensor, yellow=video out, black=ground, red=+voltage.
 - Connect the Video Transmitter (VTX) connector
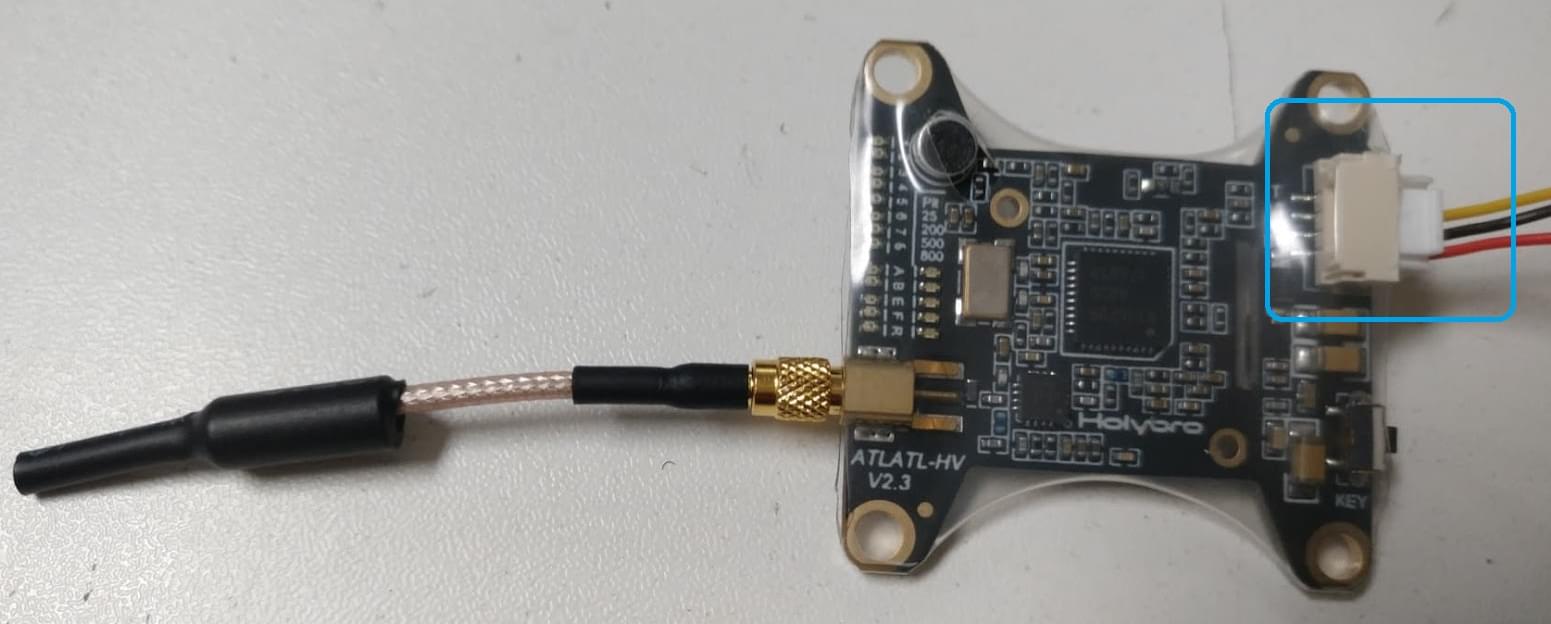 The wires are: yellow=video out, black=ground, red=+voltage.
- Attach the camera connector
- 테이프를 사용하여 비디오 송신기와 OSD 보드를 프레임에 고정합니다.
INFO
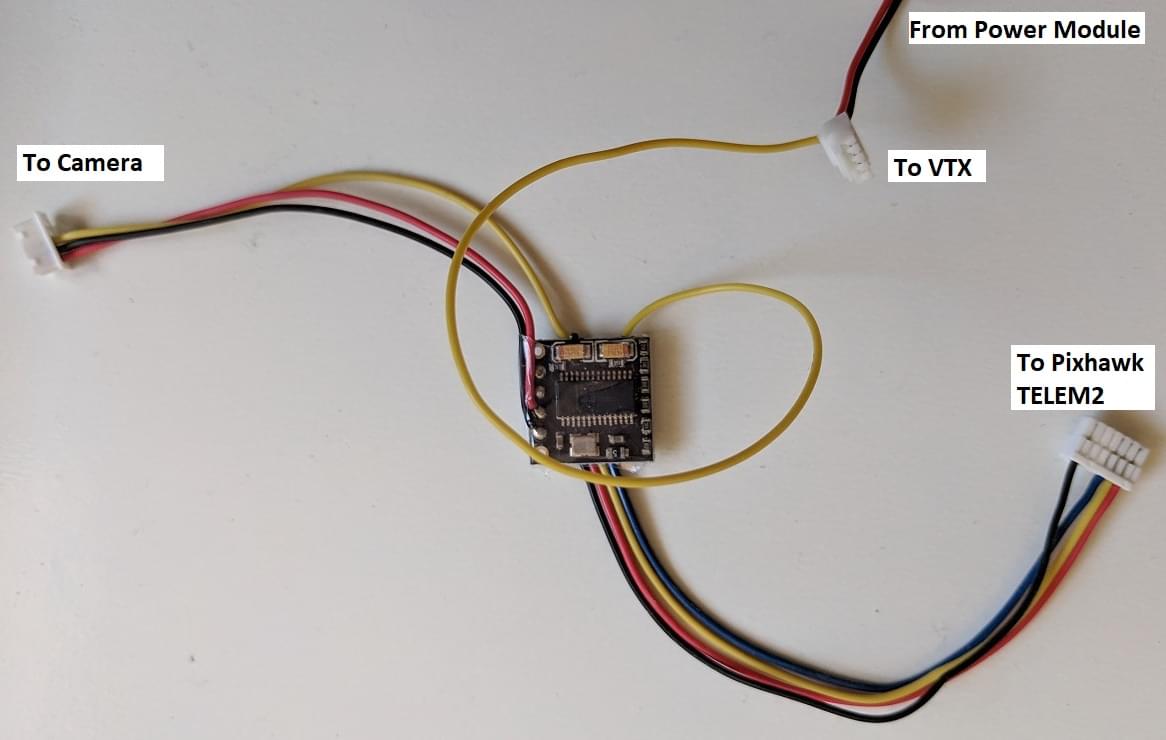
If you have to wire the system yourself, the diagram below shows all the connections between camera, VTX and power module: 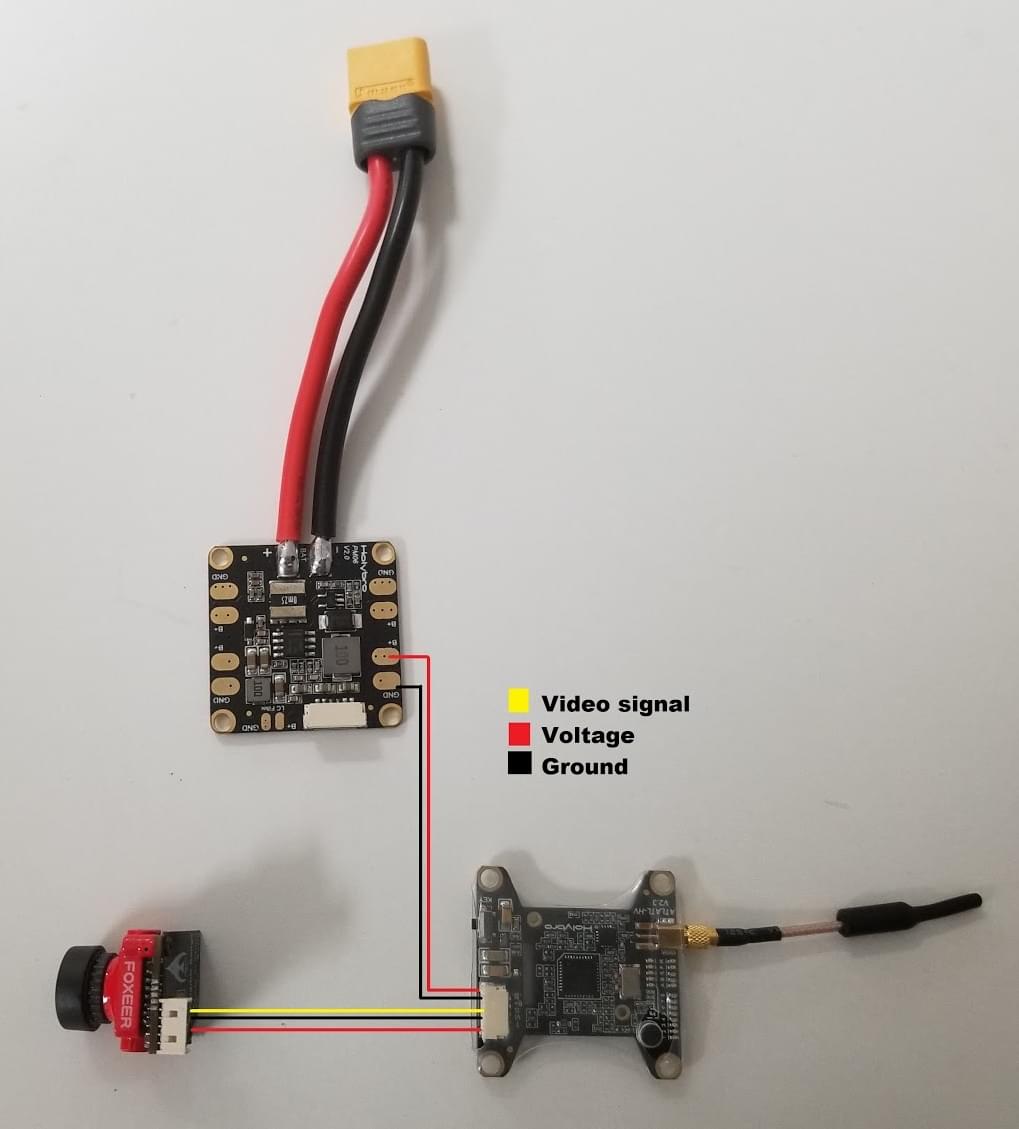
PX4 설정
QGroundControl is used to install the PX4 autopilot and configure/tune it for the QAV250 frame. Download and install QGroundControl for your platform.
TIP
Full instructions for installing and configuring PX4 can be found in Basic Configuration.
First update the firmware, airframe, and actuator mappings:
INFO
You will need to select the HolyBro QAV250 airframe (Quadrotor x > HolyBro QAV250).
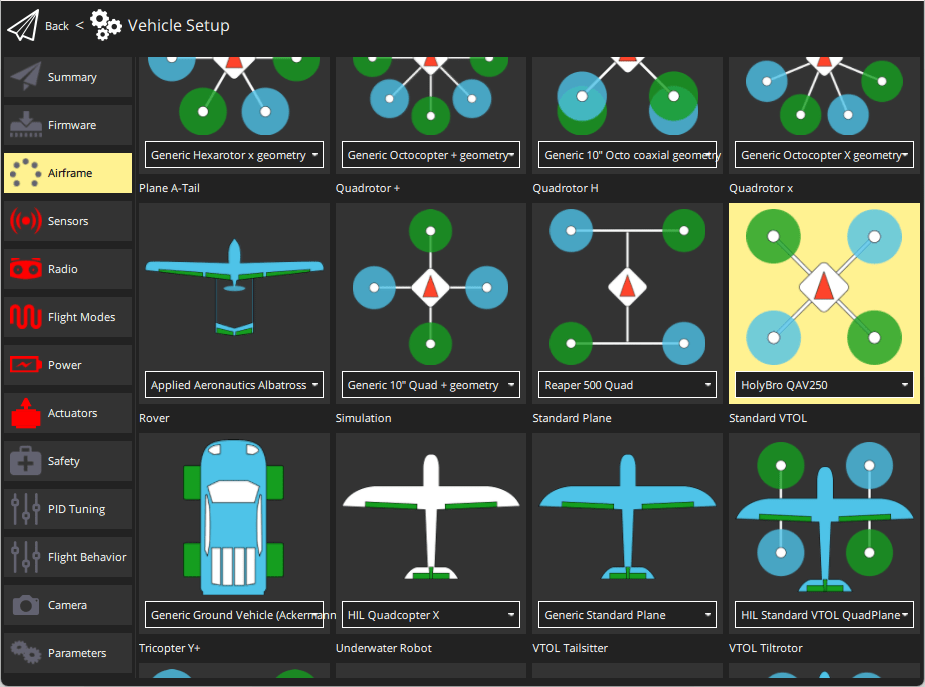
:::
- Actuators
- You should not need to update the vehicle geometry (as this is a preconfigured airframe).
- Assign actuator functions to outputs to match your wiring.
- For the Pixhawk 4 Mini, and other controllers that do not have an I/O board, you will need to assign actuators to outputs on the
PWM AUXtab in the configuration screen. - The Pix32 v6 has an I/O board, so you can assign to either AUX or MAIN.
- For the Pixhawk 4 Mini, and other controllers that do not have an I/O board, you will need to assign actuators to outputs on the
- Test the configuration using the sliders.
그리고, 설치후에 필수적인 설정 작업과 보정 작업을 진행하여야 합니다.
이후 다음 작업 역시 수행되어야 합니다:
튜닝
Airframe selection sets default autopilot parameters for the frame. These may be good enough to fly with, but you should tune each frame build.
For instructions on how, start from Autotune.
감사의 글
이 조립 로그는 PX4 테스트 팀에서 제공하였습니다.