Accelerometer Calibration
PX4를 처음 사용하거나, 비행 콘트롤러의 방향이 변경된 경우에는 가속도계를 보정하여야 합니다. 기존 장비를 계속 사용하는 경우에는 보정 작업이 필요하지 않습니다. Otherwise it should not need to recalibrated (except perhaps in winter, if the flight controller was not thermally calibrated in the factory).
INFO
Poor accelerometer calibration is generally caught by preflight checks and arming-denied messages (QGC warnings typically refer to "high accelerometer bias" and "consistency check failures").
TIP
This is similar to compass calibration except that you hold the vehicle still (rather than rotate it) in each orientation.
보정 절차
QGroundControl will guide you to place and hold your vehicle in a number of orientations (you will be prompted when to move between positions).
보정 절차는 다음과 같습니다:
Start QGroundControl and connect the vehicle.
Select "Q" icon > Vehicle Setup > Sensors (sidebar) to open Sensor Setup.
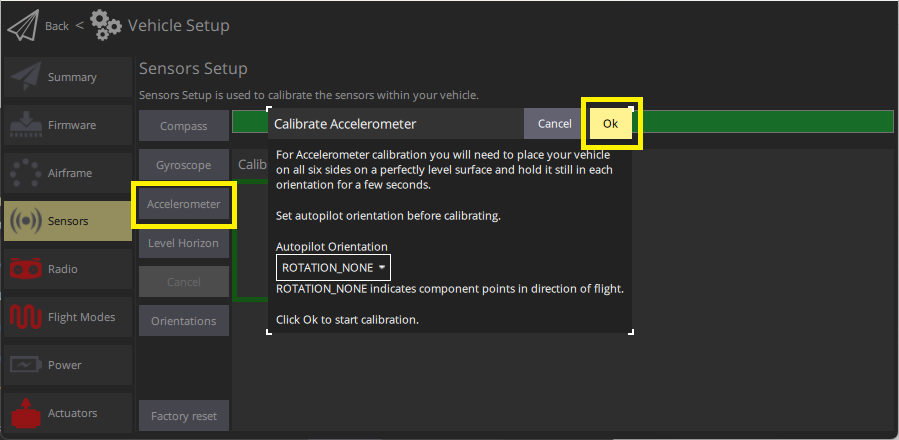
Click the Accelerometer sensor button.
INFO
You should already have set the Autopilot Orientation. 미리 설정하지 않았다면, 여기에서 설정할 수 있습니다.
:::
Click OK to start the calibration.
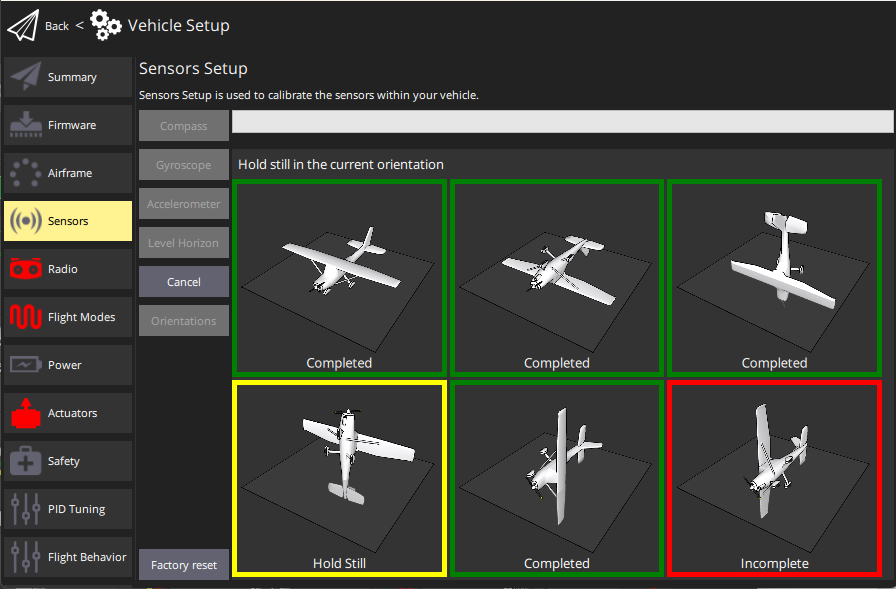
Position the vehicle as guided by the images on the screen. Once prompted (the orientation-image turns yellow) hold the vehicle still. 현재 방향에 대해 보정이 완료되면 화면의 그림이 녹색으로 바뀝니다.
INFO
The calibration uses a least squares 'fit' algorithm that doesn't require you to have "perfect" 90 degree orientations. 각 축이 보정 단계별로 어느 시점에 대부분 위아래를 가리키고, 차량이 고정되어 있으면 정확한 방향은 중요하지 않습니다.
:::
- 드론의 모든 방향에 대해 보정 과정을 반복합니다.
Once you've calibrated the vehicle in all the positions QGroundControl will display Calibration complete (all orientation images will be displayed in green and the progress bar will fill completely). 그런 다음 다음 센서의 보정 작업을 진행합니다.