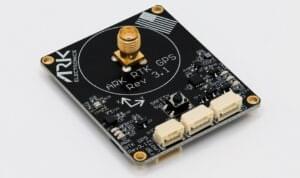
ARK RTK GPS L1 L5
ARK RTK GPS L1 L5 is an open source DroneCAN RTK GPS, u-blox F9P, magnetometer, barometer, IMU, buzzer, and safety switch module.
Де купити
Замовте цей модуль з:
- ARK Electronics (US)
Характеристики обладнання
- Open Source Schematic and BOM
- Датчики
- Ublox F9P GPS
- Multi-band GNSS receiver delivers centimetre level accuracy in seconds
- Одночасний прийом GPS, GLONASS, Galileo та BeiDou
- Багатосмуговий RTK зі швидкими часами збіжності та надійною продуктивністю
- Висока швидкість оновлення для високодинамічних додатків
- Centimetre accuracy in a small and energy efficient module
- Does not Support Moving Base for Heading
- Bosch BMM150 Magnetometer
- Bosch BMP388 Barometer
- Invensense ICM-42688-P 6-Axis IMU
- Ublox F9P GPS
- STM32F412CEU6 MCU
- Кнопка безпеки
- Зумер
- Два роз'єми стандарту CAN для Pixhawk (4 контакти JST GH)
- F9P
UART 2Connector- 3-контактний JST-GH
- TX, RX, GND
- Роз'єм для відлагодження стандарту Pixhawk (6 контактів JST SH)
- LED індикатори
- Індикатор безпеки
- GPS Fix
- Статус RTK
- RGB Статус системи
- USA Built
- Вимоги до живлення
- 5V
- Середній струм 170мA
- 180мА Макс
Налаштування програмного забезпечення
Підключення
The ARK RTK GPS L1 L5 is connected to the CAN bus using a Pixhawk standard 4 pin JST GH cable. For more information, refer to the CAN Wiring instructions.
Встановлення
The recommended mounting orientation is with the connectors on the board pointing towards the back of vehicle.
The sensor can be mounted anywhere on the frame, but you will need to specify its position, relative to vehicle centre of gravity, during PX4 configuration.
Налаштування прошивки
ARK RTK GPS L1 L5 runs the PX4 cannode firmware. As such, it supports firmware update over the CAN bus and dynamic node allocation.
ARK RTK GPS L1 L5 boards ship with recent firmware pre-installed, but if you want to build and flash the latest firmware yourself, refer to the cannode firmware build instructions.
Firmware target: ark_can-rtk-gps_default Bootloader target: ark_can-rtk-gps_canbootloader
Налаштування польотного контролера
Увімкнення DroneCAN
In order to use the ARK RTK GPS L1 L5, connect it to the Pixhawk CAN bus and enable the DroneCAN driver by setting parameter UAVCAN_ENABLE to 2 for dynamic node allocation (or 3 if using DroneCAN ESCs).
Кроки наступні:
- In QGroundControl set the parameter UAVCAN_ENABLE to
2or3and reboot (see Finding/Updating Parameters). - Connect ARK RTK GPS L1 L5 CAN to the Pixhawk CAN.
Після активації модуль буде виявлено при завантаженні. Дані GPS повинні надходити з частотою 10 Гц.
Конфігурація PX4
You need to set necessary DroneCAN parameters and define offsets if the sensor is not centred within the vehicle:
- Enable GPS yaw fusion by setting bit 3 of EKF2_GPS_CTRL to true.
- Enable GPS blending to ensure the heading is always published by setting SENS_GPS_MASK to 7 (all three bits checked).
- Enable UAVCAN_SUB_GPS, UAVCAN_SUB_MAG, and UAVCAN_SUB_BARO.
- The parameters SENS_GPS0_OFFX, SENS_GPS0_OFFY and SENS_GPS0_OFFZ can be set to account for the offset of the ARK RTK GPS L1 L5 from the vehicles centre of gravity.
ARK RTK GPS L1 L5 Configuration
You may need to configure the following parameters on the ARK RTK GPS L1 L5 itself:
| Parameter | Опис |
|---|---|
| CANNODE_NODE_ID | CAN node ID (0 for dynamic allocation). If set to 0 (default), dynamic node allocation is used. Set to 1-127 to use a static node ID. |
| CANNODE_TERM | Вбудована завершення шини CAN. Set to 1 if this is the last node on the CAN bus. |
Setting Up Rover and Fixed Base
Position of the rover is established using RTCM messages from the RTK base module (the base module is connected to QGC, which sends the RTCM information to PX4 via MAVLink).
Параметри PX4 DroneCAN:
- UAVCAN_PUB_RTCM:
- Makes PX4 publish RTCM messages (RTCMStream) to the bus (which it gets from the RTK base module via QGC).
Rover module parameters (also set using QGC):
- CANNODE_SUB_RTCM tells the rover that it should subscribe to RTCMStream RTCM messages on the bus (from the moving base).
INFO
Use UAVCAN_PUB_MBD and CANNODE_SUB_MBD instead if you want to implement moving base (see below) at the same time.
For more information see Rover and Fixed Base in the DroneCAN guide.
Значення LED індикаторів
Світлодіоди статусу GPS розташовані праворуч від роз'ємів
- Миготіння зеленого - це фіксація GPS
- Миготіння синього - це отримані корекції та RTK Float
- Сталий синій - це RTK зафіксовано
Світлодіоди статусу CAN розташовані зверху ліворуч від роз'ємів
- Повільне блимання зеленого - чекає на підключення CAN
- Швидко блимаюче зелене світло - нормальна робота
- Повільне блимання зеленим і синім - перелік CAN
- Fast blinking blue and red is firmware update in progress
- Миготливий червоний - помилка
- Якщо ви бачите червоний світлодіод, це означає, що виникла помилка, і вам слід перевірити наступне
- Переконайтеся, що у польотному контролері встановлено SD-картку
- Make sure the ARK RTK GPS L1 L5 has
ark_can-rtk-gps_canbootloaderinstalled prior to flashingark_can-rtk-gps_default - Видаліть бінарні файли з кореневих та ufw директорій SD-карти та спробуйте зібрати та знову прошити
- Якщо ви бачите червоний світлодіод, це означає, що виникла помилка, і вам слід перевірити наступне
Оновлення модуля Ublox F9P
ARK RTK GPS L1 L5 comes with the Ublox F9P module up to date with version 1.13 or newer. Проте ви можете перевірити версію та оновити прошивку за бажанням.
Кроки наступні:
- Download u-center from u-blox.com and install on your PC (Windows only)
- Open the u-blox ZED-F9P website
- Прокрутіть вниз і клацніть на поле "Show Legacy Documents"
- Прокрутіть вниз ще раз до Оновлення прошивки та завантажте потрібну прошивку (потрібна версія не нижче 1.13)
- While holding down the safety switch on the ARK RTK GPS L1 L5, connect it to power via one of its CAN ports and hold until all 3 LEDs blink rapidly
- Connect the ARK RTK GPS L1 L5 to your PC via its debug port with a cable such as the Black Magic Probe or an FTDI
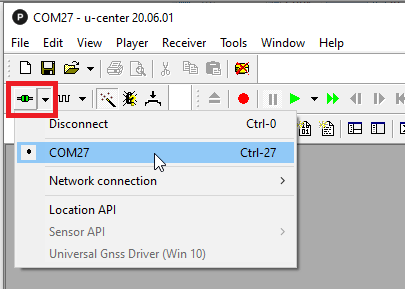
- Open u-center, select the COM port for the ARK RTK GPS L1 L5 and connect
- Check the current firmware version by selecting View, Messages View, UBX, MON, VER

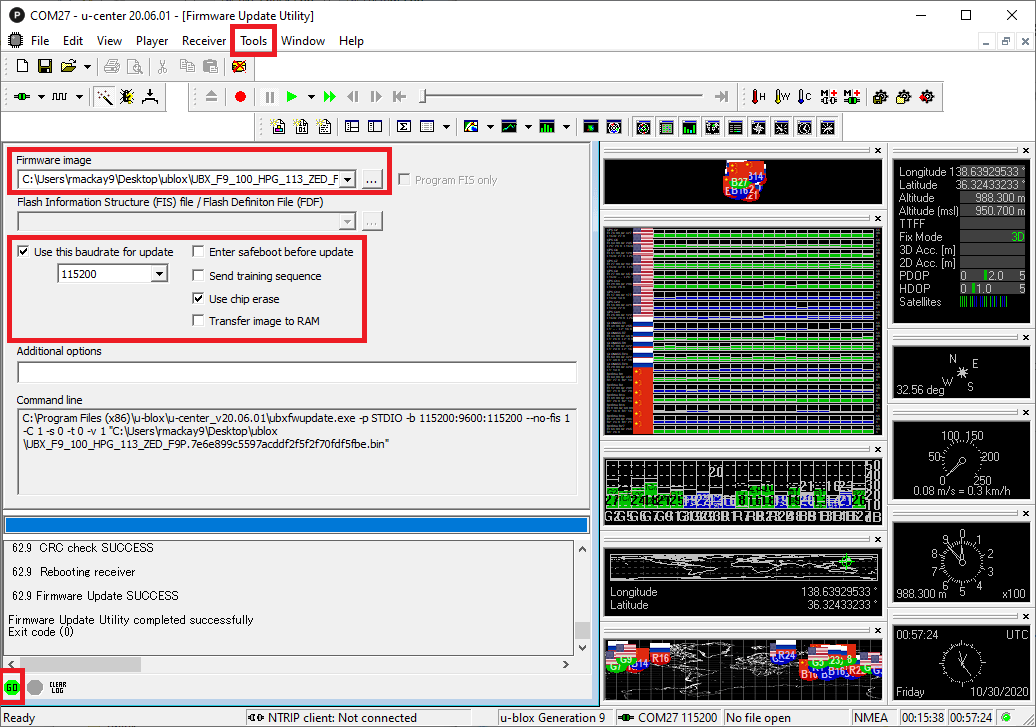
- Для оновлення прошивки:
- Виберіть Tools, Firmware Update
- Поле зображення прошивки повинно бути файлом .bin, завантаженим зі сторінки веб-сайту u-blox ZED-F9P
- Поставте прапорець "Використовувати цю швидкість передачі для оновлення" та виберіть 115200 зі списку
- Переконайтеся, що інші прапорці відображаються так, як показано нижче
- Натисніть зелену кнопку GO внизу зліва
- "Firmware Update SUCCESS" should be displayed if it updated successfully
Дивіться також
- ARK RTK GPS L1 L5 Documentation (ARK Docs)